Nokia N96 disassembly
Nokia N96 disassembly
Nokia N96 disassembly
You also want an ePaper? Increase the reach of your titles
YUMPU automatically turns print PDFs into web optimized ePapers that Google loves.
<strong>Nokia</strong> <strong>N96</strong> <strong>disassembly</strong><br />
Tools required: Torx 6 screwdriver, plastic tool such as a credit card or guitar plectrum<br />
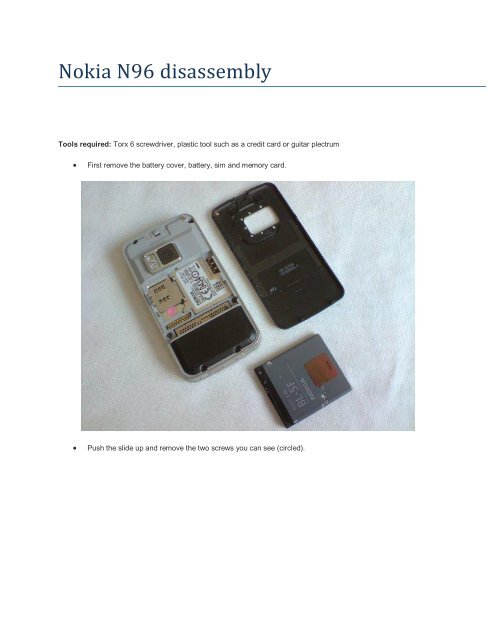
� First remove the battery cover, battery, sim and memory card.<br />
� Push the slide up and remove the two screws you can see (circled).
� Push the slide down and remove the two other circled screws.
� Starting at the top of the phone, pull the front cover away from the phone. Once you have the front cover<br />
released as far as shown below, push the centre navigation button through the front cover (indicated by the<br />
arrow) as you pull the cover away from the phone completely. This will release the cover at the bottom of the<br />
phone. Note that when you put the front cover back on, start at the bottom.
� You should now have the front cover removed. Circled below is a ribbon connector. This attaches like a plug<br />
and socket. Just lever this up to unplug it.
� Now slide your plastic tool under the LCD screen to release it.
� You should now have the LCD screen removed. Reverse the whole procedure for reassembly.
If you have any questions about <strong>Nokia</strong> <strong>N96</strong> <strong>disassembly</strong>, email<br />
sales@mobilepros.com.au<br />
Thank you.


