How to grade a G-string pattern
A G-string is a piece of lingerie that has thin elastic side and a thin elastic centre back, it differs from a thong which has side seams like a brief and can have a thicker centre back. Introduced by showgirls in the early 20Th century it has now made its way into our underwear drawers. No-one is absolutely sure where the name came from, the earliest mention of this garment was a Geestring (in 1878) which means loin cloth, others think that the ‘G’ could stand for groin, but other theories which are more likely is that it is an adaptation of the Geestring name but now references the violin string ‘G'.
When it come to grading a G-string you need to grade the fabric and the elastic, you can do this in two ways, one way tries to even out the grade (which I think in personal opinion helps in fits) and the other way is using as many whole numbers as possible on the elastics, this way is handy if you are starting out and don’t want to worry about 0.5cms.
I will show you the grading way which splits the grade across all pieces.
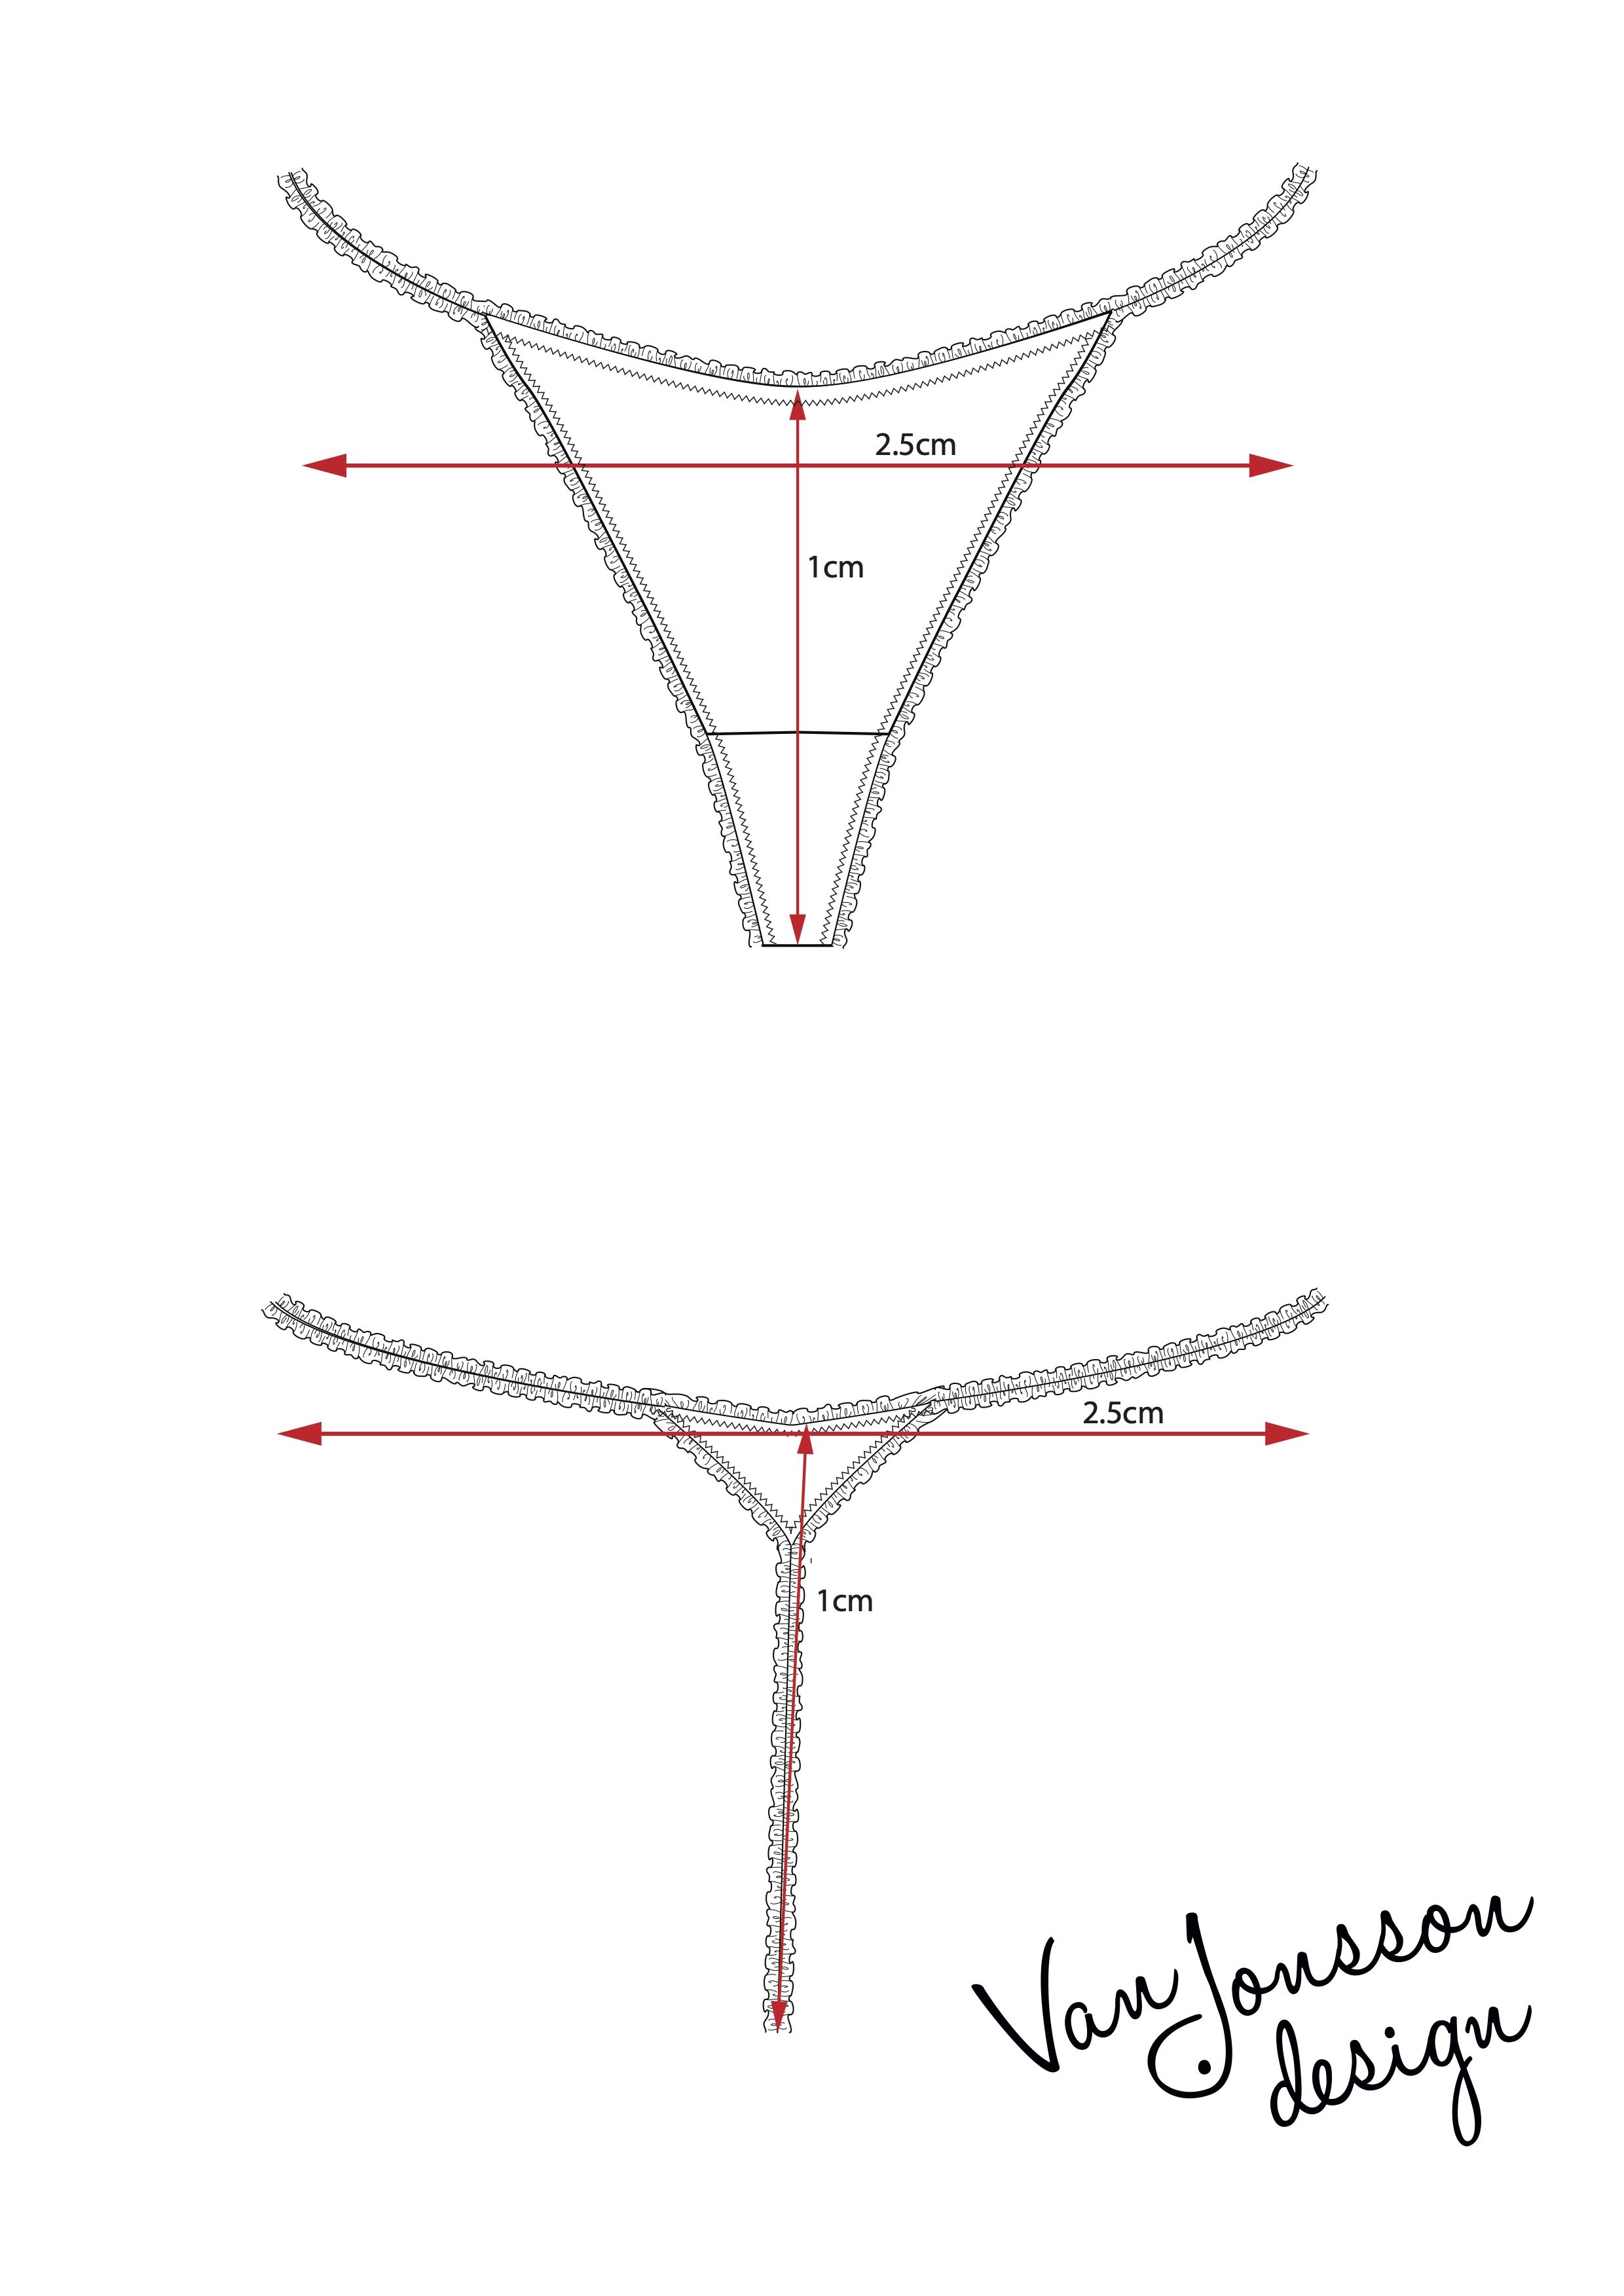
So the waist on the full grades 5cm so on the half grades 2.5cm (and quarter 1.25), so you can see from the front and back it references to grade the front and back waist 2.5 on the half, because the string on the waist connects the front and back, you need to look at the grade not just as grading the front and back but grading the front, side and back.

So you can see that the the depth of the brief grades 1cm on the front and 1cm on the back. So before I begin to grade I write down at each point what I am going to grade it by.
For this pattern I will grade the Front pattern up by 1cm, and out by 0.7cm, this leaves approx 0.5cm to go on the side string.
For the back I will grade the back pattern elastic string by 1cm and the depth of the triangle by nothing. This is because over the sizes that back triangle is just being used to hold the elastic in place and the depth is irrelevant to the garment. with the width of the triangle I will grade it 0.2cm so this will leave 1cm to go on the string, so the side string is increasing by 1.5cm (1cm +0.5cm).

So what that looks like graded…

Now I mentioned earlier for an easier grade, in which I would grade the front by 1cm in depth but then grade outwards only by 0.4cm which then leaves 0.8cm to add onto the side string.
Then I wouldn’t grade the back triangle at all leaves all 1.2cm to go onto the side string which in turn leaves the side string to increase by 2cm and the back string 1cm.
Does it make much difference? If you have a small size range, such as 4-5 sizes then no it won’t and measuring your elastic for the sides using whole numbers might be easier than using 0.5cm to measure.
I’ve worked for different companies that all grade slightly different, and the grading purists might baulk at altering the grade for ease but at the end of the day the waist increase is measuring the same which ever way you grade it, and what you have to remember if you are hand grading you may be out by a couple of mm due to pen marks and cutting. Also if you know and understand the rules of grading it’s quite okay to manipulate the grade.
If you wish to know more about grading there is a detailed book that will teach you step-by-step the ins and outs of grading.