MW 90230 - Fakir
MW 90230 - Fakir
MW 90230 - Fakir

You also want an ePaper? Increase the reach of your titles
YUMPU automatically turns print PDFs into web optimized ePapers that Google loves.
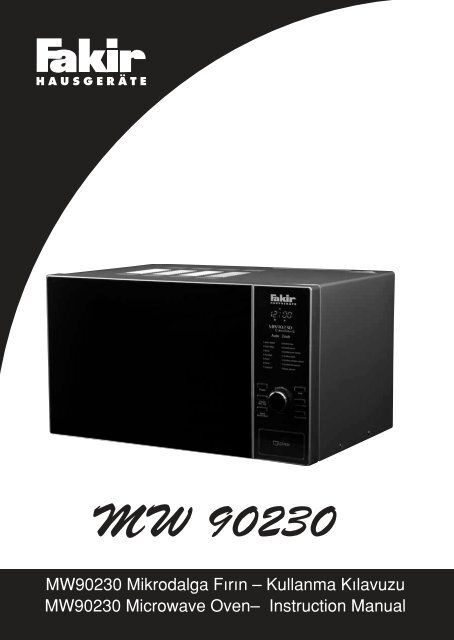
<strong>MW</strong> <strong>90230</strong><br />
<strong>MW</strong><strong>90230</strong> Mikrodalga F›r›n – Kullanma K›lavuzu<br />
<strong>MW</strong><strong>90230</strong> Microwave Oven– Instruction Manual
Girifl<br />
Uzun y›llar sorunsuz çal›flmas› için<br />
tasarlanan ve üretilen <strong>Fakir</strong> <strong>MW</strong><strong>90230</strong><br />
Mikrodalga F›r›n’› sat›n ald›¤›n›z için<br />
teflekkür ederiz.<br />
Benzer ürünleri kullanmaya al›fl›k<br />
olabilirsiniz, ancak kullanma k›lavuzunu<br />
okumak için lütfen zaman ay›r›n›z. Bu<br />
k›lavuz sat›n alm›fl oldu¤unuz üründen en<br />
iyi performans› alman›z için haz›rlanm›flt›r.<br />
Güvenlik Önemlidir<br />
Kendi güvenli¤iniz ve di¤erlerinin güvenli¤i<br />
için ürünü çal›flt›rmadan önce kullanma<br />
k›lavuzunu okuyunuz.<br />
Bu k›lavuzu ilerideki kullan›mlar için<br />
güvenli bir yerde saklay›n›z.<br />
Güvenlik Uyar›lar›<br />
Elektrikli bir cihaz kullan›l›rken, yang›n,<br />
elektrik çarpmas› ve kiflisel yaralanmalar›<br />
engellemek için; afla¤›daki önlemler her<br />
zaman al›nmal›d›r;<br />
• Cihaz› kullanmadan önce mutlaka kullanma<br />
k›lavuzunu okuyunuz.<br />
• Cihaz› sadece kullanma k›lavuzunda<br />
aç›kland›¤› flekilde ve belirtilen yerlerde<br />
kullan›n›z. Yan›c› ve kimyasal maddeleri<br />
kesinlikle f›r›n›n içine koymay›n›z ya da<br />
yak›n›nda saklamay›n›z. Bu f›r›n, yiyecekleri<br />
›s›tmak ya da piflirmek için tasarlanm›flt›r.<br />
Endüstriyel kullan›ma ya da laboratuar<br />
kullan›m›na uygun de¤ildir.<br />
• Kapak kilit güvenlik sistemi sayesinde,<br />
f›r›n›n›z aç›kken çal›flmayacakt›r. Kapak<br />
kilit sistemleri kesinlikle kurcalanmamal›<br />
ve devre d›fl› b›rak›lmamal›d›r. F›r›n›n<br />
kapa¤› aç›kken çal›flmas›, zararl›<br />
mikrodalga ›fl›nlar› yaymas›na yol açabilir.<br />
• F›r›n bofl iken, f›r›n› çal›flt›rmay›n›z.<br />
• F›r›n›n›z› çal›flt›rmadan önce, döner cam<br />
tepsi ve döner halkan›n yerine tam olarak<br />
oturdu¤undan emin olunuz. Döner cam<br />
tepsiyi tüm ›s›tma ve piflirmelerde mutlaka<br />
kullan›n›z.<br />
• Cihaz›, kablosu ya da fifli hasarl› ise, düzgün<br />
çal›flm›yorsa, düflmüfl ya da herhangi bir<br />
yerinde ar›za varsa, kesinlikle<br />
çal›flt›rmay›n›z, <strong>Fakir</strong> Yetkili Servisi’ne<br />
baflvurunuz.<br />
• Çocuklar›n bu cihaz› kullanmas›na<br />
müsaade etmeyiniz.<br />
• Plastik veya ka¤›t maddelerle piflirme<br />
ifllemi yap›yorsan›z, f›r›n›n bafl›ndan<br />
kesinlikle ayr›lmay›n›z. Ka¤›t ve benzeri<br />
maddeler yanabilir, plastik maddeler<br />
eriyebilir.<br />
• Metal tel ambalaj ba¤lar›n› paket üzerinden<br />
mutlaka ç›kart›n›z. Metal parçalar f›r›n<br />
içinde elektrik s›çramas›na yol açabilir.<br />
• E¤er f›r›ndan gelen bir duman görürseniz,<br />
hemen f›r›n› kapat›n›z ve fiflini çekiniz. F›r›n<br />
içinden ç›kabilecek alevi önlemek için, f›r›n<br />
kapa¤›n› bir süre kapal› tutunuz.<br />
• F›r›n›, saklama bölmesi olarak<br />
kullanmay›n›z. F›r›n kullan›mda de¤ilken,<br />
içinde ka¤›t, piflirme aleti ya da yiyecek vb.<br />
b›rakmay›n›z.<br />
• Patlama riskine karfl›, s›v› ya da di¤er<br />
g›dalar›, kapa¤› kapal› kaplarda ›s›tmay›n›z.<br />
• ‹çeceklerin mikrodalgada ›s›t›lmas›<br />
gecikmifl kaynamaya neden olabilir, içecek<br />
mikrodalgadan al›nd›ktan sonra da<br />
kaynamaya devam edebilece¤inden,<br />
içecekleri koydu¤unuz kab› tutarken,<br />
dikkatli olunuz.<br />
• Mikrodalga içine kesinlikle ya¤ koyarak<br />
k›zartma yapmay›n›z. S›cak ya¤, f›r›n›n<br />
parçalar›na zarar verebilir, ayr›ca, yan›klara<br />
yol açabilir.<br />
• Kabuklu ya da kabuksuz, ç›rp›lmam›fl<br />
yumurtalar› piflirmek için, mikrodalga<br />
f›r›n›n›z› kullanmay›n›z. Yumurta, piflirme<br />
s›ras›nda ya da piflirme bittikten sonra<br />
patlayabilir.<br />
• Patates, elma, kestane gibi meyveleri<br />
piflirmeden önce kabuklar›n› mutlaka<br />
deliniz.<br />
• Biberon içindeki bebek mamalar›n›<br />
›s›tt›ktan sonra, çalkalay›n›z ve kar›flt›r›n›z,<br />
bebe¤inize vermeden önce s›cakl›¤›n›<br />
kontrol ediniz. Böylece biberonun içindeki<br />
s›cakl›k eflit biçimde da¤›lm›fl olacak,<br />
hafllanma ve yanma riski önlenecektir.<br />
Is›tma öncesi, biberonun kapa¤›n› ve<br />
memesini ç›kar›n›z.<br />
3
• Devrilme riskini ortadan kald›rmak için,<br />
f›r›n› tezgahtan en az 8 cm. içeriye koyunuz.<br />
Yeterli hava ak›m›n›n sa¤lanmas› için<br />
f›r›n›n›z›n üst k›sm›nda 30 cm. arka<br />
k›sm›nda en az 10 cm. ve yan k›s›mlar›nda<br />
da en az 5 cm. boflluk b›rak›n›z.<br />
• Kapakla, f›r›n aras›na, kapa¤›n›n<br />
kapanmas›n› engelleyebilecek herhangi bir<br />
nesne koymay›n›z. F›r›n›n kapa¤›n›n<br />
tamamen kapanm›fl olmas›na dikkat ediniz.<br />
E¤er kapakta herhangi bir hasar varsa,<br />
menteflelerinde ya da mandal›nda bir<br />
problem varsa, f›r›n› kesinlikle<br />
çal›flt›rmay›n›z ve mutlaka <strong>Fakir</strong> Yetkili<br />
Servisi’ne baflvurunuz.<br />
• Alüminyum folyo parçalar›n› f›r›n›n›z›n iç<br />
duvarlar›na 2,5 cm’den daha fazla<br />
yaklaflt›rmay›n›z.<br />
• F›r›n›n›z› mutlaka <strong>Fakir</strong> Yetkili Servisi’ne<br />
tamir ettiriniz. Kesinlikle kendiniz tamir<br />
etmeye çal›flmay›n›z.<br />
• Cihaz› kullanmadan önce, flebeke voltaj›n›z<br />
ile cihaz›n voltaj›n›n uyumlu oldu¤undan<br />
emin olunuz.<br />
• Cihaz›n üzerindeki tüm tamir ifllemleri<br />
<strong>Fakir</strong> Yetkili Servisi taraf›ndan yap›lmal›d›r.<br />
• Bu kullanma k›lavuzunu ilerideki<br />
kullan›mlar için saklay›n›z.<br />
D‹KKAT: Kullanma k›lavuzunuzda yaz›l›<br />
olan güvenlik kurallar›n› ve kullanma<br />
talimatlar›n› dikkatlice okuyunuz ve<br />
kullanma k›lavuzunu sonraki kullan›mlar<br />
için saklay›n›z.<br />
1. Kap› güvenlik kilidi<br />
2. F›r›n Cam›<br />
3. Döner Halka<br />
4. Tepsi döndürme mili<br />
5. Kap› açma dü¤mesi<br />
6. Kontrol Paneli<br />
7. Hava ç›k›fl›<br />
8. Cam tepsi<br />
9. Izgara ›s›t›c›<br />
10. Metal Aparat<br />
4<br />
Ürün Özellikleri<br />
F›r›n Hacmi: 23 lt.<br />
Voltaj: 230V~50Hz<br />
Güç: 900W<br />
Enerji Harcama: 1400W(Mikrodalga)<br />
1000W(Izgara)<br />
Mikrodalga Frekans›: 2450 MHz<br />
D›fl Ölçüler: 305 mm. X 508 mm. X 420 mm.<br />
‹ç Ölçüler: 214 mm. X 332 mm. X 346 mm.<br />
Net A¤›rl›k: Yaklafl›k 16,5 kg.<br />
Ürün Kurulumu<br />
• F›r›n› kutusundan ç›kar›n›z. F›r›n›n içini<br />
boflalt›n›z ve içinde herhangi bir paketleme<br />
ürünü ya da aksesuar kalmad›¤›ndan emin<br />
olunuz.<br />
• F›r›nda herhangi bir hasar olup olmad›¤›n›<br />
kontrol ediniz. Kapa¤› yanl›fl monte edilmifl<br />
ya da e¤ilmifl ise, menteflelerinde,<br />
contalar›nda herhangi bir hasar varsa,<br />
kablosu ya da fifli hasar görmüflse, f›r›n<br />
düflürülmüfl ise, kesinlikle çal›flt›rmay›n›z<br />
ve hemen <strong>Fakir</strong> Yetkili Servisi’ne<br />
baflvurunuz.<br />
• Mikrodalgay›, kendi a¤›rl›¤›n› ve içinde<br />
piflirece¤iniz g›dalar›n a¤›rl›¤›n›<br />
tafl›yabilecek nitelikte, düzgün ve yerden<br />
en az 85 cm. yüksek bir yere koyunuz.<br />
• F›r›n›, s›cak, nemli, rutubetli ya da yan›c›<br />
ve kolay tutuflabilen maddelerin yak›n›na<br />
koymay›n›z.<br />
• Yeterli hava ak›m›n›n sa¤lanmas› için<br />
f›r›n›n›z›n üst k›sm›nda 30 cm. arka<br />
k›sm›nda en az 10 cm. ve yan k›s›mlar›nda<br />
da en az 5 cm. boflluk b›rak›n›z. F›r›n›n<br />
üstünü kesinlikle örtmeyiniz. F›r›n<br />
ayaklar›n› yerinden ç›kartmay›n›z.<br />
• F›r›n›, döner cam tepsi, döner halka ve<br />
üçgen mili tam olarak oturtmadan<br />
çal›flt›rmay›n›z.<br />
• F›r›n›n kablosunun hasars›z oldu¤una,<br />
f›r›n›n alt›ndan geçmedi¤ine ve s›cak ya da<br />
kesici bir yerden geçmedi¤ine emin olunuz.<br />
• Acil bir durumda hemen ç›karabilmek için,<br />
f›r›n›n fiflini kolayca ulafl›labilir bir yere<br />
tak›n›z. Prizin önünü hiçbir flekilde<br />
kapatmay›n›z.<br />
• F›r›n ev kullan›m› için tasarlanm›flt›r, aç›k<br />
havada kullanmay›n›z.
DalgaYay›l›m›<br />
F›r›n› radyo, TV ve antenden en az 2 metre<br />
uza¤a yerlefltiriniz. Aksi halde, f›r›n, bu tip<br />
cihazlarda parazite yol açabilir. Böyle bir<br />
durumda, afla¤›daki önlemlerle, paraziti<br />
azaltabilirsiniz;<br />
• F›r›n›n kapa¤›n› ve iç yüzeyini temizleyiniz.<br />
• TV, ya da radyo anteninizin yönünü<br />
de¤ifltiriniz.<br />
• F›r›n›n›z›n yönünü de¤ifltiriniz.<br />
• F›r›n›n›z›n yerini de¤ifltiriniz.<br />
• F›r›n›n›z›n fiflini farkl› bir prize tak›n›z.<br />
Mikrodalga piflirme prensipleri<br />
Mikrodalgalar radyo ve televizyon<br />
dalgalar›na benzer bir tür enerji çeflitidir.<br />
Piflirece¤iniz ya da ›s›taca¤›n›z g›dan›n kal›n<br />
k›sm› taba¤›n d›fl›nda kalacak flekilde,<br />
düzgünce yerlefltiriniz.<br />
Piflirme süresine dikkat ediniz. Belirtilen<br />
en k›sa süre için ayarlama yap›n›z, süre<br />
yetersiz gelirse, kontrol ettikten sonra,<br />
tekrar uzat›n›z. G›dan›n çok uzun süre<br />
piflirilmesi, yanmas›na yol açabilir.<br />
Ürünleri üzeri kapal› olarak pifliriniz. Bu<br />
sayede ürünlerinizin her taraf› ayn› oranda<br />
piflmifl olacakt›r.<br />
Tavuk ve hamburger gibi çabuk piflen<br />
g›dalar› piflirirken, bir kere, g›dalar› ters<br />
yüz ediniz. Rosto gibi daha büyük g›dalar›<br />
ise, bir kereden fazla ters yüz ediniz.<br />
Mikrodalga f›r›na uygun kaplar<br />
F›r›n›n›zda kesinlikle metal ya da metal<br />
kaplama kaplar› kullanmay›n›z.<br />
Mikrodalgalar metali delip geçemez,<br />
mikrodalgalar f›r›ndaki herhangi bir<br />
metalden yans›r ve elektrik atlamas›na yol<br />
açar.Birçok ›s›ya dayan›kl› ve metal<br />
olmayan kaplar, mikrodalga f›r›nda<br />
P‹fi‹RME KAPLARI M‹KRODALGA IZGARA KOMB‹NASYON<br />
Is›ya dayan›kl› Cam Evet Evet Evet<br />
Is›ya dayan›kl› olmayan cam Hay›r Hay›r Hay›r<br />
Is›ya dayan›kl› Seramik Evet Evet Evet<br />
Mikrodalgaya dayan›kl› Plastik Evet Hay›r Hay›r<br />
Piflirme ka¤›d› Evet Hay›r Hay›r<br />
Metal Tepsi Hay›r Evet Hay›r<br />
Aluminyum Folyo Hay›r Evet Hay›r<br />
kullan›ma uygundur. Yuvarlak/Oval kaplar,<br />
köflede kalan k›s›mlar›n yanmaya daha<br />
meyilli olmas› sebebiyle, köfleli kaplara<br />
göre, mikrodalga f›r›nda kullan›ma daha<br />
elverifllidir.<br />
Saatin Ayarlanmas›<br />
Örne¤imizde; saati 8:30’a ayarlayaca¤›n›z›<br />
varsayal›m.<br />
1. Clock/Wei.Adj. (Saat/A¤›rl›k Ayar›)<br />
dü¤mesine bas›n›z.<br />
2. Time/Menu (Zaman/Menu) dü¤mesini<br />
döndürerek 8’e getiriniz.<br />
3. Clock/Wei.Adj. (Saat/A¤›rl›k Ayar›)<br />
dü¤mesine bas›n›z.<br />
4. Time/Menu (Zaman/Menu) dü¤mesini<br />
döndürerek 30’a getiriniz.<br />
5. Clock/Wei.Adj. (Saat/A¤›rl›k Ayar›)<br />
dü¤mesine tekrar basarak ayar›<br />
onaylay›n›z.<br />
Mikrodalga Piflirme<br />
Mikrodalga piflirme için Power(Güç)<br />
dü¤mesine istedi¤iniz güç seviyesine<br />
gelene kadar (0-100) tekrar tekrar bas›n›z.<br />
Time/Menu (Zaman/Menü) dü¤mesini<br />
kullanarak, istedi¤iniz süreyi belirleyiniz.<br />
Belirlenebilecek en uzun süre 60 dakikad›r.<br />
Power(Güç) dü¤mesine bas›larak, güç<br />
seviyesinin ayarlanmas›.<br />
Örne¤imizde; %60 mikrodalga gücü ile, 1<br />
dakika piflirece¤inizi varsayal›m;<br />
1. F›r›n›n›z›n piflirme ayar›n› s›f›rlamak için,<br />
Stop/Cancel (Durdur/‹ptal) dü¤mesine<br />
bas›n›z.<br />
2. Power(Güç) dü¤mesine 3 kere bas›n›z.<br />
3. Time/Menu(Zaman/Menu) dü¤mesini<br />
Power(Güç)<br />
dü¤mesine bas›n›z<br />
Bir kere<br />
‹ki kere<br />
Üç kere<br />
Dört kere<br />
Befl kere<br />
Alt› kere<br />
Ekran<br />
100<br />
80<br />
60<br />
40<br />
20<br />
0<br />
75<br />
Piflirme gücü<br />
seviyesi<br />
%100<br />
%80<br />
%60<br />
%40<br />
%20<br />
0
çevirerek, 1:00 dakikaya ayarlay›n›z.<br />
4. Start/Quick Start(Bafllat/H›zl› Bafllat)<br />
dü¤mesine bas›n›z<br />
Izgara Piflirme<br />
Izgara piflirmede en uzun piflirme süresi,<br />
60 dakikad›r. Izgara piflirme, ince parça et,<br />
bonfile, pirzola gibi yiyecekler için<br />
uygundur. Ancak g›dalar›n yüzeylerinin,<br />
ateflte piflmifl gibi olmas› beklenmemelidir.<br />
Örne¤imizde; ›zgara piflirme seçene¤ini 12<br />
dakika olarak ayarlayaca¤›n›z› varsayal›m;<br />
1. Stop/Cancel (Durdur/‹ptal) dü¤mesine<br />
bas›n›z.<br />
2. Grill(Izgara) dü¤mesine bas›n›z.<br />
3. Time/Menu(Zaman/Menu) dü¤mesini<br />
çevirerek, 12:00 dakikaya ayarlay›n›z.<br />
4. Start/Quick Start(Bafllat/H›zl› Bafllat)<br />
dü¤mesine bas›n›z.<br />
Kombinasyon 1<br />
En uzun piflirme süresi, 60 dakikad›r. %30<br />
mikrodalga piflirme, %70 ›zgara piflirme.<br />
Bal›k ya da patates piflirme için uygundur.<br />
Örne¤imizde; ‘kombinasyon 1’ piflirme<br />
seçene¤ini 25 dakika olarak<br />
ayarlayaca¤›n›z› varsayal›m;<br />
1. Stop/Cancel (Durdur/‹ptal) dü¤mesine<br />
bas›n›z.<br />
2. Combination(Kombinasyon) dü¤mesine bir<br />
kez bas›n›z.<br />
3. Time/Menu(Zaman/Menu) dü¤mesini<br />
çevirerek, 25:00 dakikaya ayarlay›n›z.<br />
4. Start/Quick Start(Bafllat/H›zl› Bafllat)<br />
dü¤mesine bas›n›z.<br />
Kombinasyon 2<br />
En uzun piflirme süresi, 60 dakikad›r. %55<br />
mikrodalga piflirme, %45 ›zgara piflirme.<br />
Omlet, patates hafllama için uygundur.<br />
Örne¤imizde; ‘kombinasyon 2’ piflirme<br />
seçene¤ini 12 dakika olarak<br />
ayarlayaca¤›n›z› varsayal›m;<br />
6<br />
1. Stop/Cancel (Durdur/‹ptal) dü¤mesine<br />
bas›n›z.<br />
2. Combination(Kombinasyon) dü¤mesine iki<br />
kez bas›n›z.<br />
3. Time/Menu(Zaman/Menu) dü¤mesini<br />
çevirerek, 12:00 dakikaya ayarlay›n›z.<br />
4. Start/Quick Start(Bafllat/H›zl› Bafllat)<br />
dü¤mesine bas›n›z.<br />
Otomatik Piflirme Seçenekleri<br />
Otomatik piflirme seçenekleri kullan›rken,<br />
piflirme gücü ve zaman›n› ayarlaman›z<br />
gerekmeyecektir. F›r›n›n›zda hangi g›day›<br />
piflirece¤inizi ve piflirece¤iniz g›dan›n<br />
a¤›rl›¤›n›, f›r›n›n ekran›na, do¤ru bir flekilde<br />
giriniz. Time/Menu(Zaman/Menu)<br />
dü¤mesini kullanarak, otomatik piflirme<br />
seçeneklerinden size uygun olan› seçiniz,<br />
ard›ndan Clock/Wei Adj.(Saat/A¤›rl›k Ayar›)<br />
dü¤mesine basarak, g›dan›z›n yaklafl›k<br />
a¤›rl›¤›n› ya da miktar›n› belirtiniz.<br />
Start/Quick Start(Bafllat/H›zl› Bafllat)<br />
dü¤mesine bast›¤›n›zda, f›r›n›n›z çal›flmaya<br />
bafllayacakt›r.<br />
F›r›nda piflirdi¤iniz g›dan›n her taraf›n›n<br />
ayn› oranda piflmesini sa¤lamak için, g›day›<br />
tersyüz etmeniz gerekebilir.<br />
Örne¤in; 300 gr. pizza’y› piflirmek<br />
isterseniz;<br />
1. Time/Menu(Zaman/Menu) dü¤mesini<br />
çevirerek, 5 numarada yer alan, Pizza’y›<br />
seçiniz.<br />
2. Clock/Wei Adj.(Saat/A¤›rl›k Ayar›)<br />
dü¤mesine basarak, g›dan›z›n yaklafl›k<br />
a¤›rl›¤›n› ya da miktar›n› belirtiniz.<br />
3. Start/Quick Start(Bafllat/H›zl› Bafllat)<br />
dü¤mesine bas›n›z.<br />
Unutulmamal›d›r ki, otomatik piflirmede<br />
al›nacak sonuçlar, g›dalar›n, flekline,<br />
boyutuna, g›day› pifliren kiflinin f›r›na ne<br />
kadar iyi kulland›¤›na, ba¤l›d›r. E¤er<br />
ald›¤›n›z sonuçtan memnun kalmazsan›z,<br />
piflirme süresini yeniden ayarlay›n›z.<br />
Otomatik Buz Çözme<br />
F›r›n›n›z, donmufl et, bal›k ve tavuk etlerinin<br />
buzunu çözmek için kullan›labilir. Buzunun
çözülmesini istedi¤iniz g›dan›n, cinsini ve<br />
a¤›rl›¤›n› belirtmeniz halinde, buz çözme<br />
gücü ve zaman› otomatik olarak<br />
ayarlanacakt›r. 100 gr. ila 1800 gr. aras›nda<br />
olan donmufl g›dalar›n›z›n buzunu<br />
f›r›n›n›zda çözebilirsiniz.<br />
Örne¤in; 600 gr. donmufl bal›¤› çözmek<br />
isterseniz,<br />
1. Stop/Cancel (Durdur/‹ptal) dü¤mesine<br />
bas›n›z.<br />
2. Time/Menu(Zaman/Menu) dü¤mesini<br />
çevirerek, defrost(buz çözme) özelli¤ini<br />
seçiniz, ard›ndan 600 gr.’a ayarlay›n›z.<br />
3. Start/Quick Start(Bafllat/H›zl› Bafllat)<br />
dü¤mesine bas›n›z.<br />
Ekspres Piflirme<br />
Ekspres piflirme program›n› seçti¤inizde,<br />
f›r›n›n›z %100 piflirme gücü ile çal›flacakt›r.<br />
Start/Quick Start(Bafllat/H›zl› Bafllat)<br />
dü¤mesine, istedi¤iniz süreyi belirleyene<br />
kadar tekrar tekrar bas›n›z. F›r›n %100<br />
piflirme gücü ile çal›flacakt›r.<br />
Çocuk Kilidi<br />
Çocuklar›n kendi bafllar›na mikrodalga<br />
f›r›n› çal›flt›rmamas› için, çocuk kilidini<br />
kullanabilirsiniz. Çocuk kilidini devreye<br />
sokmak için; Stop/Cancel (Durdur/‹ptal)<br />
dü¤mesine 3 saniye süre ile bas›l› tutunuz.<br />
Bip sesini duydu¤unuzda, sa¤ üst köflede<br />
kilit simgesi görünecek ve çocuk kilidi<br />
devreye girecektir. Çocuk kilidini devreden<br />
ç›karmak için; Stop/Cancel (Durdur/‹ptal)<br />
dü¤mesine 3 saniye süre ile bas›l› tutunuz.<br />
Bip sesini duydu¤unuzda, sa¤ üst köflede<br />
kilit simgesi kaybolacak ve çocuk kilidi<br />
devreden ç›kacakt›r.<br />
Temizlik ve Bak›m<br />
1. F›r›n›n›z› temizlemeye bafllamadan önce,<br />
f›r›n› kapat›n›z ve fiflini prizden çekiniz.<br />
2. F›r›n›n›z›n içini her zaman temiz tutunuz.<br />
F›r›n›n duvarlar›na yemek ya da ›s›tt›¤›n›z<br />
s›v›lar›n s›çramas› durumunda, nemli bir<br />
bezle, temizleyiniz. E¤er f›r›n›n›z çok fazla<br />
kirlendiyse, temizlemek için hafif bir<br />
deterjan kullanabilirsiniz. Sprey ve sert<br />
yap›l› deterjanlar, f›r›n›n›z›n iç k›sm›n›<br />
çizebilece¤inden, iz b›rakabilece¤inden ya<br />
da zarar verebilece¤inden, bu tip<br />
deterjanlar› kullanmay›n›z.<br />
3. F›r›n›n›z›n d›fl yüzeyini, nemli bir bezle<br />
temizleyiniz. F›r›n›n›z›n içinde bulunan,<br />
parçalar›n zarar görmesine sebep<br />
olmamak için, f›r›n›n iç k›sm›ndaki<br />
havaland›rma aç›kl›klar›na kesinlikle su<br />
s›zd›rmay›n›z.<br />
4. F›r›n kapa¤›n›n üzerindeki cam›n, hem iç<br />
yüzeyini hem de d›fl yüzeyini nemli bir bezle<br />
temizleyiniz. Kap› kilit aparatlar›n›, birleflim<br />
yerlerini, herhangi bir yemek s›çramas›na<br />
ya da tortuya karfl› s›kl›kla temizleyiniz.<br />
Afl›nd›r›c› etki yapan temizlik maddelerini<br />
kesinlikle kullanmay›n›z.<br />
5. Kontrol panelinin ›slanmas›na izin<br />
vermeyiniz. Kontrol panelini, yumuflak ve<br />
nemli bir bezle temizleyiniz. Kontrol<br />
panelini temizlerken, f›r›n›n kazara<br />
çal›flmas›n› önlemek için, f›r›n kapa¤›n› aç›k<br />
b›rak›n›z.<br />
6. Mikrodalga f›r›n›n›z›n iç k›sm›nda ya da d›fl<br />
k›sm›n›n etraf›nda buhar ve nem birikir ise,<br />
biriken buhar› yumuflak bir bezle<br />
temizleyiniz. Mikrodalga f›r›n›n, yüksek<br />
nemli ve rutubetli ortamlarda çal›flt›r›lmas›,<br />
bu sonucu do¤urabilir. Ancak bu normal<br />
bir olayd›r.<br />
7. F›r›n içindeki döner cam tepsinin s›k s›k<br />
temizlenmesi gereklidir. Cam tepsiyi<br />
köpüklü su içinde ya da bulafl›k<br />
makinenizde y›kayabilirsiniz.<br />
8. Döner halka ve f›r›n iç yüzeyi, s›k s›k<br />
temizlenmelidir. Bu k›s›mlar›n<br />
temizlenmemesi afl›r› sese ve döner cam<br />
tepsinin tak›lmas›na yol açabilir. F›r›n<br />
taban›n› yumuflak bir deterjanla<br />
temizleyiniz. Döner halkay›, köpüklü su<br />
içinde ya da bulafl›k makinenizde<br />
y›kayabilirsiniz. Döner halkay›<br />
temizledikten sonra, yerine düzgün bir<br />
flekilde yerlefltirmeyi unutmay›n›z.<br />
9. Mikrodalgan›zdaki kötü kokuyu gidermek<br />
için, derin bir mikrodalga kab›n›n içine bir<br />
bardak su koyunuz, bir limonu s›k›n›z ve<br />
limonun kabu¤unu da kab›n içine at›n›z. 5<br />
7
dakika boyunca mikrodalgan›z› çal›flt›r›n›z.<br />
Ard›ndan f›r›n›n içini temizleyiniz ve<br />
yumuflak bir bezle kurulay›n›z.<br />
10. Mikrodalga f›r›n›n›z›n lambas›n›n de¤iflmesi<br />
gerekiyorsa, kesinlikle kendiniz<br />
de¤ifltirmeye çal›flmay›n›z ve <strong>Fakir</strong> Yetkili<br />
Servisi’ne baflvurunuz.<br />
11. F›r›n›n›z›n temizli¤ini düzenli bir flekilde<br />
yap›n›z ve içinde herhangi bir yemek art›¤›<br />
kalmad›¤›ndan emin olunuz. F›r›n›n temiz<br />
bir flekilde kullan›lmamas›, iç yüzeyinin<br />
bozulmas›na ve f›r›n›n ömrünün<br />
k›salmas›na yol açacak ve tehlikeli bir<br />
durumun ortaya ç›kmas›na neden<br />
olabilecektir.<br />
12. F›r›n›n›z› kesinlikle umumi bir çöp<br />
tenekesine atmay›n›z. F›r›n›n›z› atmak<br />
istiyorsan›z mutlaka, belediyelerin bu gibi<br />
cihazlar için belirledi¤i çöp tenekelerine<br />
at›n›z.<br />
Kontrol Paneli<br />
Menü Göstergesi<br />
Piflirme zaman›n›, piflirme gücünü, seçilen<br />
programlar› ve zaman› gösterir.<br />
Power (Piflirme Gücü)<br />
Piflirme gücünü belirlemek için<br />
kullanabilirsiniz.<br />
Grill (Izgara)<br />
60 dakikaya kadar, Izgara piflirme yapmak<br />
için kullanabilirsiniz.<br />
Combination (Kombinasyon)<br />
Mikrodalga ve Izgara fonksiyonlar›n›n bir<br />
arada kullanmak için bu dü¤meyi<br />
kullanabilirsiniz.<br />
Time/Menu (Zaman/Menü)<br />
Time/Menu(Zaman/Menu) dü¤mesini<br />
çevirerek, saati ya da piflirme zaman›n›<br />
ayarlayabilirsiniz.Time/Menu(Zaman/Me<br />
nu) dü¤mesini çevirerek, otomatik piflirme<br />
ayarlar›ndan birini seçebilirsiniz.<br />
Clock/Wei. Adj. (Saat/A¤›rl›k Ayar›)<br />
Otomatik piflirme ayarlar›ndan birini<br />
seçtikten sonra, piflirmek için f›r›na<br />
koydu¤unuz g›dan›n a¤›rl›¤›n› veya miktar›n›<br />
belirlemek için kullanabilirsiniz.<br />
Saati ayarlamak için de bu dü¤meyi<br />
kullanabilirsiniz.<br />
Start/Quick Start(Bafllat/H›zl› Bafllat)<br />
8<br />
Herhangi bir piflirme program›n› bafllatmak<br />
için kullanabilirsiniz. Birkaç kere üst üste<br />
bas›p istedi¤iniz zamana ayarlay›p, bir an<br />
beklerseniz, f›r›n›n›z %100 piflirme gücüyle<br />
çal›flacakt›r.<br />
Stop/Cancel (Durdur/‹ptal)<br />
Yapt›¤›n›z bir ayar› iptal etmek için ya da<br />
bir ayar yapmadan önce ayarlar› s›f›rlamak<br />
için kullanabilirsiniz. Geçici olarak piflirmeyi<br />
durdurmak için bir kere, piflirme ifllemini<br />
tamamen bitirmek için ise iki kere bas›n›z.<br />
Ayr›ca, 3 saniye sürekli basarsan›z, çocuk<br />
kilidi devreye girecektir.<br />
Yetkili servise haber vermeden önce;<br />
E¤er f›r›n›n›z düzgün bir flekilde<br />
çal›flm›yorsa;<br />
• F›r›n›n›z›n fiflinin prize düzgün olarak<br />
tak›ld›¤›ndan emin olunuz. E¤er düzgün bir<br />
flekilde tak›l› de¤ilse, fifli prizden çekiniz,<br />
on saniye kadar bekleyip, tekrar fifle tak›n›z.<br />
• Kontrol panelinde istedi¤iniz program›n ve<br />
zamanlaman›n düzgün bir flekilde<br />
ayarland›¤›ndan emin olunuz.<br />
• F›r›n›n›z›n kapa¤›n›n düzgün bir flekilde<br />
kapand›¤›ndan ve kilit sisteminin devreye<br />
girdi¤inden emin olunuz. Aksi takdirde<br />
mikrodalga f›r›n›n›z çal›flmayacakt›r.<br />
Topraklama<br />
F›r›n›n›z toprakl› bir prizle birlikte<br />
sat›lmaktad›r. Fiflinizi mutlaka toprakl› bir<br />
prize takman›z gerekmektedir. Prizinizin<br />
düzgün bir flekilde tak›lm›fl ve topraklanm›fl<br />
oldu¤undan emin olunuz. Herhangi bir<br />
elektrik kaça¤›nda, topraklanm›fl priz,<br />
elektri¤in topra¤a gitmesini sa¤layarak,<br />
elektrik floku riskini azalt›r.<br />
UYARI: Topraklanm›fl prizin düzgün bir<br />
flekilde kullan›lmamas› elektrik floku riski<br />
oluflturabilir.<br />
Not: E¤er topraklama hakk›nda herhangi<br />
bir sorunuz var ise, mutlaka <strong>Fakir</strong> Yetkili<br />
Servisi’ne baflvurunuz.<br />
• Elektriksel ba¤lant›n›n yanl›fl yap›lmas›<br />
yüzünden f›r›n›n›za gelebilecek<br />
zararlardan, üretici sorumlu tutulamaz.
Introduction<br />
Thank you for purchasing <strong>MW</strong><strong>90230</strong><br />
Microwave Oven, which has been designed<br />
and manufactured to give you many years<br />
of trouble-free service.<br />
You may already be familiar with using a<br />
similar product, but do please take time to<br />
read these instructions - they have been<br />
written to ensure you get the very best from<br />
your purchase.<br />
Safety is important<br />
For yours and others safety please read<br />
the instructions before using the appliance.<br />
Please keep this instruction in a safe place<br />
for the further use.<br />
Important safeguards<br />
When using electrical appliances, basic<br />
safety precautions should always follwed<br />
to provide against the fire, electric shock<br />
and personel injuries.<br />
• Read the instruction carefully before using<br />
the appliance.<br />
• Use this applience only for its intended use<br />
as described in this manual. Do not use<br />
corrosive chemicals or vapors in this<br />
appliance. This type of oven is specifically<br />
designed to heat, cook or dry food. It is not<br />
designed for industrial or laboratory use.<br />
• Your oven will not operate when the door<br />
is open through safety interlock system.<br />
Interlock system shouldn’t be tampered<br />
and put out of operation. If the oven<br />
operates when its door open, this might<br />
cause the harmful microwave rays.<br />
• Do not operate the oven when empty.<br />
• Before operating your appliance make sure<br />
that spining glass tray and spining circle is<br />
placed perfectly. Please use the glass tray<br />
for all heatings and cookings.<br />
• Do not operate this appliance if it has<br />
damaged cord or plug. If it is not working<br />
propely or if it has been damaged or<br />
dropped. Please apply an authorized <strong>Fakir</strong><br />
service.<br />
• Do not allow the children to use this<br />
appliance.<br />
10<br />
• When heating food in plastic or paper<br />
container, do not leave your oven. Paper<br />
or similar containers might burn and plastic<br />
sontainers might melt.<br />
• Please remove metal wire twist-ties from<br />
package. Metal pieces might cause electric<br />
bounces.<br />
• If smoke observed, switch off or unplug<br />
the appliance and keep the door closed in<br />
order to stifle any flames.<br />
• Do not use the cavity for storage purposes.<br />
Do not leave paper products, cooking<br />
utensils or food in the cavity when not in<br />
use.<br />
• Liquid or other food must not be heated in<br />
sealed containers since they are liable to<br />
explode.<br />
• Microwave heating of beverage can result<br />
delayed eruptive boiling, therefore care<br />
has to be taken when handle the container.<br />
• Do not fry food in the oven. Hot oil can<br />
damage over parts and utensils and even<br />
result in skin burns.<br />
• Eggs in their shell and whole hard-boiled<br />
eggs should not be heated in microwave<br />
ovens since they may explode even after<br />
microwave heating has ended.<br />
• Pierce foods with heavy skin such as<br />
potatoes, whole squashes, apples and<br />
chestnuts before serving.<br />
• The contents of feeding bootles and babby<br />
jars should be stirred or shaken and the<br />
temperature should be checked before<br />
serving. Consequently, the temterature in<br />
babby jars will be diffused equally and this<br />
will prevent the skin burns. Before heating,<br />
put the baby jar cover and teat out.<br />
• Please put your oven at least 8 c.m. inside<br />
on the bench for preventing the rish of<br />
falling over. Allow 30 cm of space above<br />
the oven, 10 cm at back and 5 cm at both<br />
sides to keep the sufficient airflow.<br />
• Please do not put any items between door<br />
and oven that might prevent to close the<br />
door. Make sure that the door is securely<br />
closed. If there is any damage on the door,<br />
any problem on the door hinges or latches,<br />
do not operate the oven and contact with a<br />
qualified <strong>Fakir</strong> service.
• Please do not approximate the aliminuim<br />
foil pieces more than 2,5 cm to your oven’s<br />
inside wall.<br />
• Please put your oven to repair by <strong>Fakir</strong><br />
service. Do not try to repair your oven by<br />
yourself.<br />
• Before operating your appliance, make<br />
sure that your network’s voltage is<br />
compatible with your appliance’s voltage.<br />
• All repair operations of the appliance<br />
should be done by an authorized <strong>Fakir</strong><br />
service.<br />
• Please keep this instruction for the further<br />
use.<br />
WARNING: Please read the safeguards and<br />
the operating instructions carefully in the<br />
instruction manual for further usage.<br />
1. Door Safety Lock System<br />
2. Oven Window<br />
3. Roller Ring<br />
4. Shaft<br />
5. Door Release Button<br />
6. Control Panel<br />
7. Oven Air Vent<br />
8. Glass Tray<br />
9. Grill Heater<br />
10. Metal Rack<br />
Specifications<br />
Oven capacity: 23 litres<br />
Voltage: 230V~50Hz<br />
Output: 900W<br />
Power Consumption: 1400W(Microwave),<br />
1000W(Gril)<br />
Operation Frequency: 2450MHz<br />
Outside Dimensions:<br />
350mm(H)• 508mm(W)• 420mm(D)<br />
Oven Cavity Dimensions: 214mm(H) •<br />
332mm(W) • 346mm(D)<br />
Net Weight: Approx. 16.5 kg<br />
Installation<br />
• Please put the oven out of its box. Leave<br />
the oven’s inside empty and make sure that<br />
there isn’t any packaging product or<br />
accessary left.<br />
• Check the oven for any damage, such as<br />
misaligned or bent door, damaged door<br />
seals and sealing surface, broken or loose<br />
door hinges and latches and dents inside<br />
the cavity or on the door. If there is any<br />
damage, do not operate the oven and<br />
contact qualified <strong>Fakir</strong> service.<br />
• This microwave oven must be placed on a<br />
flat which is 85 cm higher than the ground,<br />
stable surface to hold its weight and the<br />
heaviest food likely to be cooked in the<br />
owen.<br />
• Do not place the oven where heat, moisture<br />
or high humidity are generated, or near<br />
combustible metarials.<br />
• Allow 30 cm of space above the oven, 10<br />
cm at back and 5 cm at both sides to keep<br />
the sufficient airflow. Do not cover or block<br />
any openings on the appliance. Do not<br />
remove feet.<br />
• Do not operate the oven without glass tray,<br />
roller support and shaft in their proper<br />
position.<br />
• Make sure that the power supply cord is<br />
undamaged and does not run under the<br />
oven or over any hot or sharp surface.<br />
• The socket must be readily accessible so<br />
that it can be easily unplugged in an<br />
emergency.<br />
• Do not use the oven outdoors.<br />
Radio interference<br />
Please place your oven at least 2 metres<br />
away from your radio, TV, or similar<br />
equipment like antenna. Operation of the<br />
microwave oven can cause interference to<br />
your radio, Tv, or similar equipment. When<br />
there is interference, it may be reduced or<br />
eliminated by taking the following<br />
measures:<br />
1. Clean the door and sealing surface of the<br />
oven.<br />
2. Reorient the receiving antenna of radio or<br />
television.<br />
3. Relocate the microwave oven with respect<br />
to the receiver.<br />
4. Move the microwave oven away from the<br />
receiver.<br />
5. Plug the microwave oven into a different<br />
11
outlet so that microwave oven and receiver<br />
are on different branch circuits.<br />
Microwave cooking principles<br />
Microwaves are a kind of energy types<br />
which are similar to television and radio<br />
waves. Arrange food carefully. Place<br />
thickest areas towards outside of dish.<br />
Watch cooking time. Cook for the shortest<br />
amount of time indicated and add more as<br />
needed. Food severely overcooked can<br />
smoke or ignite. Cover foods while cooking.<br />
Covers prevent spattering and help foods<br />
to cook evently. Turn foods over once during<br />
microwaving to speed cooking of such foods<br />
as chicken and hamburgers. Large items<br />
like roasts must be turned over at least<br />
once. Rearrange foods as meatballs<br />
halfway through cooking both from top to<br />
bottom and from the center of the dish to<br />
the outside.<br />
Utensils guide<br />
Microwave can not penetrate metal, so<br />
metal utensils or dishes with metalic trim<br />
should not be used. Microwaves do not<br />
Pierce the metal, microwaves reflect from<br />
any metal in the oven and causes an electric<br />
leap. Many utensils, which are strong and<br />
not metal are suitable to operate in the<br />
microwave oven. Round/oval dishes rather<br />
than square/oblong ones are recommend,<br />
as food in corners tends to overcook.<br />
COOKWARE MICROWAVE GRILL COMBINATION<br />
Heat-Resistant Glass Yes Yes Yes<br />
Non-Heat Resistant Glass No No No<br />
Heat Resistant Ceramics Yes Yes Yes<br />
Microwave-Safe Plastic Dish Yes No No<br />
Kitchen Paper Yes No No<br />
Metal Tray No Yes No<br />
Aluminium Foil No Yes No<br />
Setting clock time<br />
FOR EXAMPLE: Suppose you want to set<br />
the oven clock time to 8:30 (A.M. or P.M.).<br />
1. Press Clock/Wei.Adj. buton<br />
2. Turn Time/Menu to set 8 o’clock.<br />
3. Pres Clock/Wei.Adj. buton.<br />
4. Turn time/Menu to set 30 min.<br />
5. Press Clock/Wei.Adj. to confirm the setting.<br />
12<br />
Microwave cooking<br />
For microwave cooking, just pres the Power<br />
buton a number of times to select a cooking<br />
power level (0-100), and then use the<br />
Time/Menu dial to set a desired cooking<br />
time. The longest cooking time is 60<br />
minutes.<br />
Select power level by pressing the Power<br />
buton.<br />
PRESS Power<br />
BUTTON DISPLAY COOK‹NG POWER<br />
once 100 100%<br />
twice 80 80%<br />
3 times 60 60%<br />
4 times 40 40%<br />
5 times 20 20%<br />
6 times (setting timer) 0 0<br />
For example, suppose you want to cook for<br />
1 minute at 60% of microwave power.<br />
1. Press Stop/Cancel buton to reset the oven.<br />
2. Press Power buton 3 times.<br />
3. Turn Time/Menu to 1:00.<br />
4. Pres Start/Quick Start.<br />
Grill<br />
The longest cooking time is 60 minutes.<br />
The gril cooking is particularly useful for<br />
thin slices of meat, steaks, chops, kebabs,<br />
sausages of piece of chicken. It is also<br />
suitable for hot sandwiches anda u gratin<br />
dishes.<br />
For example, suppose you want to gril for<br />
12 minutes.<br />
1. Press Stop/Cancel button.<br />
2. Press Grill button.<br />
3. Turn the Time/Menu to 12:00<br />
4. Press Start/Quick Start.<br />
Combination 1<br />
The longest cooking time is 60 minutes.<br />
30% time for microwave cooking. %70 for<br />
gril cooking. Use for fish, potatoes ora u<br />
gratin.
FOR EXAMPLE: Suppose you want to set<br />
combination 1 cooking for 25 minutes.<br />
1. Press Stop/Cancel button.<br />
2. Press Combination button once.<br />
3. Turn Time/Menu to 25:00.<br />
4. Press Start/Quick Start.<br />
Combination 2<br />
The longest cooking time is 60 minutes.<br />
55% time for microwave cooking, 45% for<br />
gril cooking. Use for puddings omelettes,<br />
baked potatoes and poultry.<br />
FOR EXAMPLE: Suppose you want to set<br />
combination 2 cooking for 12 minutes.<br />
1. Press Stop/Cancel button.<br />
2. Press Combination button twice.<br />
3. Turn Time/Menu to 12:00.<br />
4. Press Start/Quick Start.<br />
Auto Cook Menu<br />
For he following foods or cooking operation,<br />
you do not need to input cooking power and<br />
time. Try to focus on telling the oven what<br />
you want to cook and how much the food<br />
weighs. You can do so by turning the<br />
Time/Menu dial to select a food/operation<br />
category, then press the Clock/Wei.Adj.<br />
button to indicate the number of servings<br />
or approximate weights of food you are<br />
about to cook. The oven starts to work after<br />
you touching the Start/Quick Start.<br />
You may need to turn food over at the<br />
middle of cooking time to obtain uniform<br />
cooking.<br />
For example, to cook 300g of pizza.<br />
1. Turn Time/Menu dial clockwise to indicate<br />
pizza, which is the item 5 on the auto-menu.<br />
2. Press Clock/Wei.Adj. button to select the<br />
weight or amount of the food.<br />
3. Press Start/Quick Start.<br />
Please remember that the result of auto<br />
cooking depends on factors such as the<br />
shape and size of food, your personel<br />
preference as to the doneness of certain<br />
foods an deven how well you happen to<br />
place the food in the oven. If you find the<br />
result at any rate not quite satisfactory,<br />
please adjust the cooking time a little bit<br />
accordingly.<br />
Auto Defrost<br />
The oven can be used to defrost meat,<br />
poultry and seafood. The defrosting time<br />
and powerlevel are automatically set once<br />
the food category and the weight are<br />
programmed. The frozen food weight<br />
ranges from 100g to 1800g.<br />
For example: Suppose you want to defrost<br />
600g of fish.<br />
1. Press Stop/Cancel button.<br />
2. Turn Time/Menu dial to defrost setting by<br />
turning the dial until indicate weight 600g.<br />
3. Press Start/Quick Start.<br />
Express Cooking<br />
The oven will operate at HIGH power (100&<br />
power output) for EXPRESS cooking<br />
program. Just press the Start/Quick Start<br />
a number of times to set cooking time, the<br />
oven starts working immediately at full<br />
power.<br />
Child Lock<br />
Use the prevent unsupervised operation of<br />
the oven by little children. To set the CHILD<br />
LOCK; Press and hold the Stop/Cancel<br />
buton for 3 seconds, a beep sounds and<br />
LOCK indicator lights. To cancel the CHILD<br />
LOCK; Press and hold the Stop/Cancel<br />
buton for 3 seconds until lock indicator on<br />
display goes off.<br />
Cleaning and Care:<br />
1. Turn off the oven and remove the power<br />
plug from the wall socket before cleaning.<br />
2. Keep the inside of the oven clean. When<br />
food splatters or spilled liquids adhere to<br />
oven walls, wipe with a damp cloth. Mild<br />
detergent may be used if the oven gets very<br />
dirty. Avoid the use of spray and other harsh<br />
13
cleaners as they may stain, streak or dull<br />
the door surface.<br />
3. The outside surfaces should be cleaned<br />
with a damp cloth. To prevent damage to<br />
the operating parts inside the oven, water<br />
should not be allowed to seep into the<br />
ventilation surface.<br />
4. Wipe the door and window on both sides,<br />
the door seals and adjacent parts frequently<br />
with a damp cloth to remove any spills or<br />
spatters. Do not use abrasive cleaners.<br />
5. Do not allow the control panel to become<br />
wet. Clean with a soft, damp cloth. When<br />
cleaning the control panel, leave oven door<br />
open to prevent oven from accidently<br />
turning on.<br />
6. If steam accumulates inside or around the<br />
outside of the oven door, wipe with a soft<br />
cloth. This may ocur when the microwave<br />
oven is operated under high humidity<br />
condition. And it is normal.<br />
7. It is occasionally necessary to remove the<br />
glass tray for cleaning. Wash the tray in<br />
warm sudsy water or in a dishwasher.<br />
8. The roller ring and oven floor should be<br />
cleaned regularly to avoid excessive noise.<br />
Simply wipe the bottom surface of the oven<br />
with mild detergent. The roller ring may<br />
be washed in mild sudsy water or<br />
dishwasher. When removeing the roller<br />
ring from cavity floor for cleaning, be sure<br />
to replace in the proper position.<br />
9. Remove odors from your oven by combining<br />
a cup of water with the juice and skin of<br />
one lemon in a deep microwaveable bowl,<br />
microwave for 5 minutes. Wipe thoroughly<br />
and dry with a soft cloth.<br />
10. When it becomes necessary to replace the<br />
oven light, please consult a qualified <strong>Fakir</strong><br />
service to have it replaced.<br />
11. The oven should be cleaned regularly and<br />
any food deposits removed. Failure to<br />
maintain the oven in a clean condition could<br />
lead to deterioration of the surface that<br />
could adversely affect the life of the<br />
appliance and possibly result in a<br />
hazardous situation.<br />
12. Please do not dispose this appliance into<br />
the domestic rubbish bin, it should be<br />
disposed to the particular disposal center<br />
provided by the municipalities.<br />
Control Panel<br />
Menu Action Screen<br />
Cooking time power, action indicators, and<br />
clock time are displayed.<br />
Power<br />
Touch this button a number of times to set<br />
microwave cooking power level.<br />
Grill<br />
Press this button to set a gril-cooking<br />
program up to 60 minutes.<br />
Combination<br />
Cooking with combined microwave and gril<br />
power.<br />
Time/Menu<br />
Turn the dial to set the oven clock time and<br />
input cooking time.<br />
Turn the Time/Menu dial to select an autocooking<br />
menu including auto defrost.<br />
Wei. Adj.<br />
After choosing an auto-cooking menu, use<br />
it to specify food weights or number of<br />
servings.<br />
Clock/Wei. Adj.<br />
Touch this button to set the clock.<br />
Touch the set weight of food.<br />
Start/Quick Start<br />
Touch to start a cooking program.<br />
Simply touch it a number of times to set<br />
cooking time and cook immediately at full<br />
power level.<br />
Stop/Cancel<br />
Press to cancel setting or reset the oven<br />
before setting a cooking program.<br />
Press once to temporarily stop cooking, or<br />
twice to cancel cooking altogether.<br />
It is also used for setting child lock.
Before you call for service,<br />
If the oven fails to operate:<br />
1. Check to ensure that the oven is plugged<br />
in securely. If it is not, remove the plug<br />
from the outlet, wait 10 seconds, and plug<br />
it in again securely.<br />
2. Check to ensure that the control panel is<br />
programmed correctly and the timer is set.<br />
3. Check to ensure that the door is securely<br />
closed engaging the door safety lock<br />
system. Otherwise, the microwave energy<br />
will not flow into the oven.<br />
Grounding instructions,<br />
This appliance must be grounded. This oven<br />
is equipped with a cord having a grounding<br />
wire with a grounding plug. It must be<br />
plugged into a wall receptacle that is<br />
properly installed and grounded. In the<br />
event of an electrical short circuit,<br />
grounding reduces risk of electric shock<br />
by providing an escape wire for the electric<br />
current. It is recommended that a separate<br />
circuit serving only the oven be provided.<br />
Using a high voltage is dangerous and may<br />
result in a fire or other accident causing<br />
oven damage.<br />
WARN‹NG: Improper use of the grounding<br />
plug can result in a risk of electric shock.<br />
Note:<br />
If you have any questions about the<br />
grounding or electrical instructions, consult<br />
an authorized <strong>Fakir</strong> service. Neither the<br />
manufacturer not the dealer can accept<br />
any liability for damage to the oven or<br />
personel injury resulting from failure to<br />
observe the electrical connection<br />
procedures.