Exposure Tools for Digital Video, Part 2
The first part of this exposure tools overview article introduced the topic and covered histogram, zebras and waveform monitor. We are now continuing the summary with a few more tools: false color, spot displays, external light meters. Familiarity with all these instruments is a prerequisite for good technical understanding and creative handling of various exposure tasks.
False color
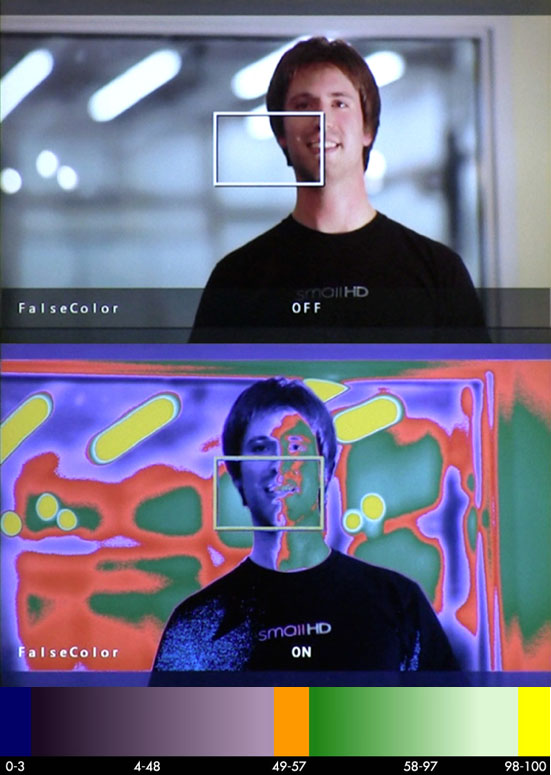
False color is an exposure tool that colorizes specific levels on the image. Tonal regions are color coded with easily recognizable colors. Sometimes these regions include only the near-clipping extremes and the most common tonal range of skin, but the whole range can be split in intervals and colorized. A legend for the different color codes is often included in the frame for reference.
False color can be thought of as an extension of zebras. Zebras can be left active for monitoring during recording. But false color is generally used to tune exposure in advance, as composition is difficult to judge with colorization on. Overreliance on false color with its neatly predefined tonal zones can force shooters into exposure patterns. This tool should be used for reference only.
Through-the-lens digital spotmeters
Isolating a portion of the image for evaluation can be a big help. Problematic or important areas can be quickly judged on their own or in respect to the whole image. This is especially useful when paired with tools that display the exact levels. Constant aperture zooms can be used to isolate an area of interest while preserving the exposure. This is not always applicable though.
Some cameras (Canon C-series, for example) include a spot waveform, which imposes the waveform of a smaller rectangular image region on the waveform of the whole image. Magic Lantern includes a simpler and more straightforward spotmeter. It indicates the averaged brightness level of a small rectangular area in the center of the picture. This is a powerful exposure tool when coupled with some good knowledge of the underlying transfer curve. Finding out reflected light (luminance) ratios is then just a matter of pointing and measuring shadows and highlights.
Good old light meters
Any overview of exposure tools is not complete without a few words on light meters.
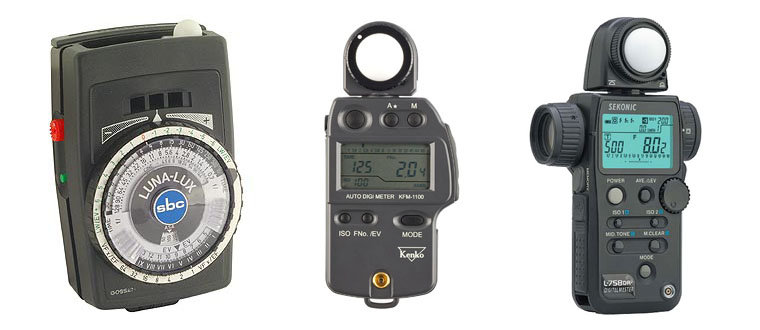
For years light meters have been indispensable to the cinematographer due to film’s lack of immediate feedback. They are of two basic varieties: reflected light meters and incident light meters. Both functions are often found in a single body. Incident light meters measure falling (incident) light, or illuminance. Reflected light meters measure light reflected from scene surfaces, or luminance. This is an important difference: incident light readings are thus scene independent, unlike reflected light readings. Cinematographers, in general, tended to rely on incident readings. The spotmeter is a variant of the reflected light meters. Unlike standard reflected light meters, which are usually reading reflected light within an angle of 20 to 30 degree, spotmeters measure reflected light in a small angle (sometimes as small as 1 degree). This makes them very useful for isolating surfaces and for contrast ratio calculations. Light measurements are converted to photographic exposure terms based on the assumption for average scene brightness (18% reflection). So creative use of light meters usually requires exposure compensation based on the creative intent.
All digital cameras feature internal light meters. These are through-the-lens reflected light meters. On photo cameras they usually default to sophisticated evaluative (matrix/multizone) metering modes. Matrix metering is great for still images, but it is hard to consistently use for matching exposure between shots. An experienced video user can get more mileage from the spot metering mode of the camera.
With the rise of digital video and the associated exposure tools external light meters are falling into obscurity. Digital video guys tend to discard them as unnecessary and old fashioned. Nevertheless, they can still be useful to a knowledgeable video shooter. Unlike any of the exposure tools mentioned above, external light meters measure either the scene reflected light or the incident light directly, and not by processing the captured image. So predicting the transfer of scene luminance into image levels requires intimate knowledge of the tonal characteristics of the recording medium, and – in the case of incident readings – some experience of the reflectivity of various materials. That’s how shooting film works. A somewhat underestimated property of incident readings: being independent of the reflective properties of scene elements, they can allow for consistent light measurement and, consequently, for consistent exposure without the need for a grey card or any other scene reference. And as they don’t need a camera to function, external light meters are also handy for location scouting and setting lights up. This is their most common use nowadays.

Incident readings are taken with the meter at the subject, pointed towards the camera. Reflected readings are taken with the meter at the camera, pointed towards the subject.
It is worth noting that light meters are not created equal. With different brands, varying calibration constants may lead to variations of up to 1/5 stop in measurements. This is a bit annoying, but ultimately doesn’t really matter – meters should always be tested (and possibly corrected through meter correction factors) with the specific transfer curve used.
A further article will explore the application of these exposure tools.


