France
 Australia
Push-ups are a staple of fitness routines across the globe. In the U.S., the term push-up was first coined in the early 20th century. Since then, people have gone about perfecting the push-up as well as creating new styles of the iconic exercise, each with their own twist. Some people prefer push-ups that provide an intense challenge where getting one push-up done is a feat of its own. Others want to make the traditional push-up easier to do. Fence lizards do push-ups to ward off other lizards from their territory.

Source: American Wildlife
Before you get into any of those options, you’ll need to master the basic push-up. Here are five tips to take your push-up game from beginner to expert:
1. Start Your Push-Ups the Right Way
Getting the most out of a push-up isn’t about how many you do or how fast you go. It's about starting with the right form. Performing a push-up with the wrong posture can completely negate the positive effects that result from the exercise, and even cause upper body or back pain.
Feet
- Your feet should be one to two inches apart throughout the exercise.
Hands
- Your hands should be just beyond shoulder-width apart, placed on the ground, right below the shoulders. Keep your fingertips facing directly forward.
Aligned Spine
To get the perfect push-up, the most important part is maintaining a straight back and keeping it level up to the crown of your head. You should be able to draw a flat line from your toes to your head. This will keep your spine aligned and force your upper body to do all of the work. Keep your knees unbent with a tight core and glutes.
Now you’re ready to start the perfect push-up.
2. Going Down
Going down seems like the easiest part. Let gravity do its job, then push back up, right? Not quite. Your impeccable starting form will all be for nothing if you don’t keep it throughout the push-up.
Elbows
- All of the motion going on during a push-up runs through the elbows. Lower yourself by moving your elbows from a straightened position to a 90-degree angle. Your upper arm should be parallel to your torso with your forearm going directly towards the ground. Make sure your elbows stay 45 degrees away from the hips.
Where to Stop
- Lower yourself slowly in a fluid manner. This should feel like one continuous motion. End when your chest is a few inches from the ground and your elbows are at a right angle.
It’s time to finish strong.
3. Bring it Home
You’ve come this far. Don’t give up on the perfect push-up now. Going up is the most physically demanding part of a push-up, but the technique is the easiest. Just keep doing what you’ve been doing.
Stay Straightened
- It can be tempting to wiggle and move as you return to the starting position. This is the most difficult part of a push-up and getting back to the top is just inches away. Don’t cheat just to finish though. Keep your back straight and aligned with your glutes and neck.
Flat Torso
- Try to keep your torso and hips completely flat and level. People tend to twist their hips to compensate for the non-dominant side of their body being naturally weaker. This can lessen the effects of the workout and prevent you from exercising both sides of your body.
Weight Distribution
- You should be able to feel the weight of your upper body in your hands and arms. Don’t lean to one side or the other. If you feel like one arm is doing more work, make sure both of your hands are just outside of shoulder-width and are equidistant from the center of your chest.
- If you still feel more resistance in one arm, it may be because that arm is weaker. This is common and usually your stronger arm is the one you write with. Push-ups are a great way to exercise both arms equally.
4. Finding the Right Push-Up
You should be able to do about 10 of the standard style of push-ups to make them your exercise of choice. If ten is too many or just feels uncomfortable, there are a number of other styles of push-ups that still do a great job of working the muscles in the upper body, but are easier to perform.
Incline Push-Ups
- Incline push-ups use the same form as standard push-ups but you don’t go down to the floor. The elevated surface makes the push-up easier to complete. Find a secure, elevated surface, plant your hands flat on the surface, and perform a regular push-up. Lower until your chest is inches from the surface and return to the starting position. As long as the surface won’t slide, chairs and exercise benches can both be used.
- One of the best choices for incline push-ups is a staircase. The staircase is less likely to move than a chair or a bench, and each stair is a different level of difficulty. Find the stair that provides you with a challenging but manageable set of ten push-ups and work down from there.
Knee Push-Ups
- Doing push-ups from your knees is another way to modify the difficulty of a standard push-up. They activate the same muscles as normal push-ups but place a larger weight load on the knees instead of your feet. Because of this, you may want to use an exercise mat to pad the ground.
5. Taking Your Push-Ups to the Next Level
Think you’ve graduated from regular push-ups? There are countless ways to make push-ups a more challenging and engaging exercise. Resistance, form, and weight can all be used to further push your body to its limits. Here are some great techniques for taking your push-up game up a notch.
CLX Shoulder Push-Ups
- Get in position to do a knee push-up, then put one hand through a loop of the CLX Band. Lay the band over your back, crossing your shoulders. Place your other hand through a loop on the other side. Enter a push-up position.
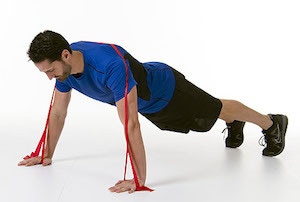
- As you do this, you should feel the resistance the band is providing. Go through the steps of a standard push-up. The band will make returning to your starting position more challenging and increase the force your arms and chest have to exert throughout the push-up.
Triangle Push-Ups
- Enter the standard push-up position. Bring your hands towards each other, meeting underneath the center of your chest. Touch the tips of your pointer fingers and thumbs, forming a triangle between them. Bend at the elbows until your chest is a few inches from the ground. Your elbows should bend beyond the 90-degrees of a normal push-up. Instead of bending near your hips, your elbows extend outside of your shoulder. This provides an intense workout for the triceps and chest.
Thera-Band Stability Disc Push-Up
- This is just your standard push-up with a slight twist: Perform the push-up with your hands placed firmly on two Thera-Band Stability Discs. The discs make balancing during the exercise difficult to challenge your core and stability.
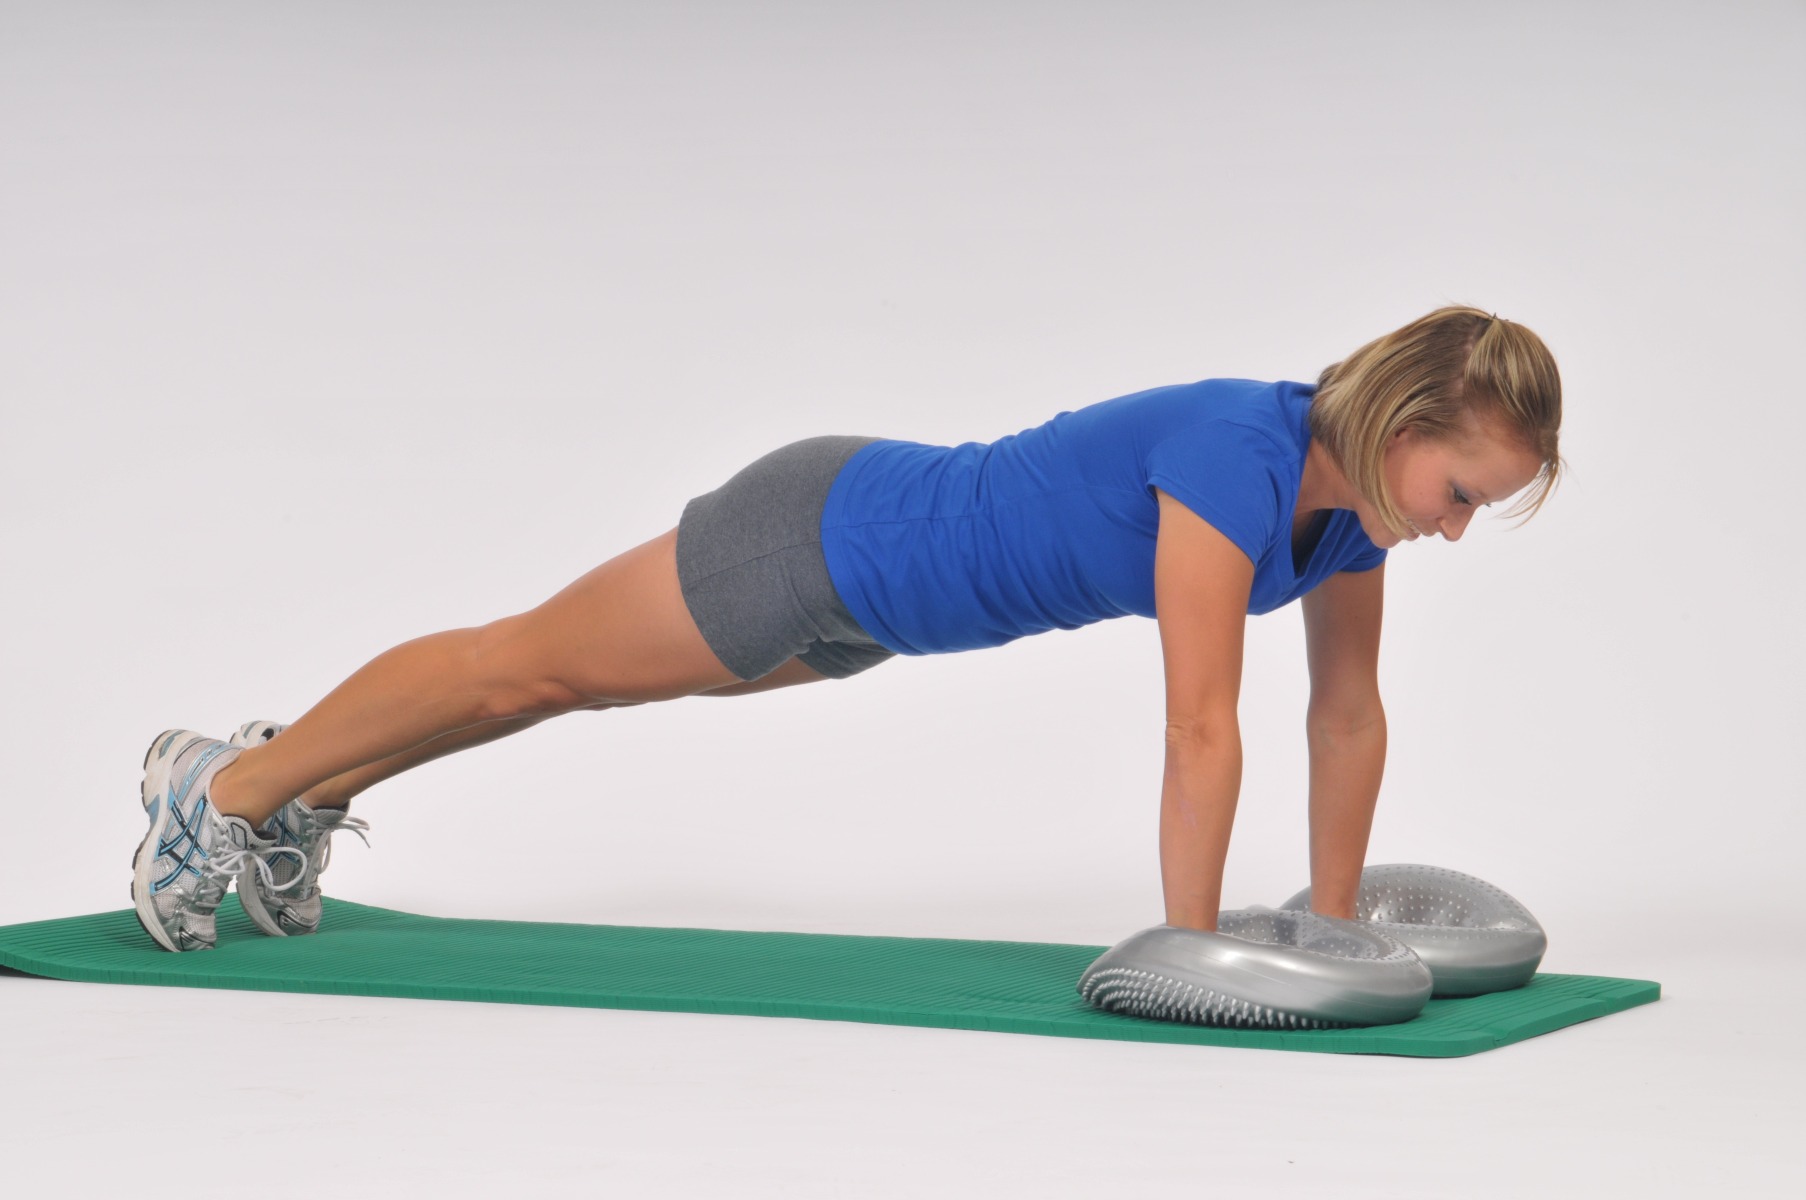
- The discs can be inflated or deflated to modify the difficulty of your workout. The more inflated the disc is, the more effort it takes to balance while doing the push-ups.
You’ve passed Push-ups 101 with flying colors. It’s time to attack one of the oldest exercises in the book like you never have before. Start executing your push-ups with perfect form!
References
Cespedes, A. (n.d.). What Muscles Do Triangle Push-Ups Work? Retrieved from https://bit.ly/2HQow3D
CSCS, A. H. (2018, September 05). How to Get Better at Push-Ups. Retrieved from https://bit.ly/2Ikkwrw
Push-up. (n.d.). Retrieved from https://bit.ly/2WEwN3c
Medical Disclaimer: The information provided on this site, including text, graphics, images and other material, are for informational purposes only and are not intended to substitute for professional medical advice, diagnosis or treatment. Always seek the advice of your physician or other healthcare professional with any questions or concerns you may have regarding your condition.