

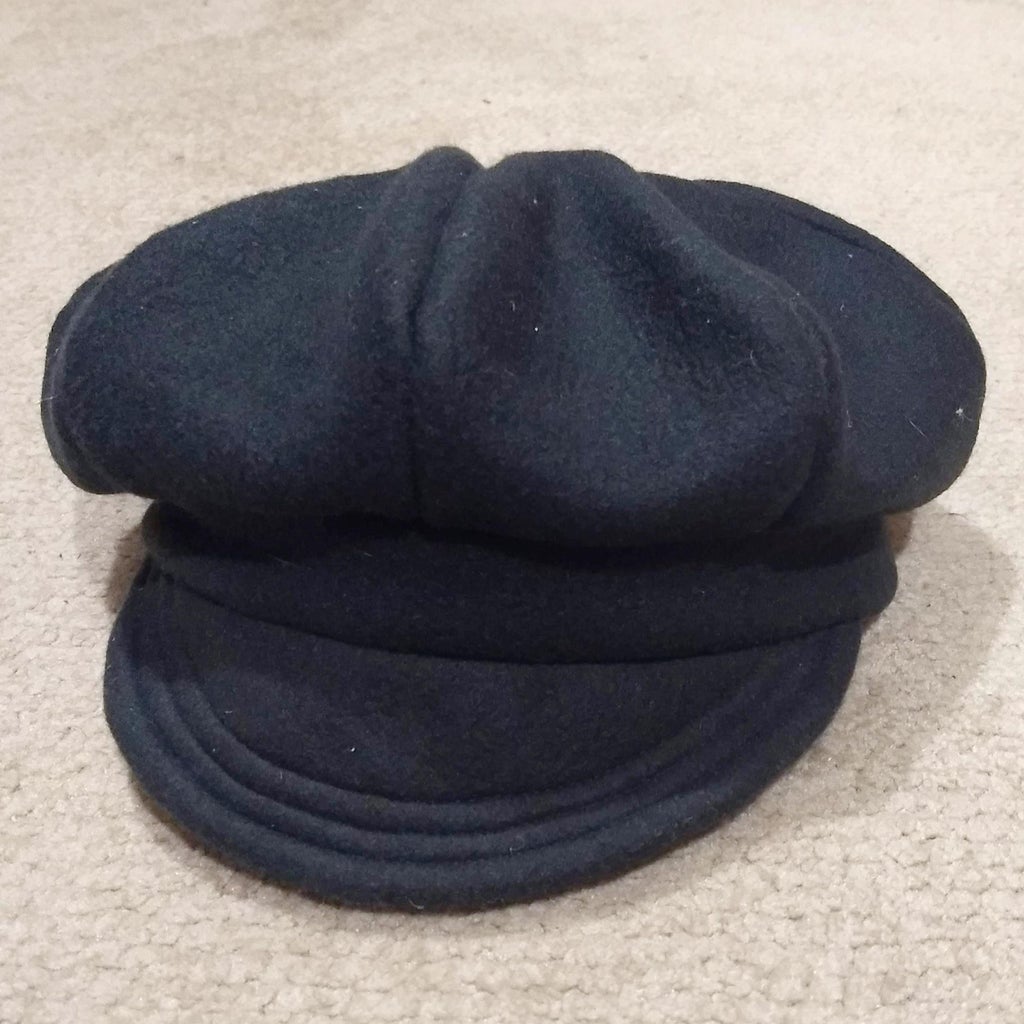
Introduction: Fleece Newsboy Hat


This is another project I tried from a blog and them wandered in a different direction. After I thought I was done making these, my aunt wanted one, so I decided I'd at least document the process a little in case anyone else wanted to try this modification.
Pattern credit for the body of the hat and inspiration goes to: https://oneyardprojects.blogspot.com/2012/05/fleece-beret.html
After making their beret out of scrap fleece one afternoon, I decided the shape made me think less beret and more newsboy cap sans brim. Since that's one of my favorite styles I had to give adding a brim and lining a go.
Supplies
1/2 yard of fleece should be more than enough, careful cutting you could get three from a yard, but a single one takes a hair over 1/3 yard
1/3 yard thin fabric for lining (I had worn jersey sheets in my scrap bin)
fusible interfacing scraps, maybe 1/8 yard (I used pellon #845 because that's what I had from mask making)
pins
sewing machine
coordinating thread
flat button, about 3/4" diameter
Step 1: Creating Pattern Pieces

This is where I take off my hat to One Yard Projects https://oneyardprojects.blogspot.com/2012/05/fleece-beret.html I don't have the math skills for their pattern calculation! Go check it out.
I had trouble getting a symmetrical piece with free-handing the measurements, so I took a scrap of paper and folded it in half to get a symmetrical 8 1/2" long pattern piece. Then using their measurements sketched out a half tear drop shape 2 3/8" at the widest and 1 5/8" at the bottom. My concave curve up in the bottom measures about 1/2" at the center point.
If you're low on fabric, cutting one at a time and alternating bottom and point direction is the most efficient use of fabric. If you're low on time, folding fabric and cutting a stack at a time is a more efficient use of time.
I folded width-wise once and then alternated to get my pairs right sides together right off the bat but still use the fabric a little more efficiently.
For the brim I traced the brim of a hat that I liked and added 3/8" for a 1/4" seam allowance assuming fabric thickness.
Step 2: Cutting Out the Body and Brim

You'll need 8 of wedge shaped pieces cut from the fleece, and 8 from the lining fabric. Pin them into pairs, right sides together.
You'll need to cut two pieces of your brim pattern out from the fleece as well.
Save your scraps for now, you'll need at least one of them for your button at the end.
Step 3: Cutting a Hat Band

One 2" strip should be enough if you're working with a full length of fleece. (You see two here since I'm working with a scrap that's not the full 60" width.)
To calculate the length you'll need, measure around your head where you want the hat to sit. You'll want one strip that length, one 1/2" longer.
(eg- My aunt measured 22", so I'm cutting one strip 22" and one 22 1/2" long.)
*If this is a gift and you're unsure, you can google standard head circumferences and make it a little larger then add elastic to the back. I think for adults medium size woman is 22 1/2 and men's is 23. But please double check me!
Step 4: Assembling the Body


Sew each pinned pair of fleece together, then pin two pairs to make halves, then sew the halves together. Do the same for the lining and set aside.
I used 1/4" seam allowance and had my machine set to 7 stitches per inch for the fleece, 8 stitches per inch for the lining. Back stitch each seam.
With the fleece, I generally find it easier to sew from the wide base to the point. It makes it easier to get close to the seam cluster as it gets thicker.
No matter how carefully you pin the fleece, you'll probably have a small hole at the center, don't worry, that's what the scrap and button will be for at the end!
Step 5: Sewing the Brim


Cut two pieces of fusible interfacing to completely cover the brim pieces. Fuse them to the wrong side of your brim pieces.
Pin right sides together and sew the outer curve. Again, I use a 1/4" seam and set my machine to 7 stitches per inch.
Carefully clip notches along the curve, making sure you never cut into the seam.
Turn the brim right side out. Run your finger along the inside of seam to make sure it's as turned out and flat as it will get. Then pin along the seam.
Increase stitch size to 6 stitches per inch and sew 1/4" in from the edge. Repeat, making another parallel stitch running 1/4" in from that seam. And again. You'll have three concentric lines of top stitching about 1/4" apart.
Step 6: Sewing the Band and Brim


Sew your two hatband strips with 1/4" seams. Now you have two loops. Try them both on to make sure they're not too tight!
Set the slightly smaller one aside for now. Fold the larger so you can find the center, mark it with a pin.
Gently fold your brim to find it's center. Pin the raw edge of the brim to the edge of the slightly larger band, lining up those center points as best as possible. The brim goes on the band on the right side of the seam. (I know this feels wrong. I double check every time...)
Sew with a 1/4" seam. Use 6 stitches per inch here and go slowly, it's a lot of fabric for the machine to get through. Backstitch at the beginning and end of the brim.
Step 7: Attaching the Bands to the Body and Lining


You have a band with a brim, it needs to get attached to the outside hat body.
Pin the right side of the band to the right side of the hat. (Keep in mind the brim will be under the band, so it's on the opposite side from the one that's getting pinned to the hat.)
Start by pinning the back seam of the band to a seam between two 'slices' of the hat body. I spread both seams open so they're a little flatter.
Next, pin the middle of the band to the 'slices' seam opposite to the one you pinned the back seam to.
Keep folding the band between pinned points to check the approximate halfway points and pinning to the rest of the seams in the hat body. Then pin the band to the middle of each hat segment.
Use 7 stitches per inch here. The fleece is stretchy, the circumference of the band is a little smaller than the hat body, sew slowly and pull gently so the fleece is lined up as you stitch. Once sewn, it will act as its own elastic.
Start at the back seam, back stitch, go all the way around, back stitch again to finish.
Follow the same procedure for the lining, using the slightly smaller band.
Now you have a hat with a band and brim but a raw edge, and a lining with a band.
Try on the hat to make sure it's not too small, it might still be a little too large at this point, that's okay. It'll be a little tighter once we get the lining in.
Step 8: Putting in the Lining


Putting the two together hides the seams and makes the hat warmer.
Match the right sides of the body and lining. The very slightly smaller lining band should fit neatly into the outer band. Start pinning at the back seams. Pin the middles together next. Then continue subdividing and pinning. The front is going to be a little tricky with the brim sandwiched between, pin that area more densely than the rest of the hat!
Pin all around until you get almost back to the back seam. Stop about 3" from the back seam. This is where the hat will be turned right side out. (I also use doubled red pins here to remind me to stop in time!)
Use a 1/4" seam and 7 stitches per inch until the brim. Back stitch at the beginning, and also before and after swapping to 6 stitches per inch for the brim. Continue along the pinned bands until you reach that unpinned segment. Back stitch and trim.
Step 9: Turning Right Side Out


Reach inside that hole and curl up the brim slightly to pull through. Continue pulling until the entire hat is right side out. Run your fingers along the inside of the seams to make sure the bands are pulled entirely right side out.
Try the hat on. If it fits, excellent!
If it's a little too big, we can work with that. Too small, not much for it but to redo it with larger bands. But since fleece is really stretchy, you might want to try to stretch it out a little first.
Step 10: Adding a Finishing Button


Add the button before sewing the hole at the base of the hat closed.
Use a flat round button without a shank, any size about 1/2" to 1" should do. (One with narrower edges is preferable, but not worth going out and buying new buttons!)
Take a scrap and trim it to a circle about twice the diameter of the button. Double up coordinating thread, and do a running stitch around the outside of the scrap circle. Start gathering it up with the button inside and pull until it's tight around the button. Tie a knot.
Stitch to the center of the hat, covering any gap where the pieces meet! I recommend a ladder stitch for this. Once the button is secure, tie a knot, pull the needle through to the inside, and cut the thread.
Step 11: Sewing It Closed


Now you can seal up your hat. Fold the edges along the gap in about 1/4" so they'll be even with the seam. Pin, and sew closed with a ladder stitch.
Wear and enjoy!
Step 12: Optional: Adding Elastic

If you need the hat a little smaller or want some adjustability, you can add a bit of elastic to the back *before* you sew it closed.
Cut 3" of 1/2" wide woven elastic. Reach in through the hole in the back of the hat and push one end of the elastic into the already closed section on the other side of the back seam. Pin that end about 2" past the center seam. Pin the other end about 2" past the back seam above the still open area.
If the hat is for you, I'd gently try it on first to make sure you like the fit! Loosen the elastic or pin it further out to make it tighter if you need to.
Sew an X at either end of the elastic to secure it.
Step 13: *Footnotes
* A note on head circumference- it also depends how you want to wear your hat! I get bad headaches and like to pull mine over the top of my ears, so went with 24" for a looser, keep-my-ears-warm fit.
*Overall I'm really pleased with this hat. I do wonder if the top would lay flatter if you increase the body pattern to accommodate a 1/2" seam allowance, then topstitch the top of the hat 1/4" from each seam.
But I'd already made several before thinking of that and don't have the fabric to redo them! Maybe if I try more later.
*Something else that might give a more polished look is making a channel for the elastic so it gathers in a small bunch rather than the whole back.
*For a different look, you could make a pompom out of the fleece scraps or coordinating/contrasting yarn and add that to the top instead of a fabric coated button.

Second Prize in the
Winter Fun Challenge


