When online education became common practice, Kami swooped into the lives of teachers worldwide, responding to the need for a trustworthy and engaging platform to keep students studying while they were on lockdown.
The Kami app is one of the most beneficial educational tools platforms available. It is an application designed to maximize productivity and enable teachers to promote increased education. Its excellent features assist today’s teachers in streamlining their activities, from feedback to assessments and pedagogical techniques. Furthermore, teachers can make a copy of a document and distribute it to students so that everyone in the class can see it. Educators can annotate a standard Word document, a PDF, an image, or another resource for interaction.
Do you know how? If not, this guide will walk you through the easiest ways to copy and forward the assignment to your students effortlessly.
Table of Contents
What Is Kami?
Kami is an online classroom plugin that keeps students engaged by providing easy-to-use annotation capabilities in and out of the classroom, saving educators time with instruction and assessment. Kami is a digital classroom system designed to improve screen interaction. It offers a one-stop shop for teachers who want to educate by utilizing digital resources but don’t want to learn how to use various of them.
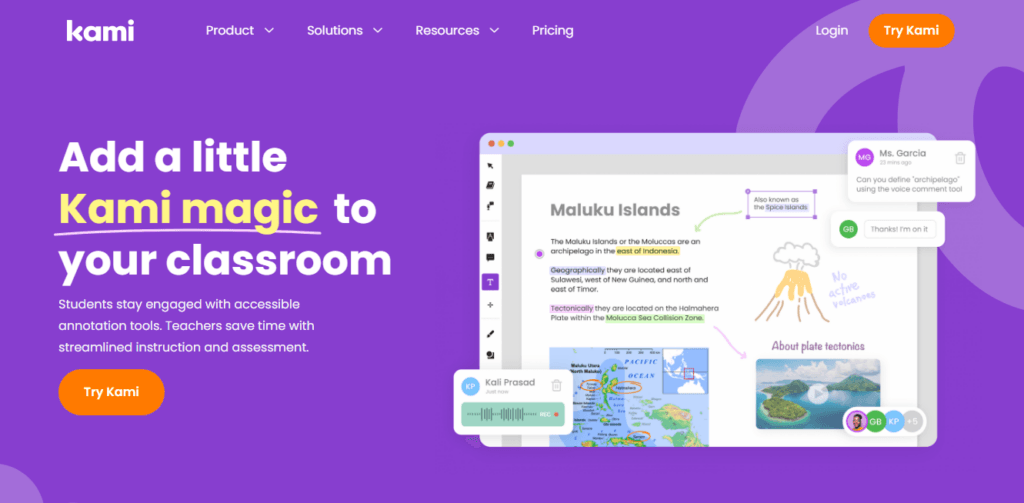
Kami keeps students interested with accessible annotation tools while saving instructors time with education and evaluation. It enables them to finish their complete task in a single location. This implies that teachers may post resources to utilize, set up areas for students to submit work, grade, and offer comments.
Now let’s look at some conceivably simple ways to make a copy in Kami.
How To Make A Copy In Kami?
So here we are, ready to share some easiest ways to make a copy of documents in Kami. Note those photos have been used to show an example to you.
Steps For Making A Copy Of The Whole Pages:
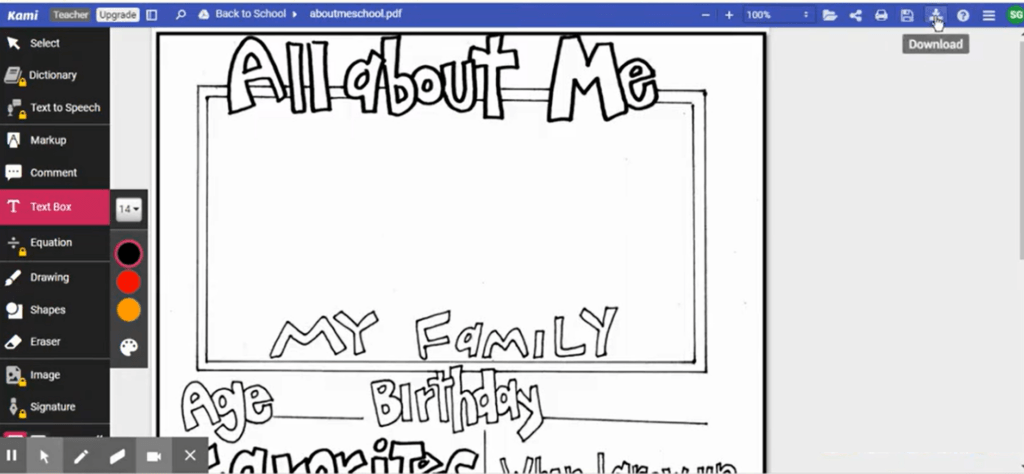
Step 1: Open the document in the Kami app and click the “Download” option to make a copy for yourself.
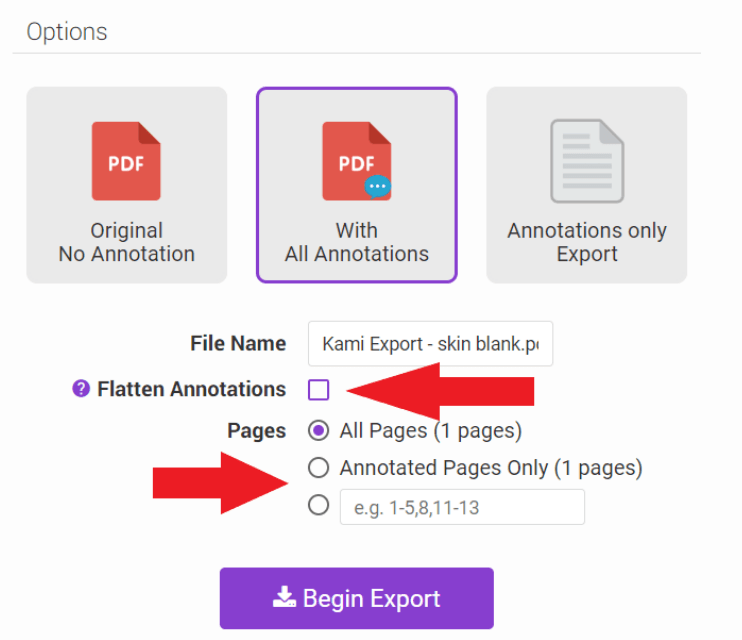
Step 2: You can make a copy to your computer or Google Drive. And there are 3 options for the copy: Original No Annotation, With All Annotations, and Annotations only Export.
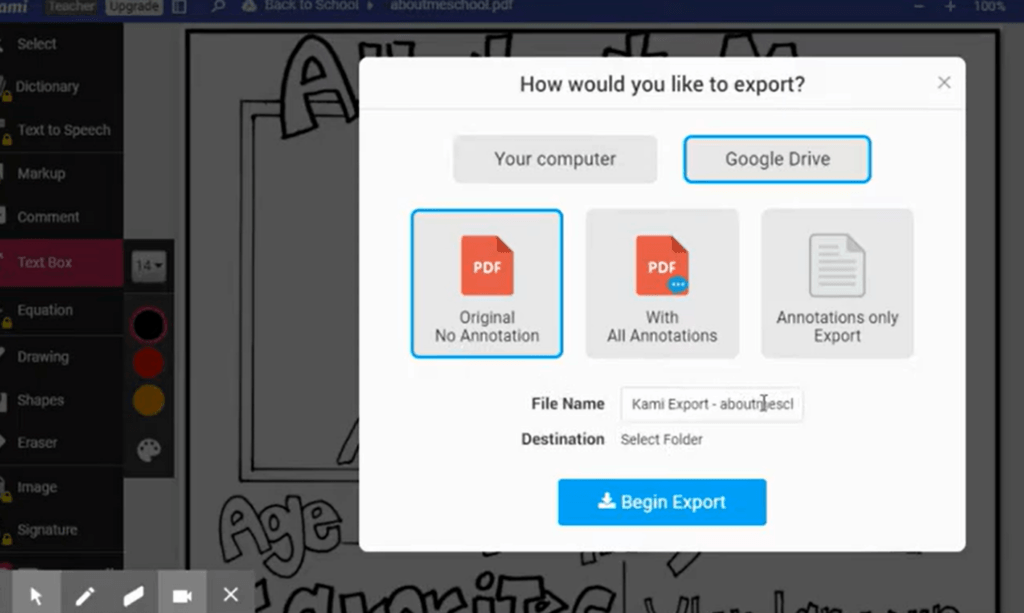
Step 3: Edit the name and add a folder from the google drive you want to send.
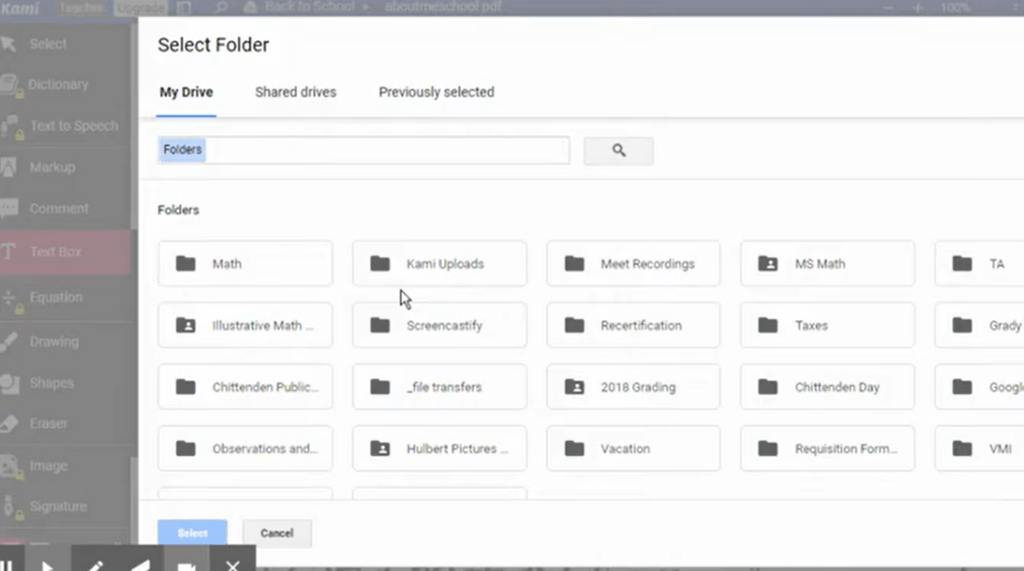
Step 4: After you click Begin export, the folder will be saved in your drive.
Now we have made a copy of that folder and are free to edit it.
Steps For Another Way- Advanced Export:
This way is extremely helpful if you want to make a copy for only a couple of pages from any Folder; for example, if you have a folder of 8 pages, you may make a copy of the pages you want in the Kami app. Below we have mentioned the steps on how to do so!
Step 1: First, open the folder you want to copy in the Kami app.
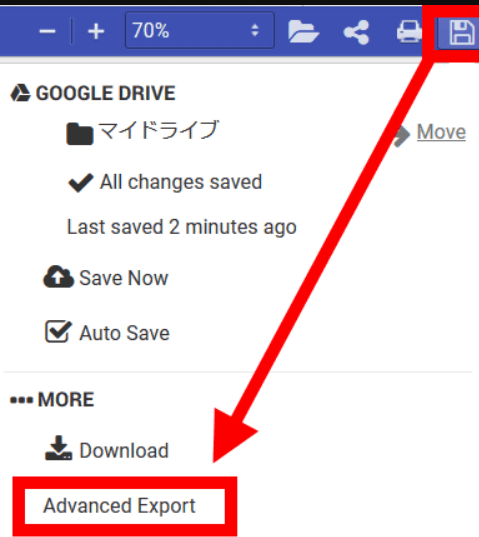
Step 2: Click the save button, and you will find the “advanced export” option, select it.
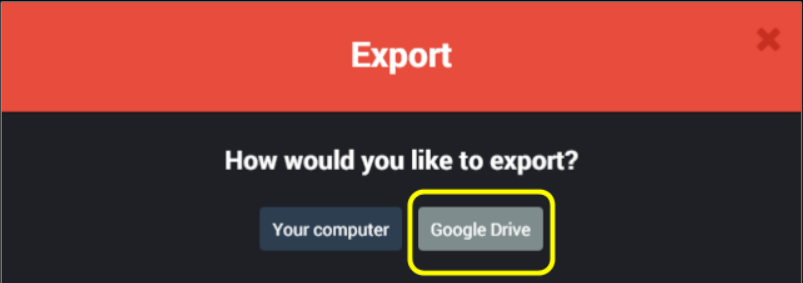
Step 3: You will have a window with a screen showing “How would you like to export?” select the option “google drive” as shown below.
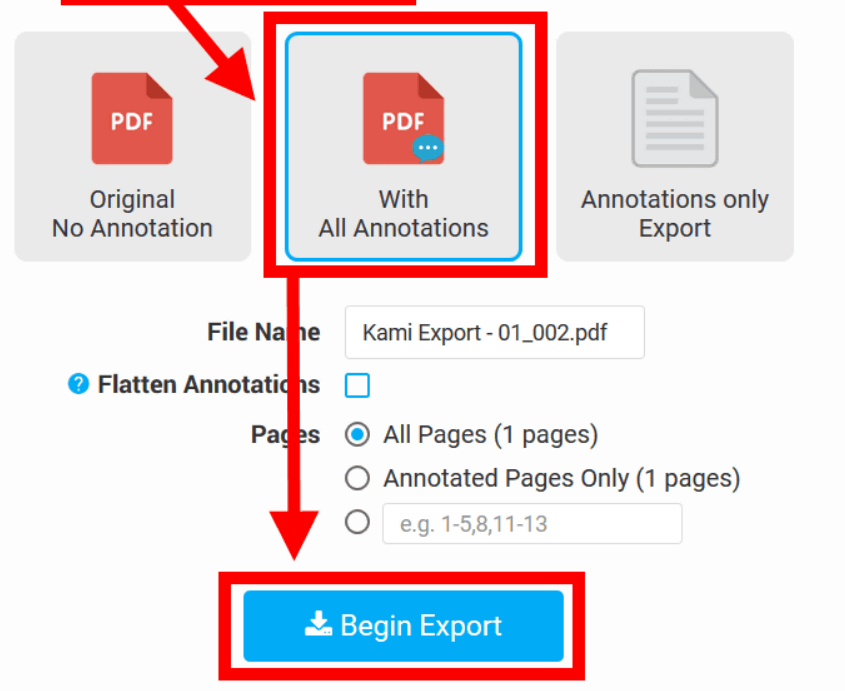
Step 4: After you click the “google drive” option below, you will see, you will find three options, click on “with all annotations.”
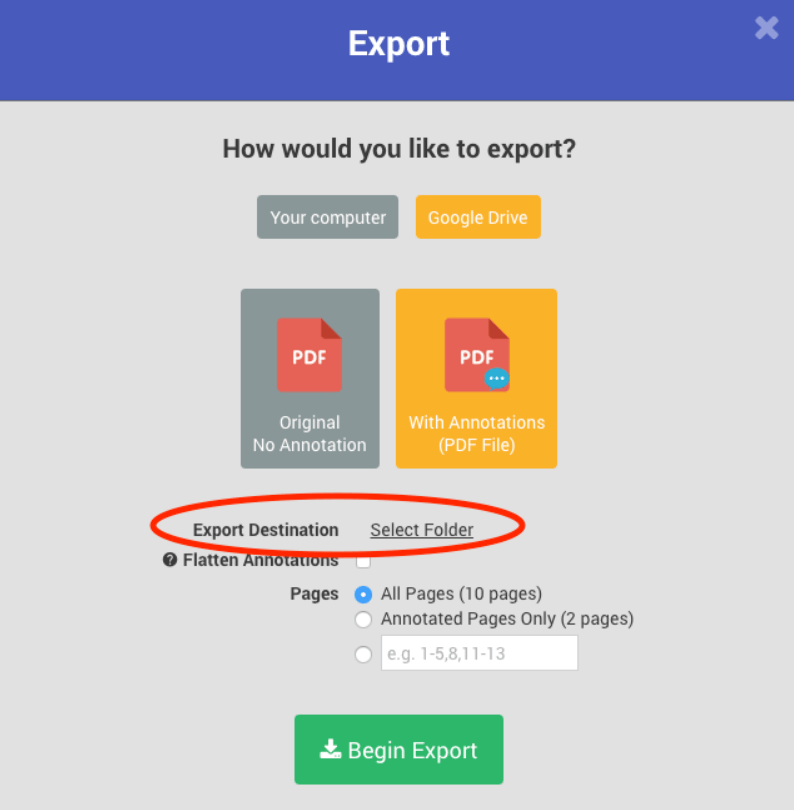
Step 5: Then, on the same window, you will find an opinion “page” with the page number you want from that folder. For example, write (2:4:6) if you want pages between the folder.
Step 6: Click “Begin export” once you have selected all the required options.
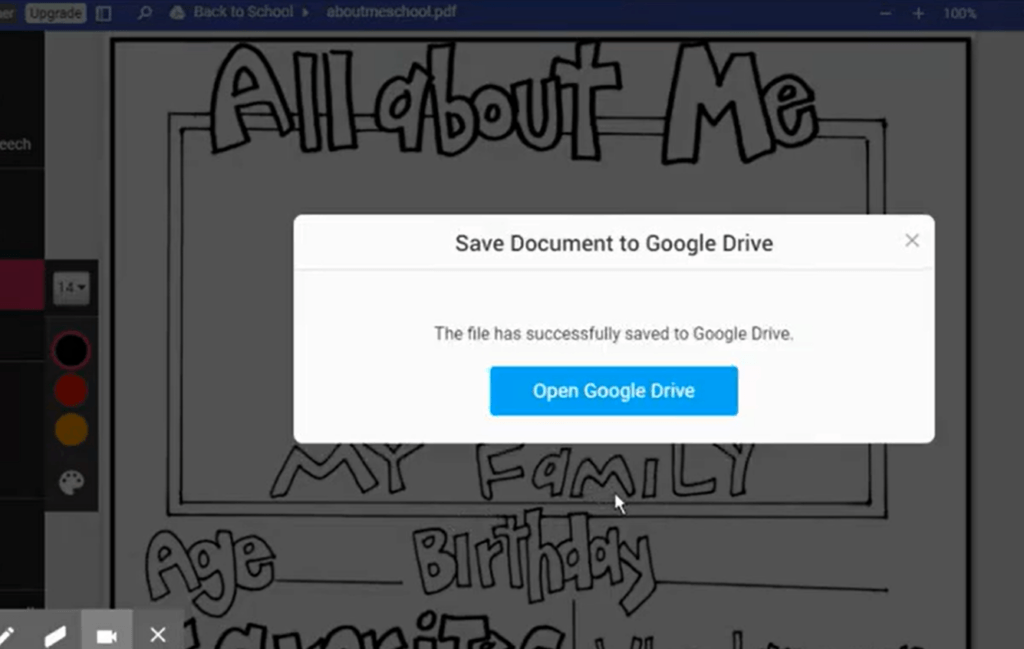
Step 7: Now the file has been saved to google docs successfully. And you can open that file in google drive.
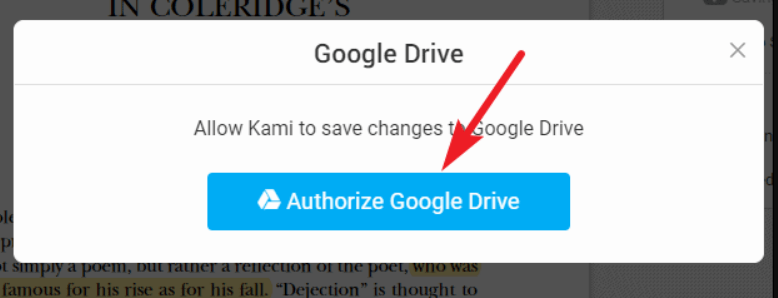
Step 8: You will be on the Kami site again after opening the file. Click the “share document” icon from that window.
Bonus Tip: How To Use Kami To Distribute Documents To Students
Kami is available in both a free and a premium edition for instructors. This article demonstrates how to use Google Classroom’s free version of Kami. The commercial edition of Kami has an integrated Turn In button so students always submit the correct file, automated saving to Google Drive, and assignment creation. Although the free edition lacks these upgrades, Kami can still be used in the classroom successfully.
You need the following to utilize this:
- Set up Google Classroom.
- Both your Chrome browser and the Chrome browsers of your pupils have the Kami Chrome extension and app installed. Visit the Chrome Web Store to install or deploy using the Google Admin interface.
How to use Google Classroom to distribute individual copies to students
Step 1: Make an assignment (announcements do not allow you to transmit individual copies).
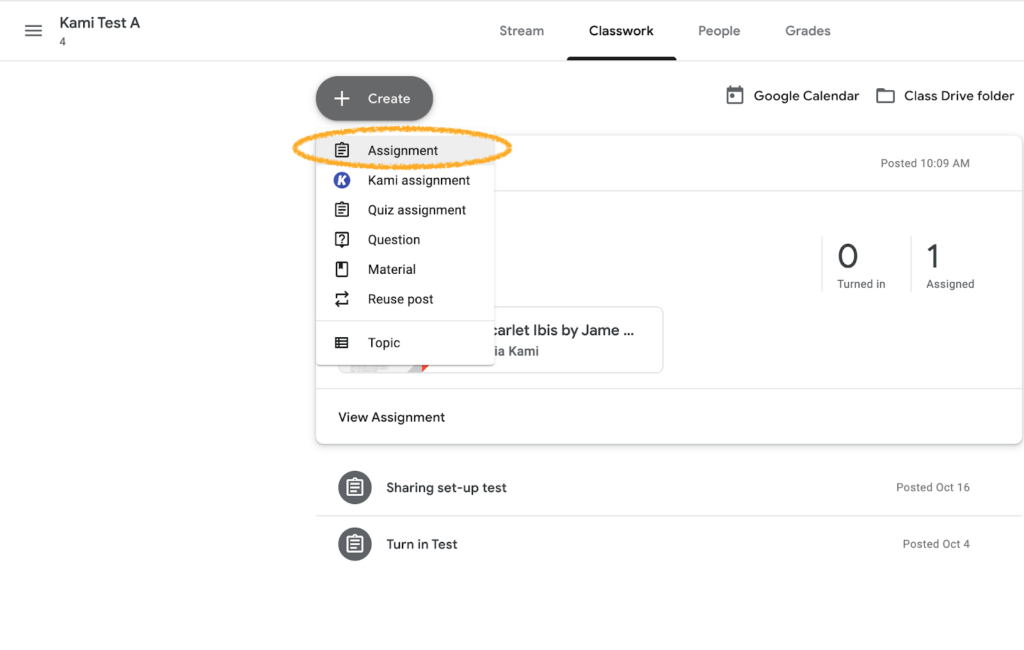
Step 2: Select “Make a copy for each student” and attach the file you want to send to the students.
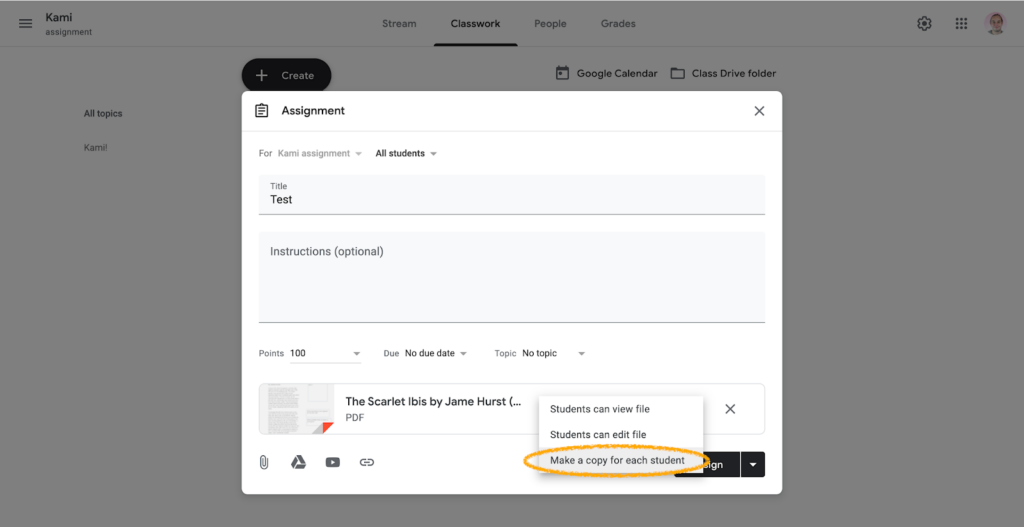
Step 3: Select Assign.
Now each of your students will get a copy of the assignment. We have also mentioned below how later how, after receiving the assignment, how they can submit their work. Find out:
Assignment Submission from The Student’s Side!
Step 1: The Classroom Assignments tab in the classroom allows the pupils to access the file.
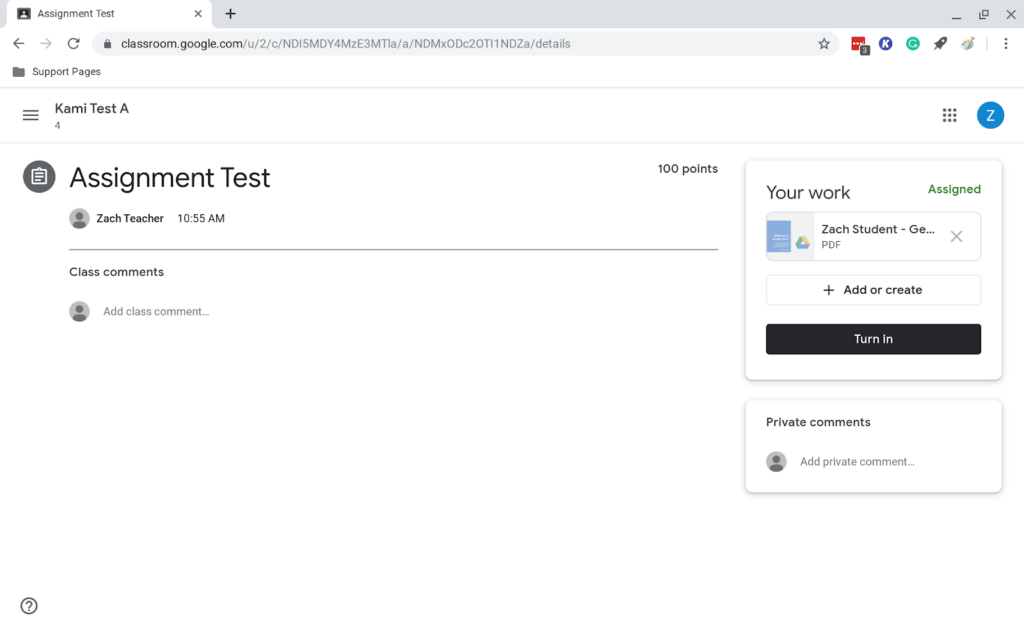
Step 2: The students can open the file immediately from the Google file preview box in the Kami app if they have the Chrome extension installed.

Step 3: The students can annotate using the left-hand toolbar. When finished, students can save it to the file Classroom produced in Drive. They accomplish this by clicking the Save Now button after clicking the ‘Save’ button, which is shaped like a floppy disc.
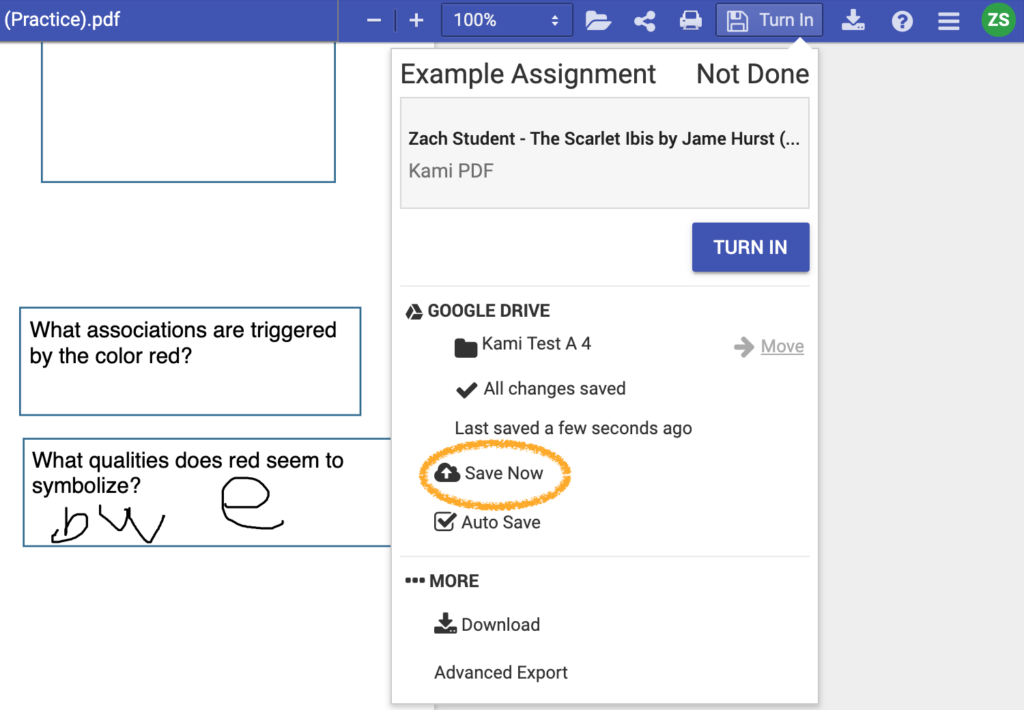
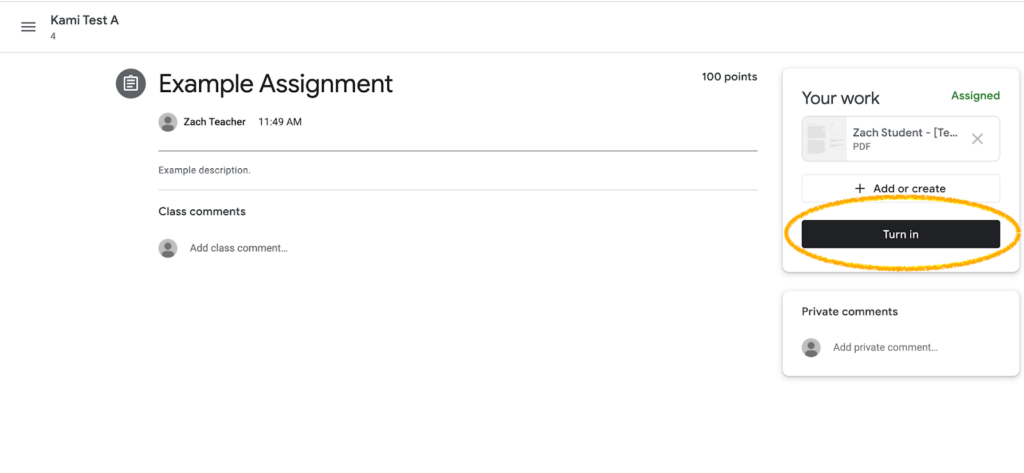
Step 4: In the classroom, the student can submit the work by clicking the “Turn in” button.
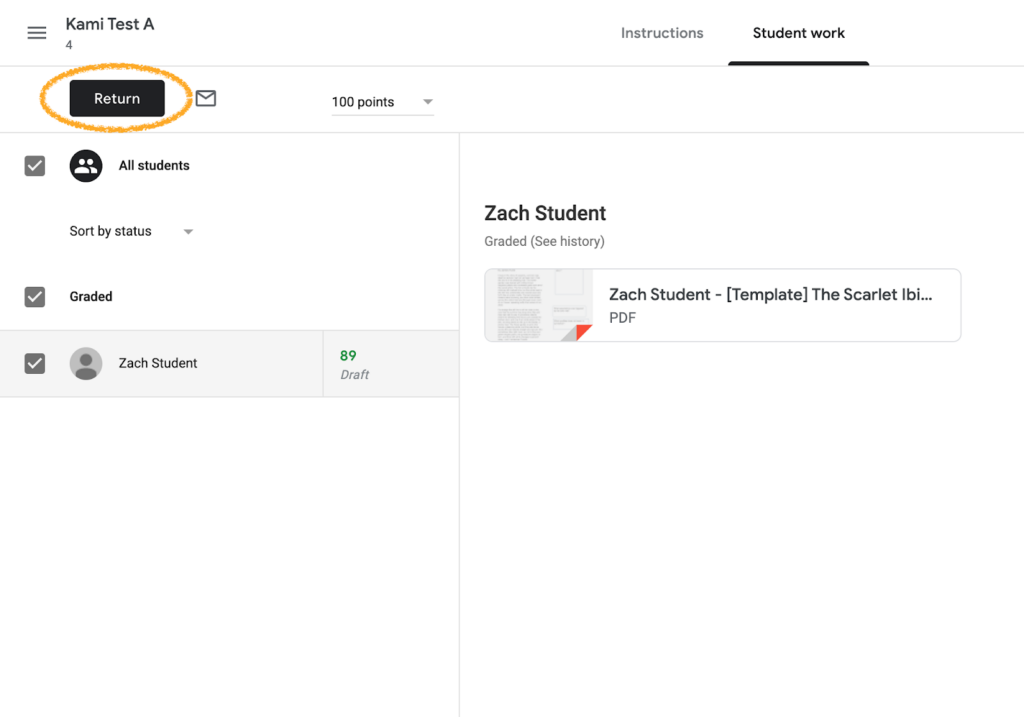
Optional: You can return your students’ work from within Classroom if you have corrections for them. After that, the students can access the file again and make any necessary adjustments before resubmitting.
Conclusion
Though teaching is a tough task, you have to assign several. Teachers are supported, regardless of grade or subject, and Kami personalizes learning. Though teaching is difficult, you have to assign multiple assignments to students while having many mandatory responsibilities. Kami’s cutting-edge features assist you in achieving your responsibilities while also helping you save time. Furthermore, regardless of grade level or subject, teachers are provided with assistance, and Kami personalizes learning. We hope our post will help you make a copy in Kami.
FAQ’s
Q1. Can we make an extra copy of the Kami document?
If you are a viewer, simply attempt to annotate, and you will see a button that reads “create copy,” otherwise, click “create your copy” from the “save” option.
Q2. How does a student make a copy in Kami?
To submit your Kami assignment-
When you’re finished, go to the menu bar and click the Share Document icon: Set permission to My Domain or Anyone with the link in the Sharing Permissions section. Choose Make an individual copy. Copy and paste the Kami link into an email to your instructor.
Q3. How can teachers make use of the Kami app?
To access Kami, use your browser’s extension or go directly to Kami. App. Sign up or log in with your school’s email address, either Google or Microsoft. Follow the steps to establish a profile, and pick Teacher as your role when signing up.


![How to Screen Record with Audio [Step by Step]](https://www.hollyland.com/wp-content/uploads/2024/05/how-to-screen-record-with-audio-step-by-step.jpg)
![How to Record Audio on PC [Step by Step]](https://www.hollyland.com/wp-content/uploads/2024/05/how-to-record-audio-on-pc-step-by-step.jpg)
![How to Add Audio to PowerPoint [Step by Step]](https://www.hollyland.com/wp-content/uploads/2024/05/how-to-add-audio-to-powerpoint-step-by-step.jpg)