How to Shoot a Cinematic Video: Camera Settings Checklist

Have you been struggling to find the right settings on your camera for your filming project?
Or perhaps you’ve only realised the importance of settings during the editing process, wondering where you went wrong?
Or maybe your battery died just at the crucial moment and you missed that exquisite footage?
I wouldn't be able to count all the times that these things happened when I started out. Using the right settings and being prepared to adapt your camera to suit the situation is one of the most important skills to be able to master when making a documentary.
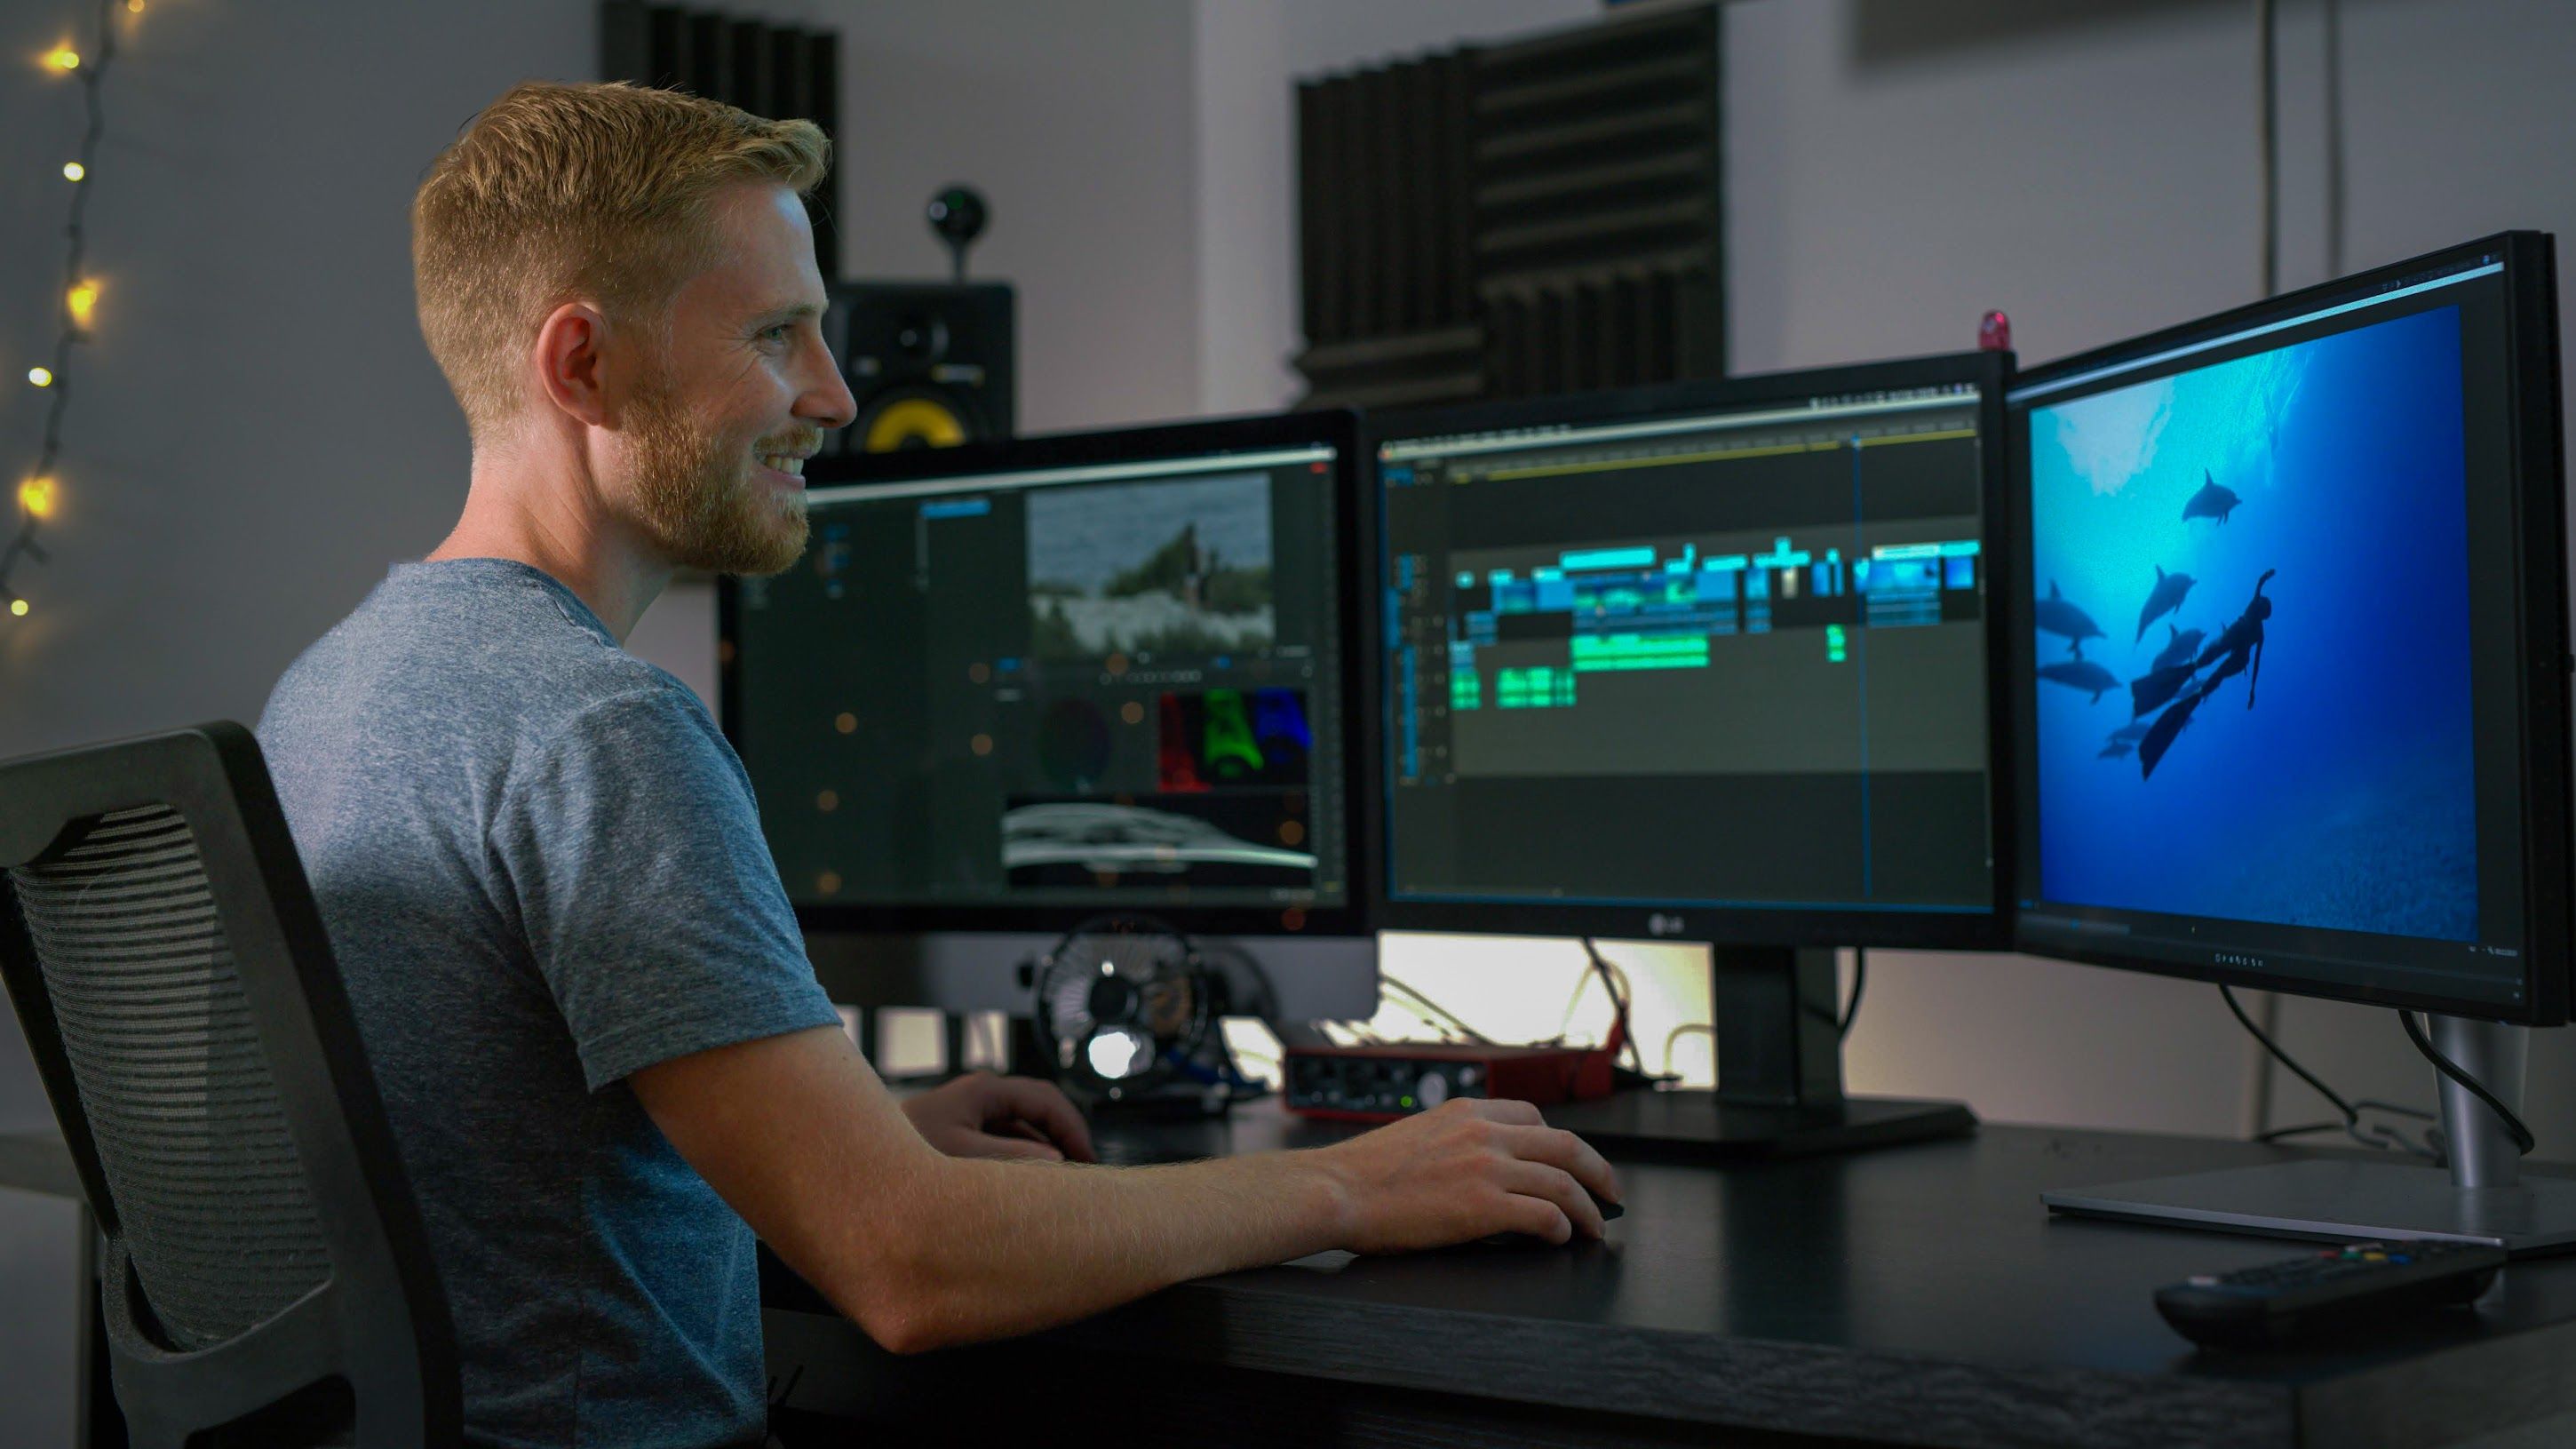
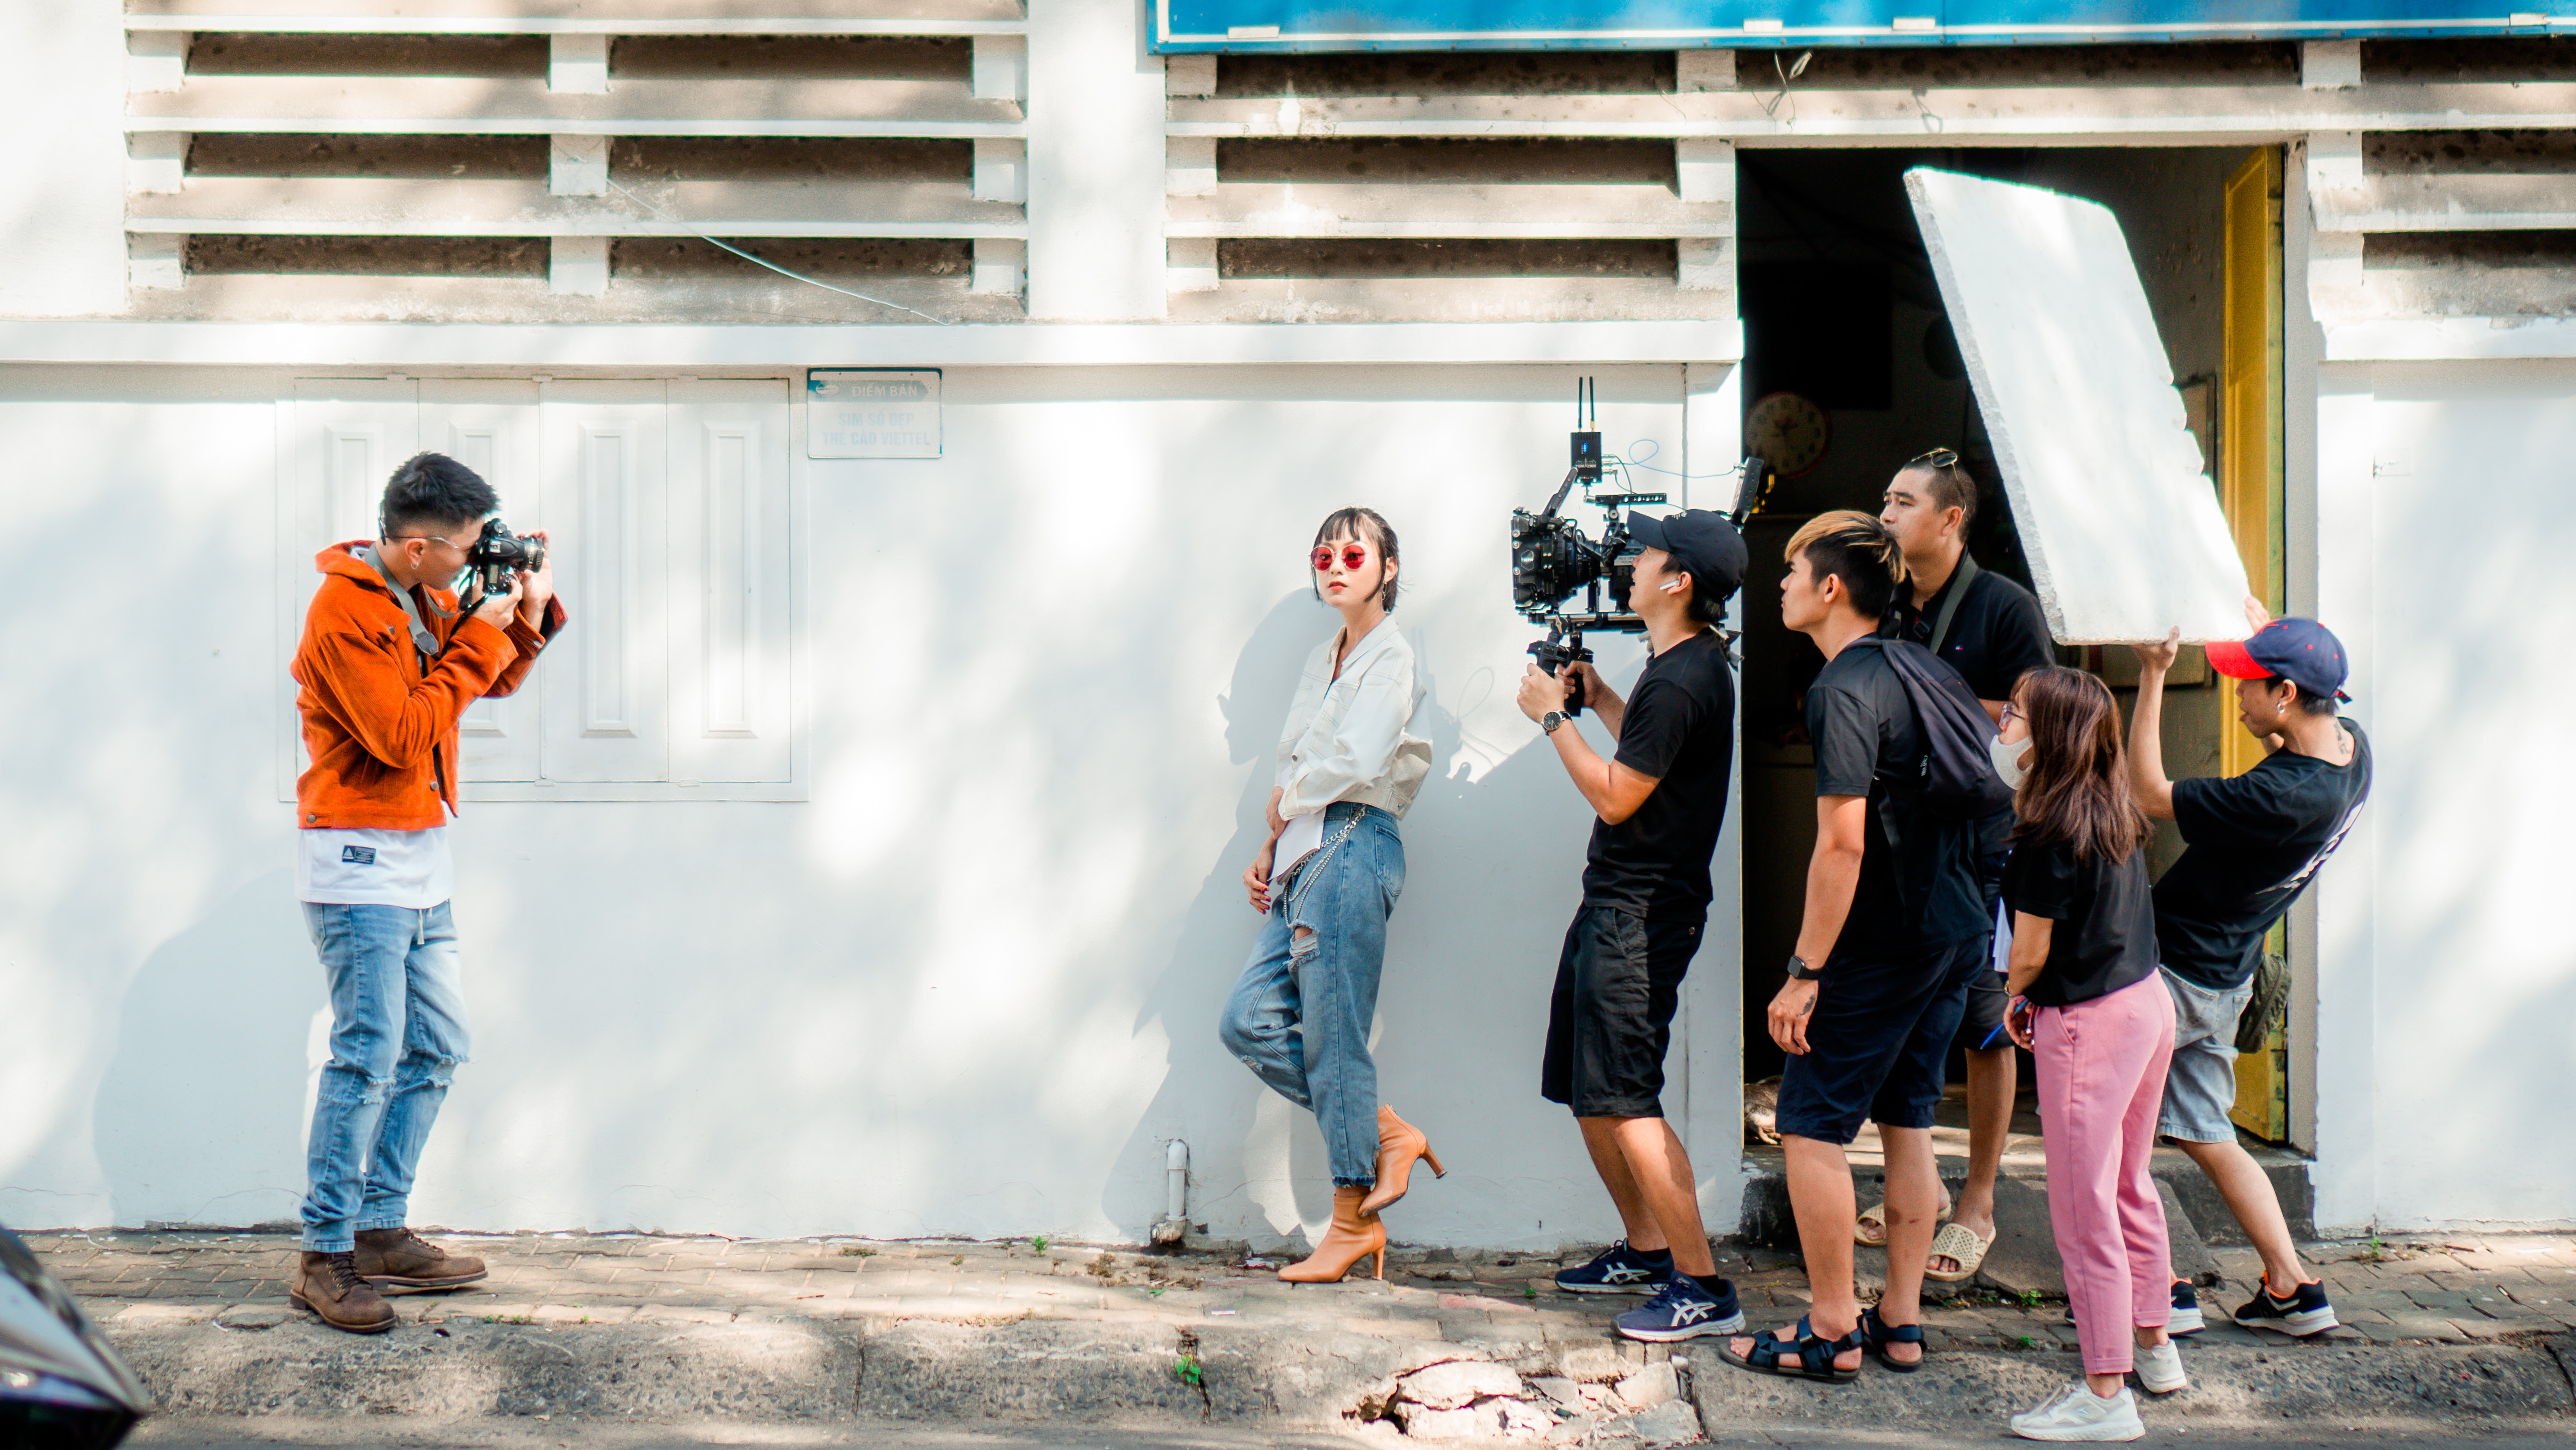
I know how overwhelming it can be, so I’m going to talk you through some key things to check before starting your shoot so you can get that gorgeous cinematic look.
Master Cinematic Camera Settings
1. Cinematic Camera Settings Checklist: Batteries and SD Card
Ok, so this one might seem really obvious - but you can't imagine how many times I have heard stories from friends and colleagues about running out of battery, or leaving their SD card in their laptop, just when it really mattered. Don’t tell me you haven't done it too! There’s no point knowing anything about camera settings if you don't have any power or storage. So, make sure yours is packed and always bring spares.

2. Cinematic Camera Settings Checklist: Camera resolution
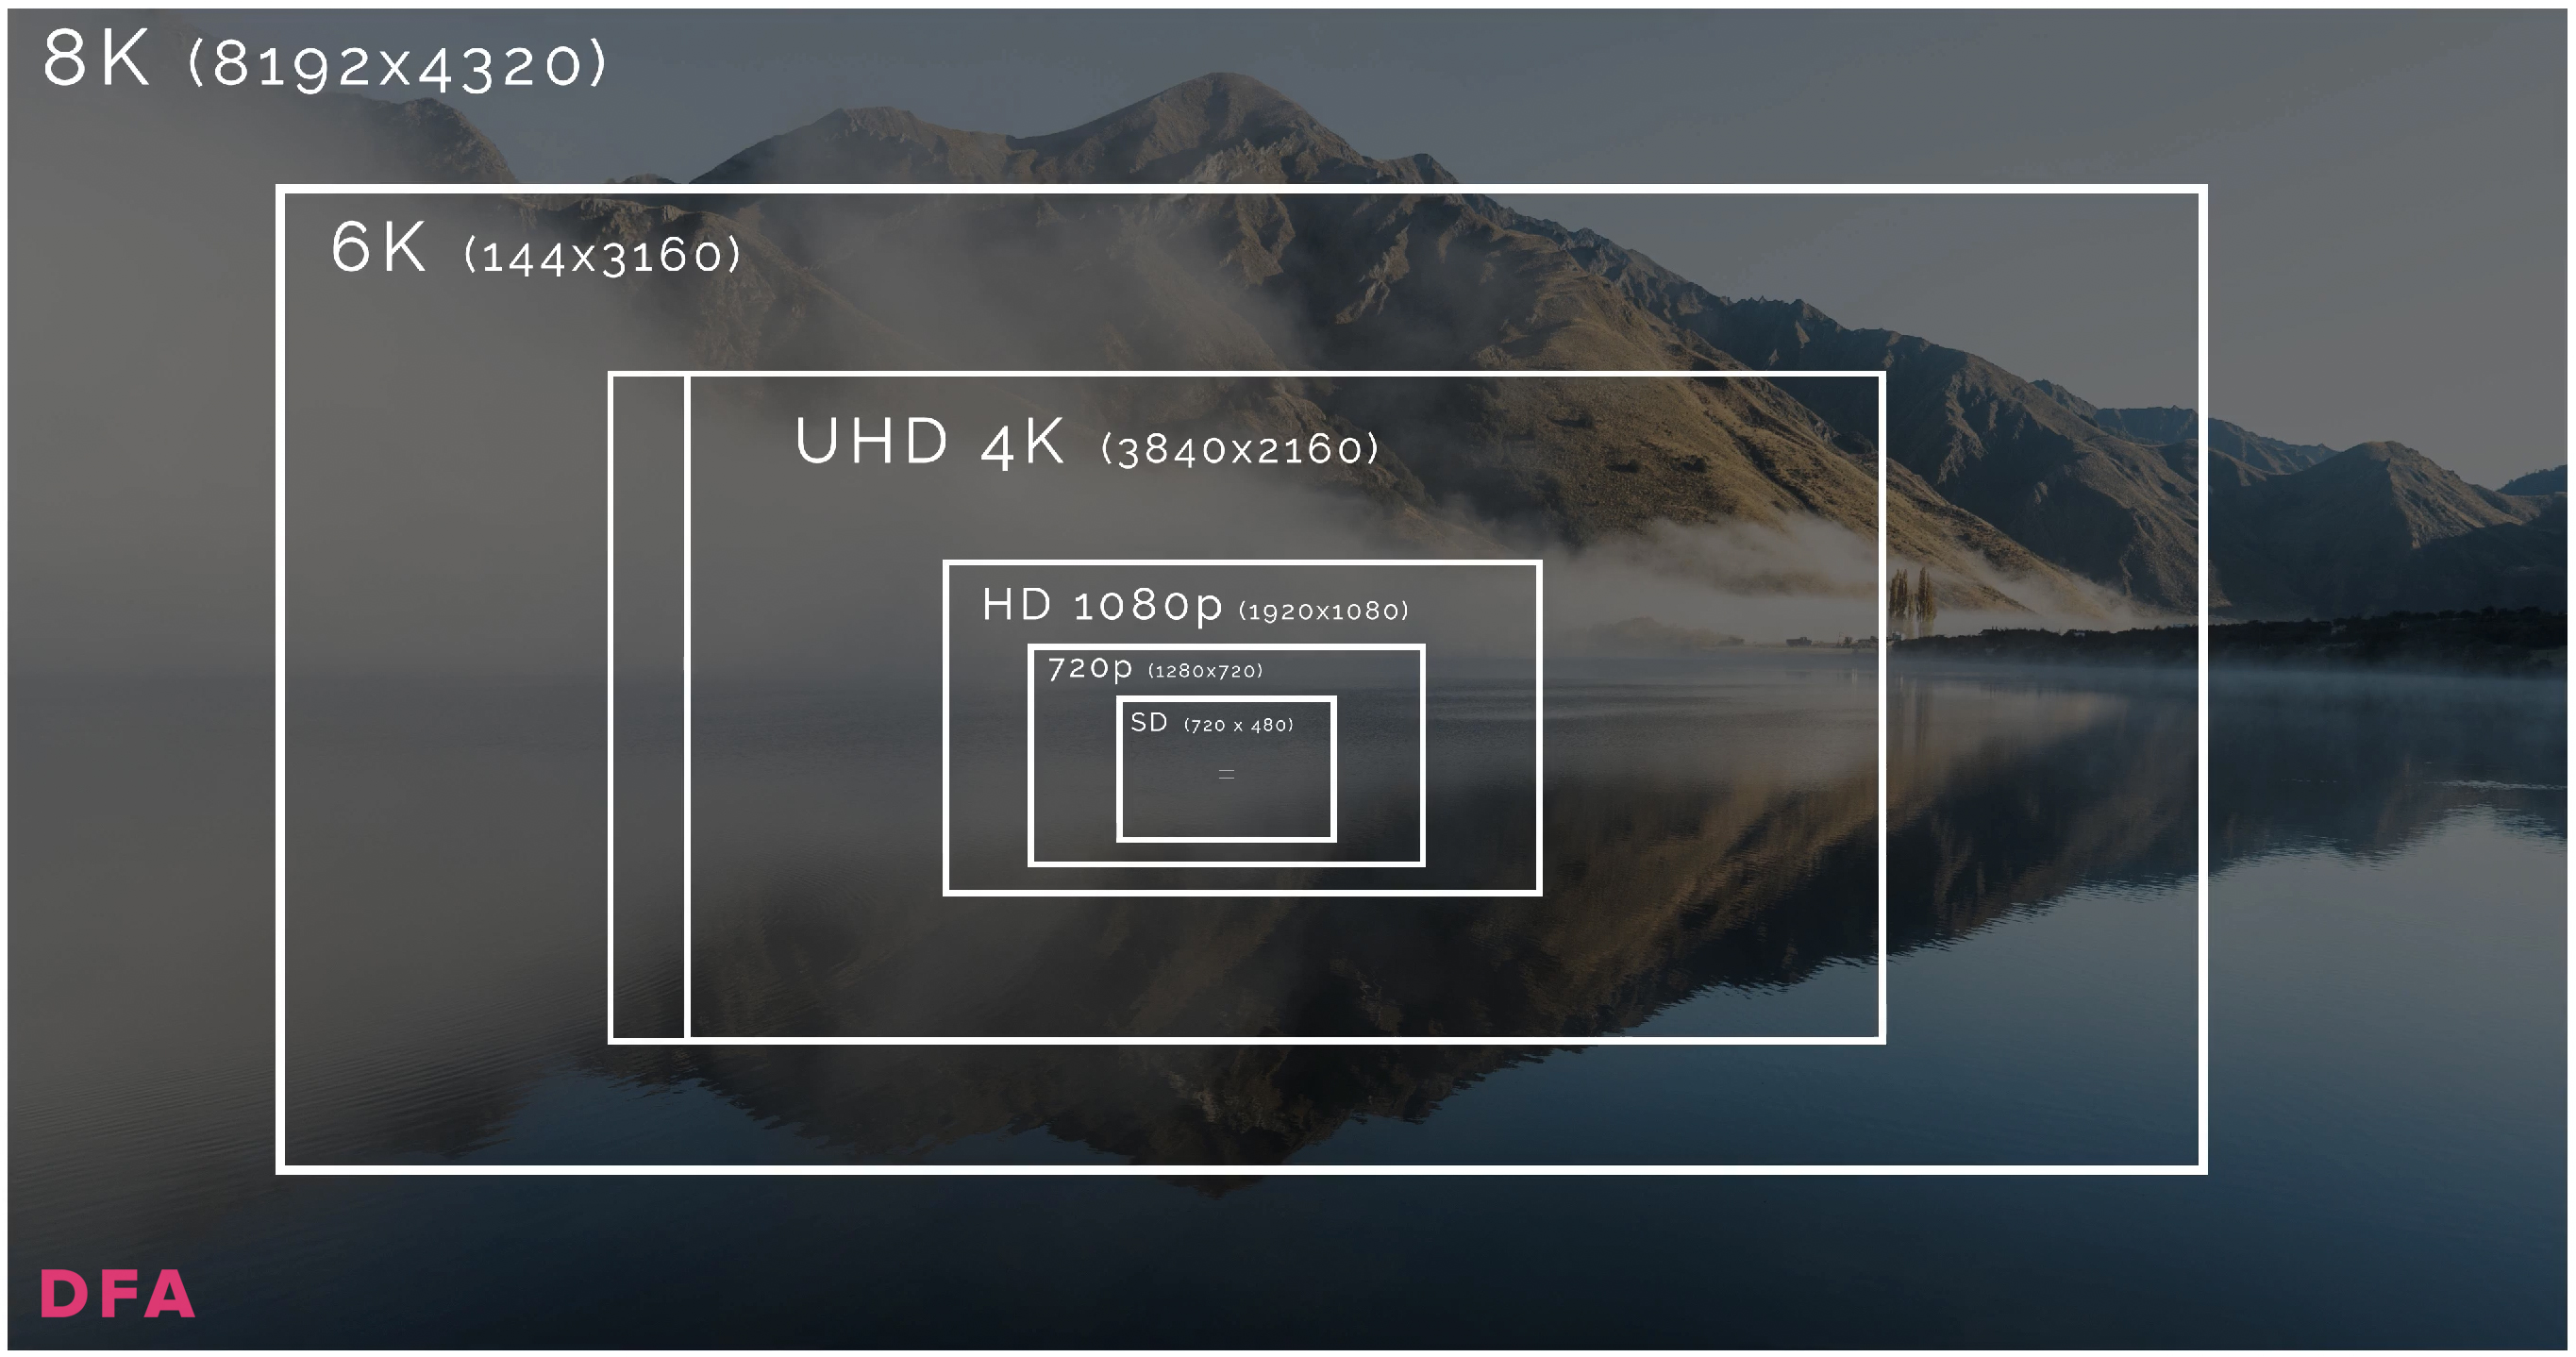
Keeping up to date with the standard camera resolution is a must for ambitious documentary makers. The higher the resolution of the image, the more pixels there are and the more detail there is. Often cameras have several options, allowing you to shoot in settings such as HD, 4K or 8K.
HD has been the standard resolution for some time, but it's good to be aware that 4K is becoming increasingly more popular because it offers a better quality image. 8K is even better because it allows you to zoom into footage and reframe shots.
I would highly recommend shooting in 4K if you can, although not all cameras have these settings and it can be slower to edit. If you don't have that option, then it’s still possible to create a cinematic experience using HD.
3. Cinematic Camera Settings Checklist: Frame Rate
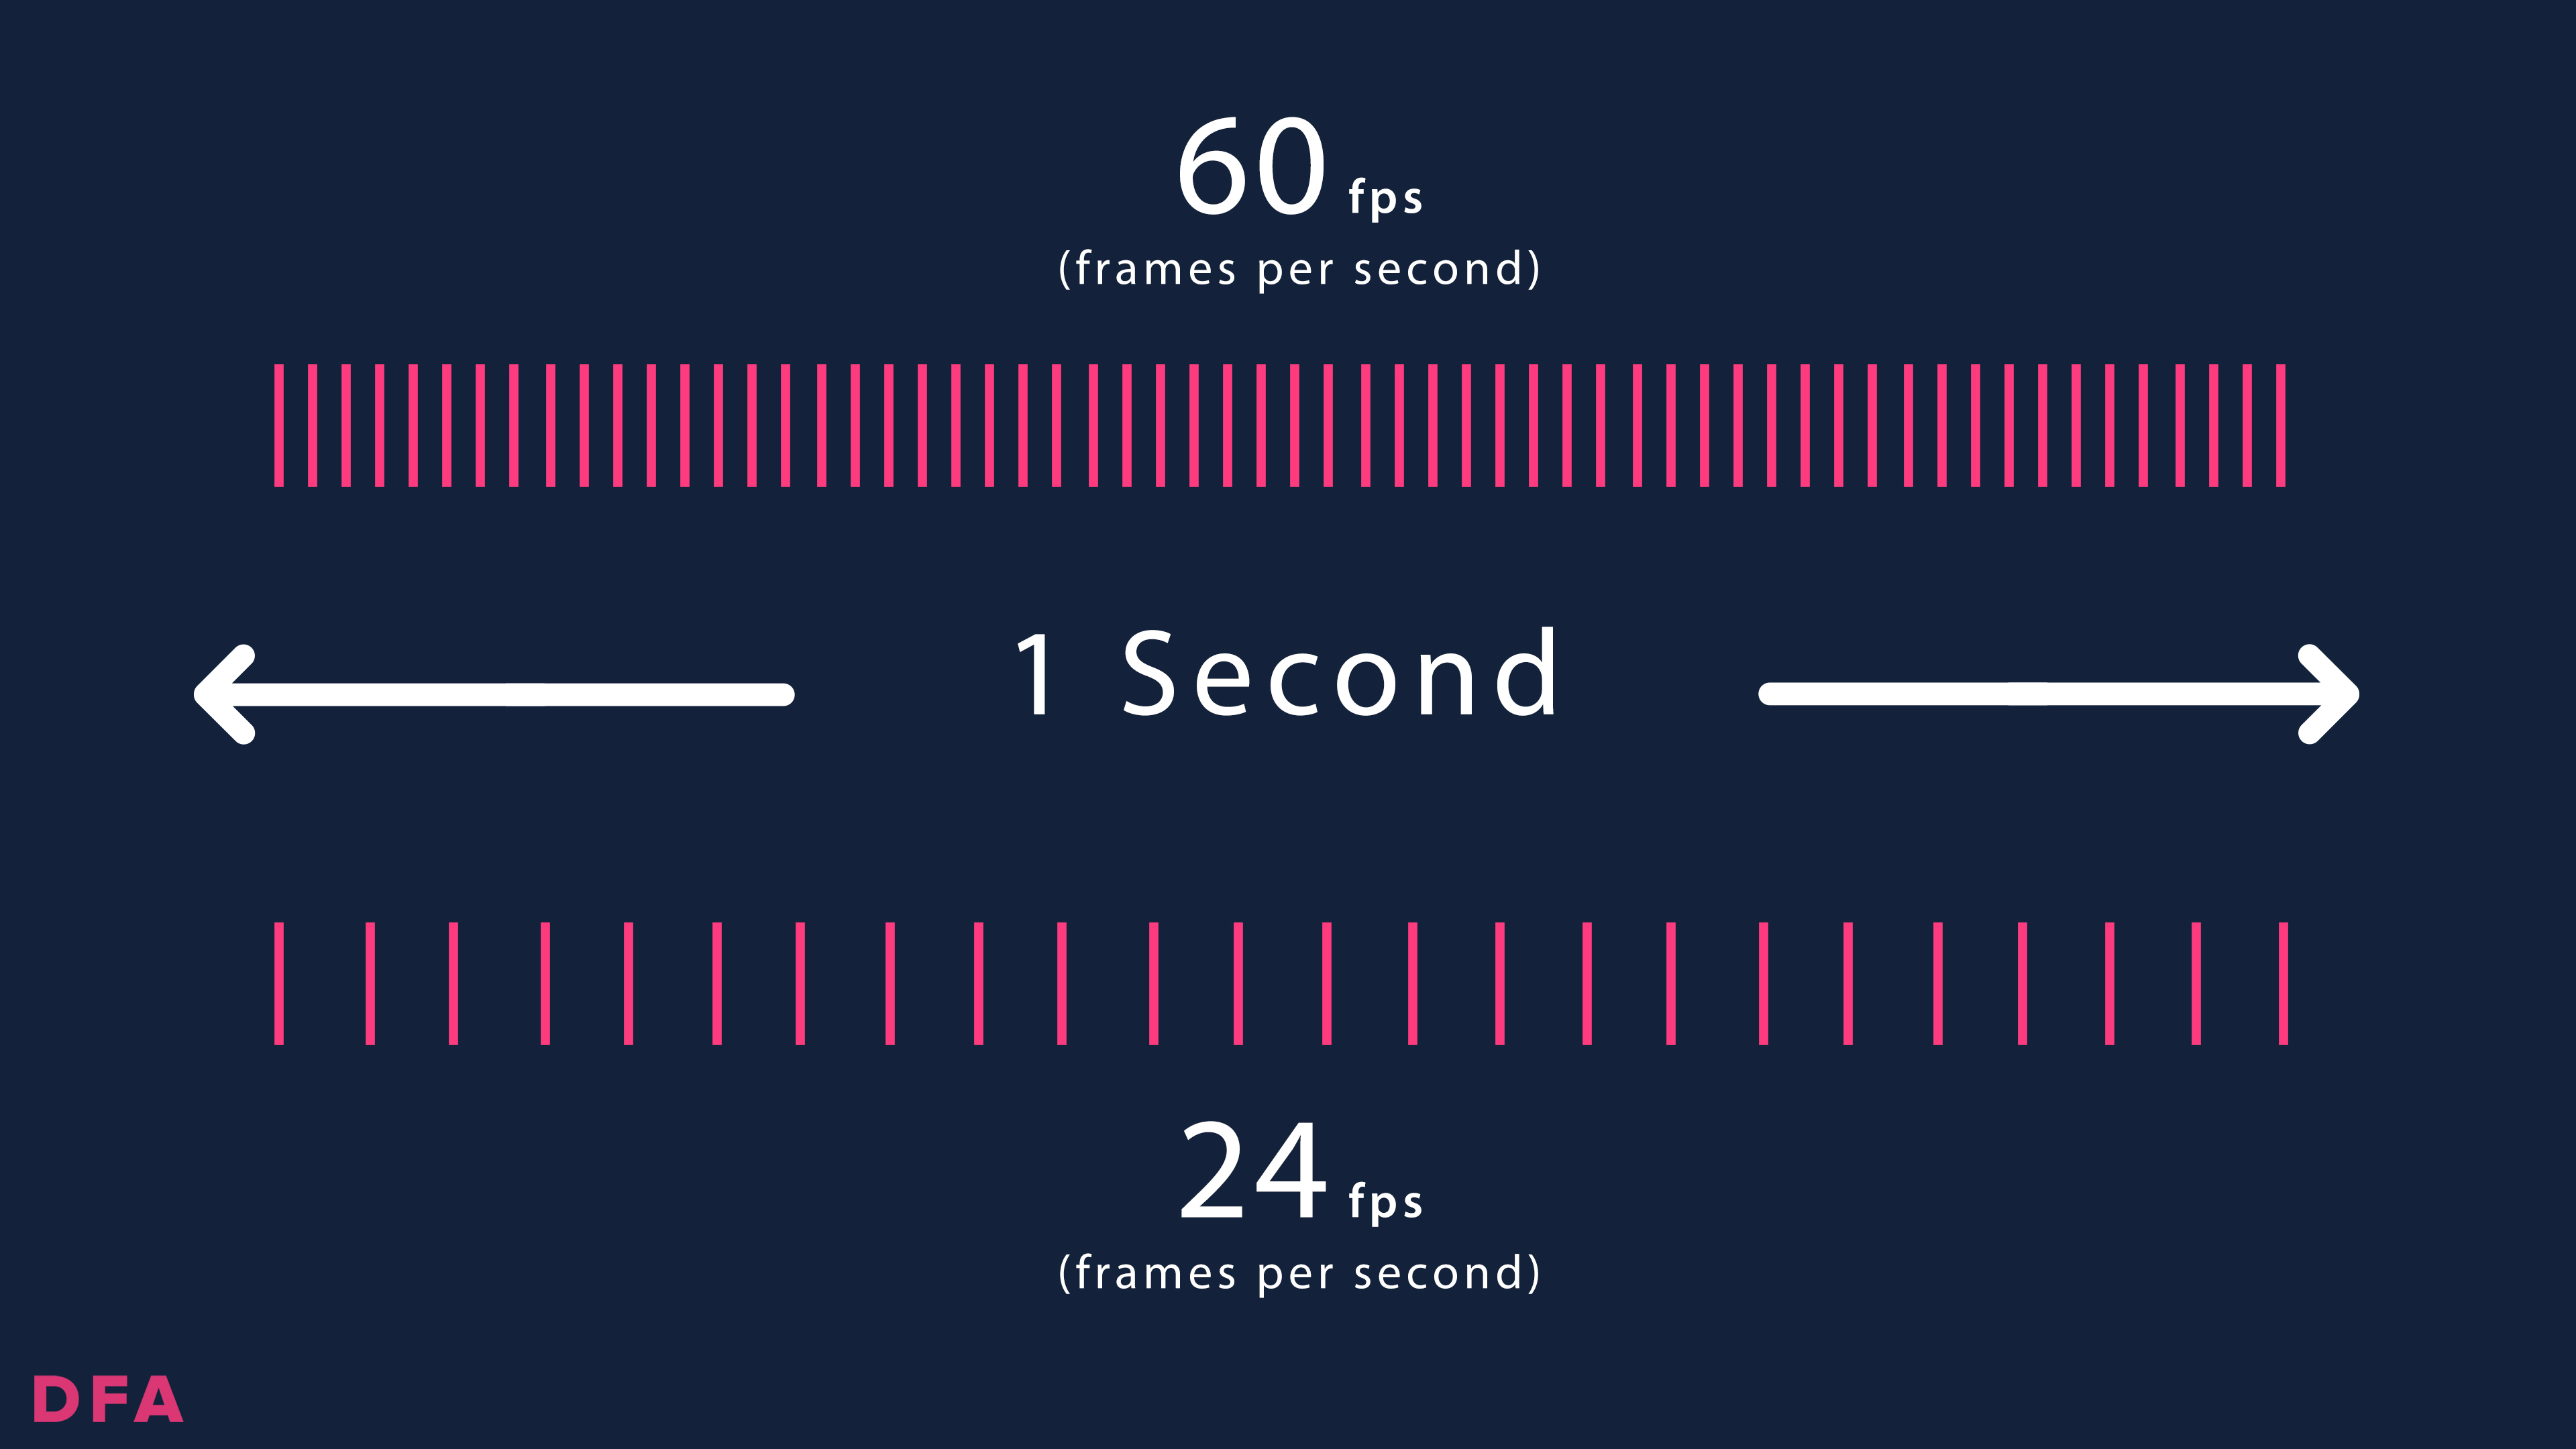
Frame rate which is also known as frames per second is the number of still frames (or images) that your camera captures per second. Watching these images in quick succession is what gives the illusion of motion, just like a flip book. The frame rate has a big impact on the final look of the film, so choosing a suitable frame rate is really important. It often means deciding on how realistic, cinematic or stylistic you want your footage to look.
What's The Best Frame Rate To Use?
Personally, if I'm filming something in real-time, I like to shoot it at 24 or 25 frames per second, as this creates a visually pleasing motion-blur effect.
But, if you’re creating content for news channels, YouTube, or sporting events you’ll probably want at a higher frame rate, such as 30fps, for the footage to look crisper and smoother.
So, it’s good to decide in advance how you want the footage to look and set your frame rate accordingly. For example, if you want you're wanting to film a timelapse sequence, you can film at 1fps or if you want to capture high-speed action in slow motion, you can film at 60 or 120fps.
4. Cinematic Camera Settings Checklist: Aspect Ratio
Yes, it is starting to sound a bit like a maths class! But don't worry, you don't have to be a mathematician to understand aspect ratio - it's simply the relationship between the width and height of your video. Depending on what your intended output is, whether it’s for cinemas, TV or social media, you can set the aspect ratio you want at the outset, to prevent having to resize your video in post-production. This saves loads of time, and means your video is the best possible quality for its size.
The three most common aspect ratios for documentaries are: 4:3, 16:9 and 1:85. The 1.85 aspect, for example, usually gives the most cinematic feeling, although 16:9 is the video standard. It’s helpful to know a bit about this before shooting your film, so that you can choose the perfect one.
I’ve actually created video editing templates for each of these aspect ratios which you can access in the full Documentary Film Academy course and use for your documentary. I also run through modern video aspect ratios, used on social media such as instagram TV and Facebook and how to optimise your videos for these different platforms. So, if you find getting your head around the numbers all a bit too much, I’m here to help.

5. Cinematic Camera Settings Checklist: White Balance
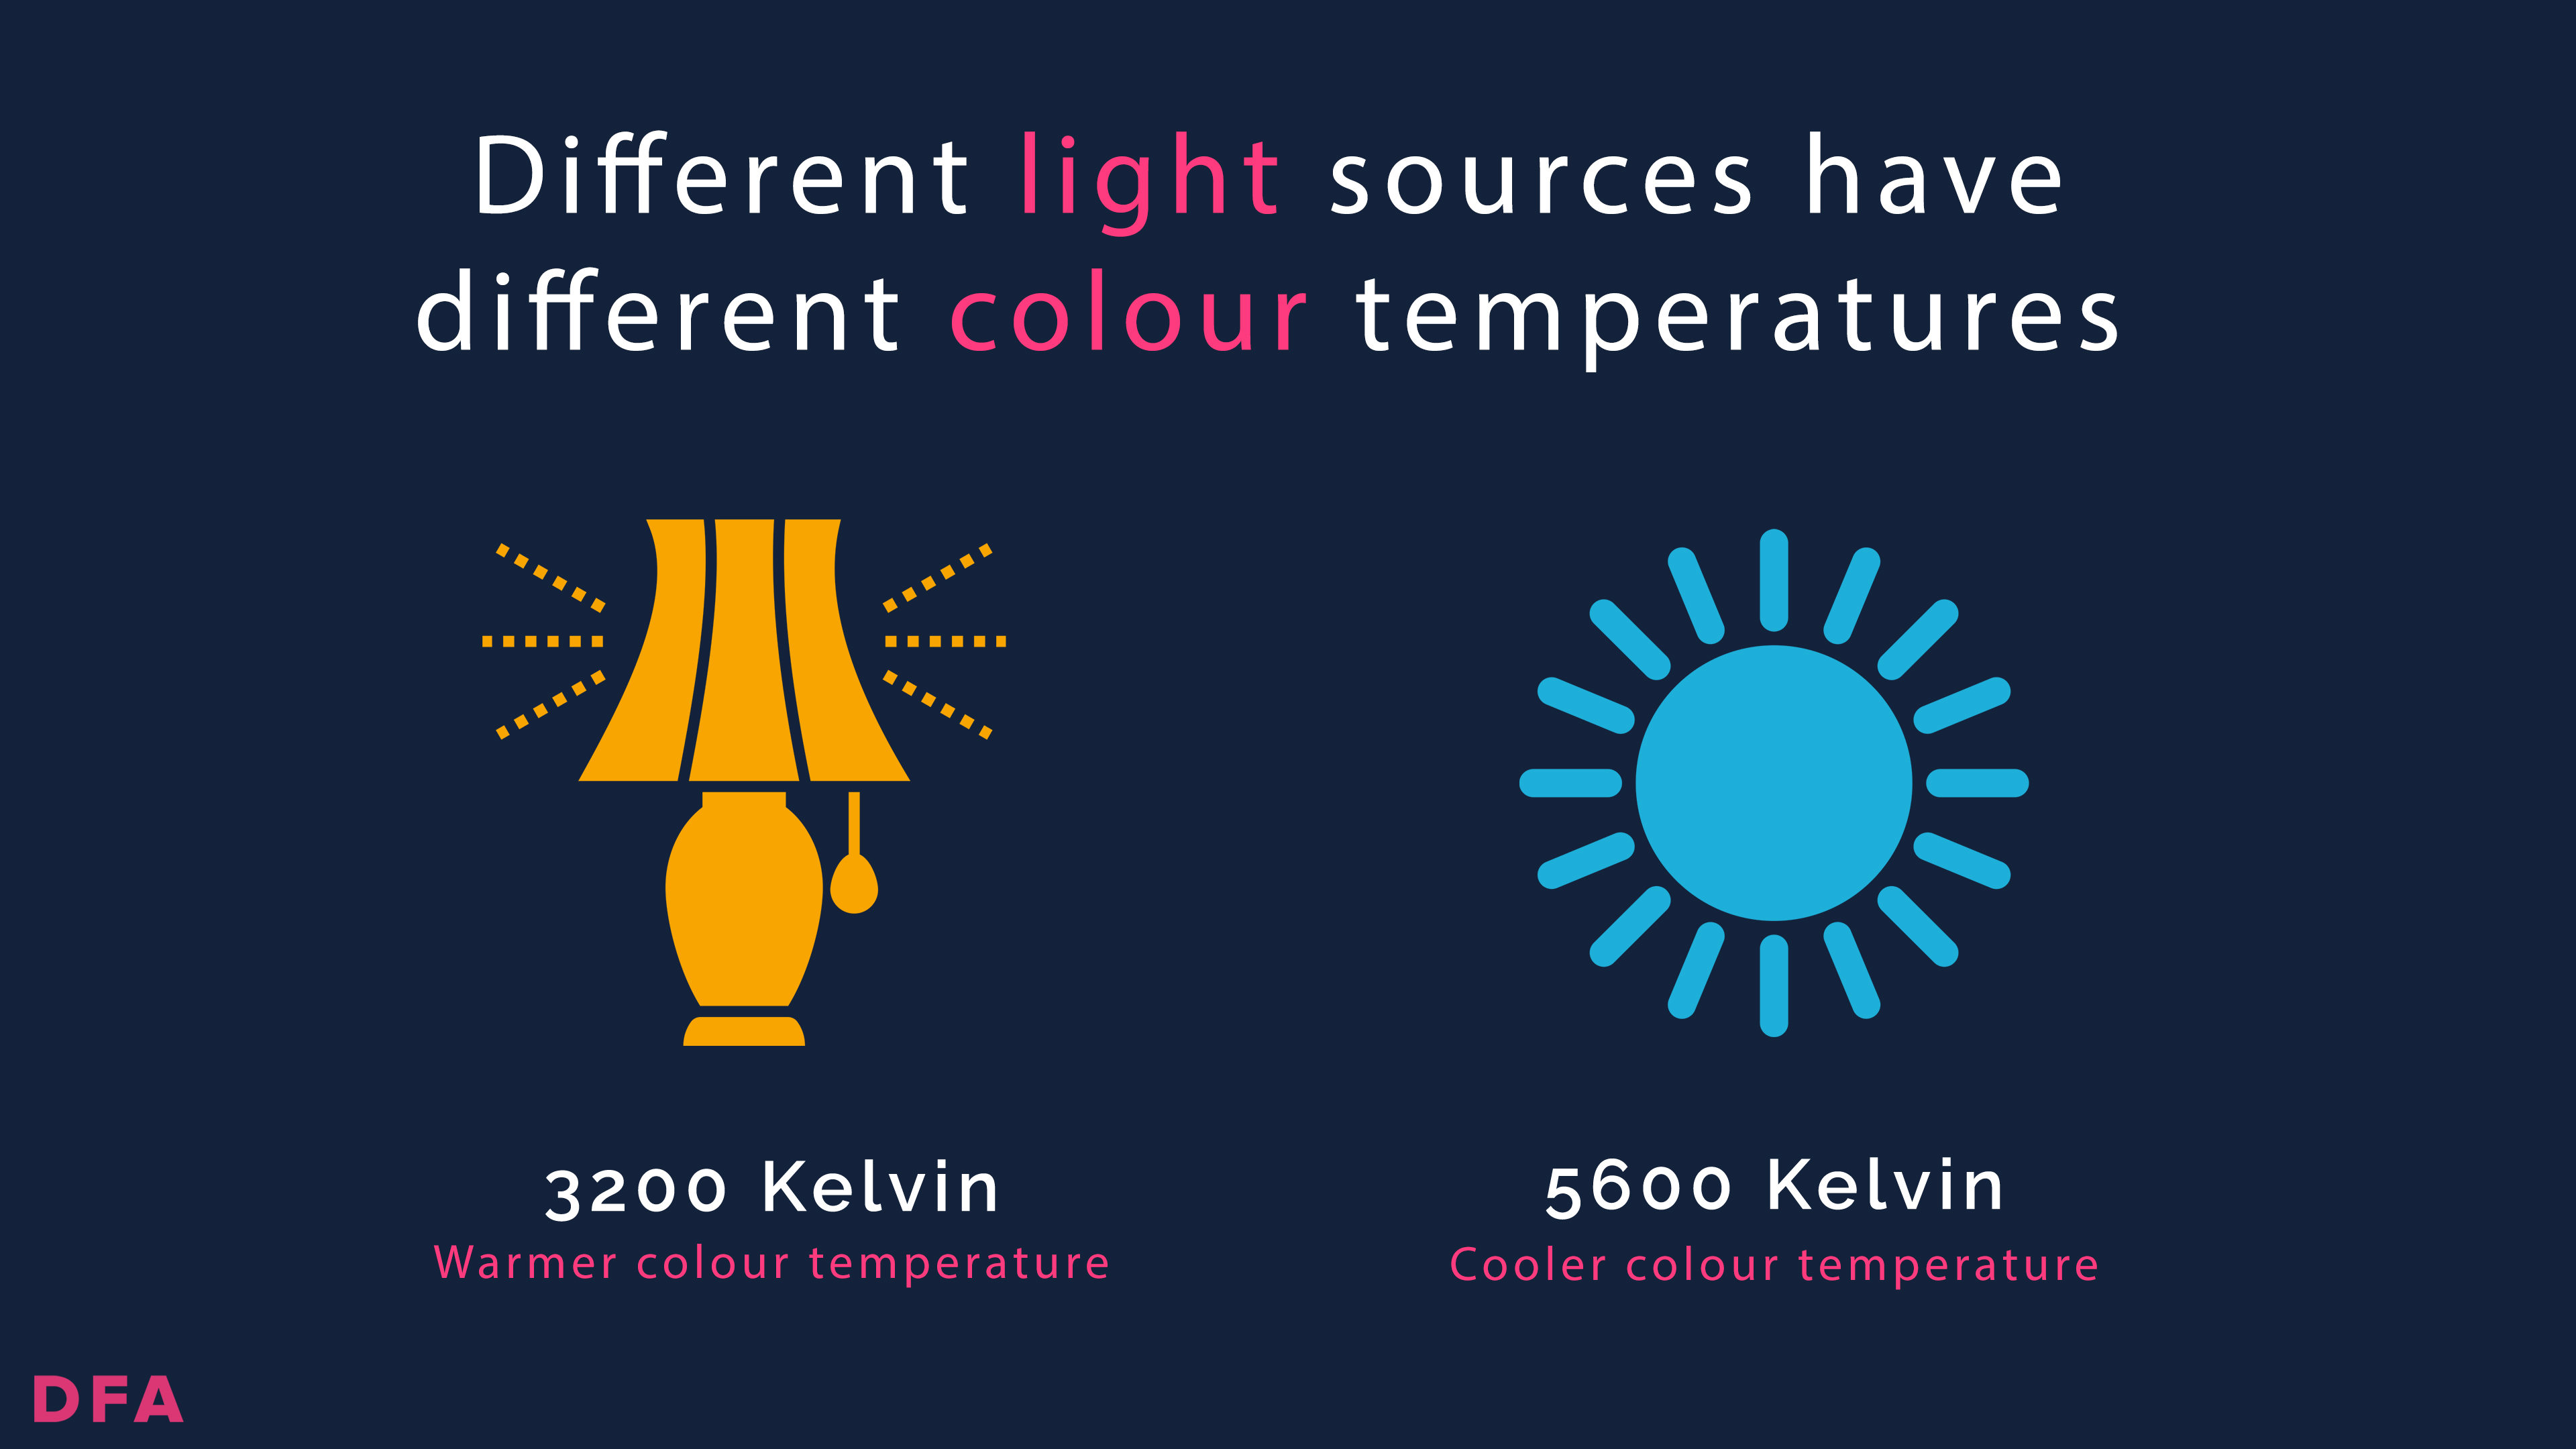
Have you ever watched back footage and been confused by the blue light that wasn't there in real life? This is because different light sources all produce different colour hues, but, the good news is - your camera can be adjusted to deal with that (don’t worry, no more physics today!).
The white balance setting allows you to adjust your camera so that the white you see with your camera is the same as what you see in real life. Again, adjusting your white balance while filming can reduce your post-production editing, and create a smooth, cinematic experience for the audience. This also gives you a neutral starting point, so if you’re wanting to give your image a certain colour style or look, then it's much easier in post-production.
You can either set white balance manually, or select the presents in your camera menu to save you time. In the full course, I discuss different scenarios and the white balances that I use.
6. Cinematic Camera Settings Checklist: Exposure
Well, I’m sure everyone’s heard of exposure! But just in case you don’t know what this refers to - exposure is the amount of light that reaches your camera sensor. When making a cinematic documentary, you want your footage to be correctly exposed so you can see all the detail in the highlights and shadows. There’s a fine line between too dark and too light.
How To Set The Correct Camera Exposure
A question I’m often asked is how you set the correct exposure when you can’t adjust the strength of your light source (this is mostly the case when shooting documentaries).
Here are four main techniques which you can use to change the camera exposure:
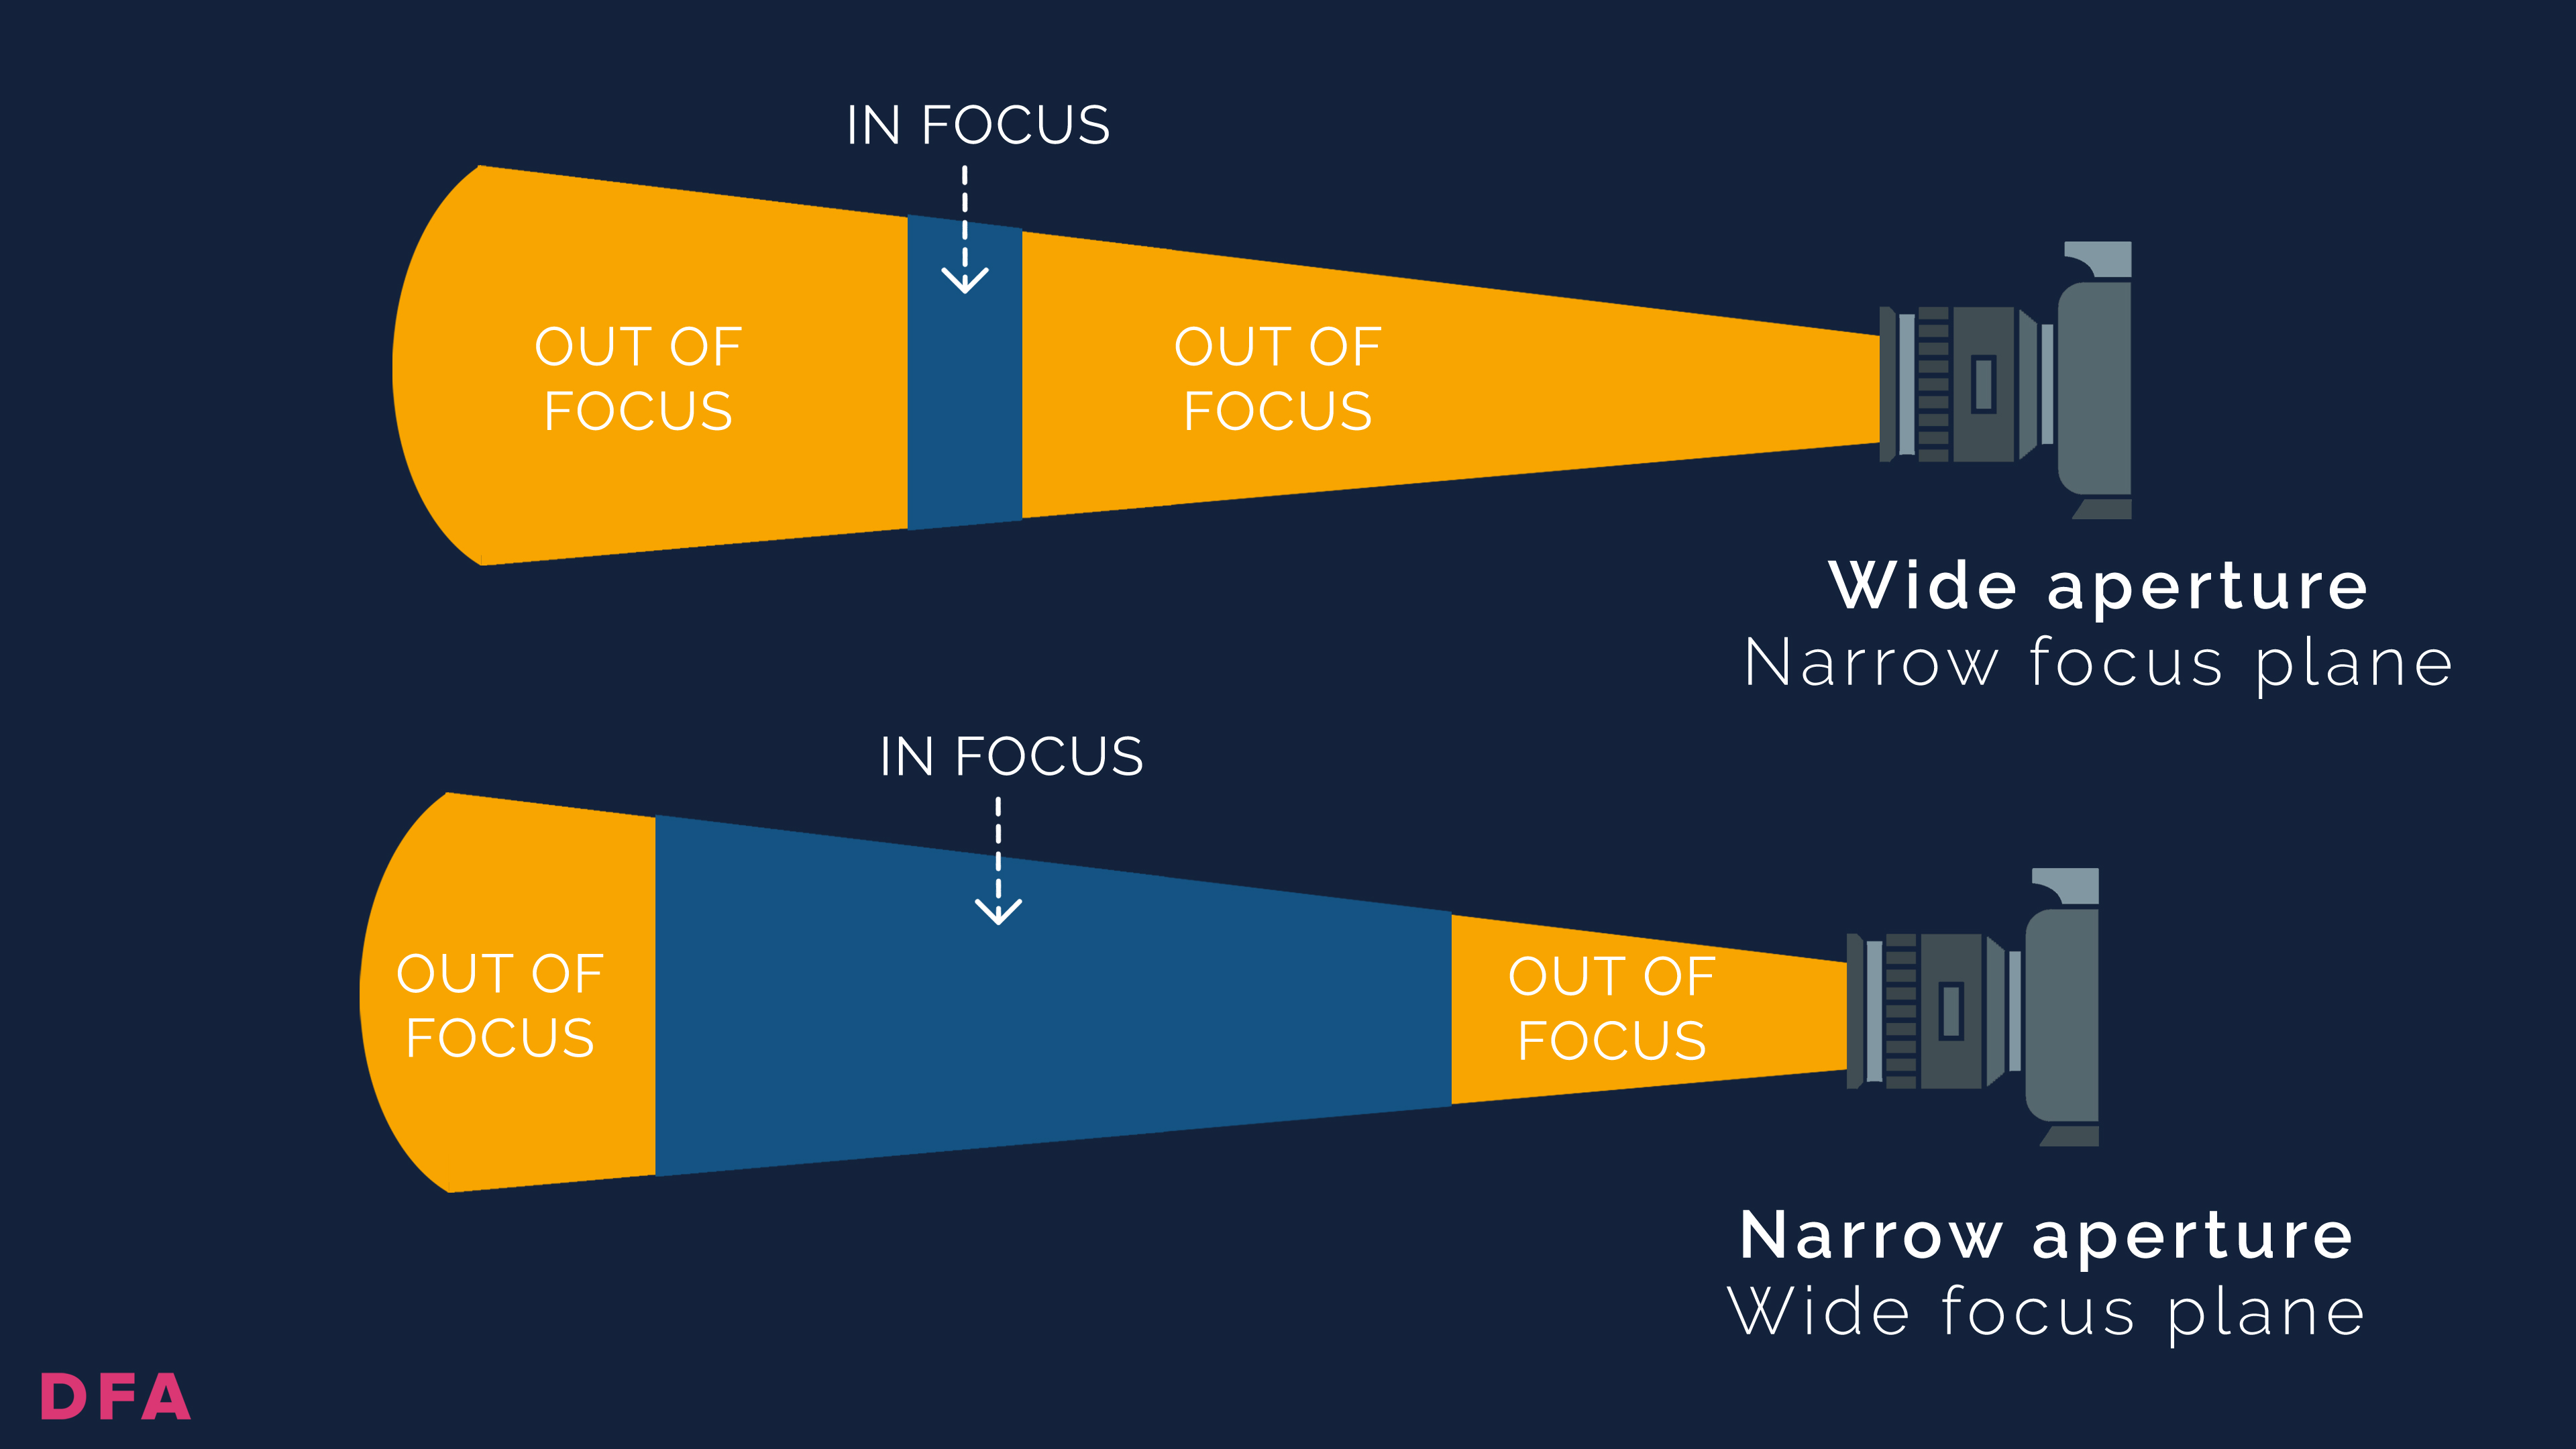
1. Aperture allows you to control what of the scene is in focus, and what is blurred, through changing the amount of light let through the lens. This impacts the depth of field that your camera can capture. For instance, a shallow depth of field can be good when doing portraits, where landscapes are better captured with a wider depth of field.
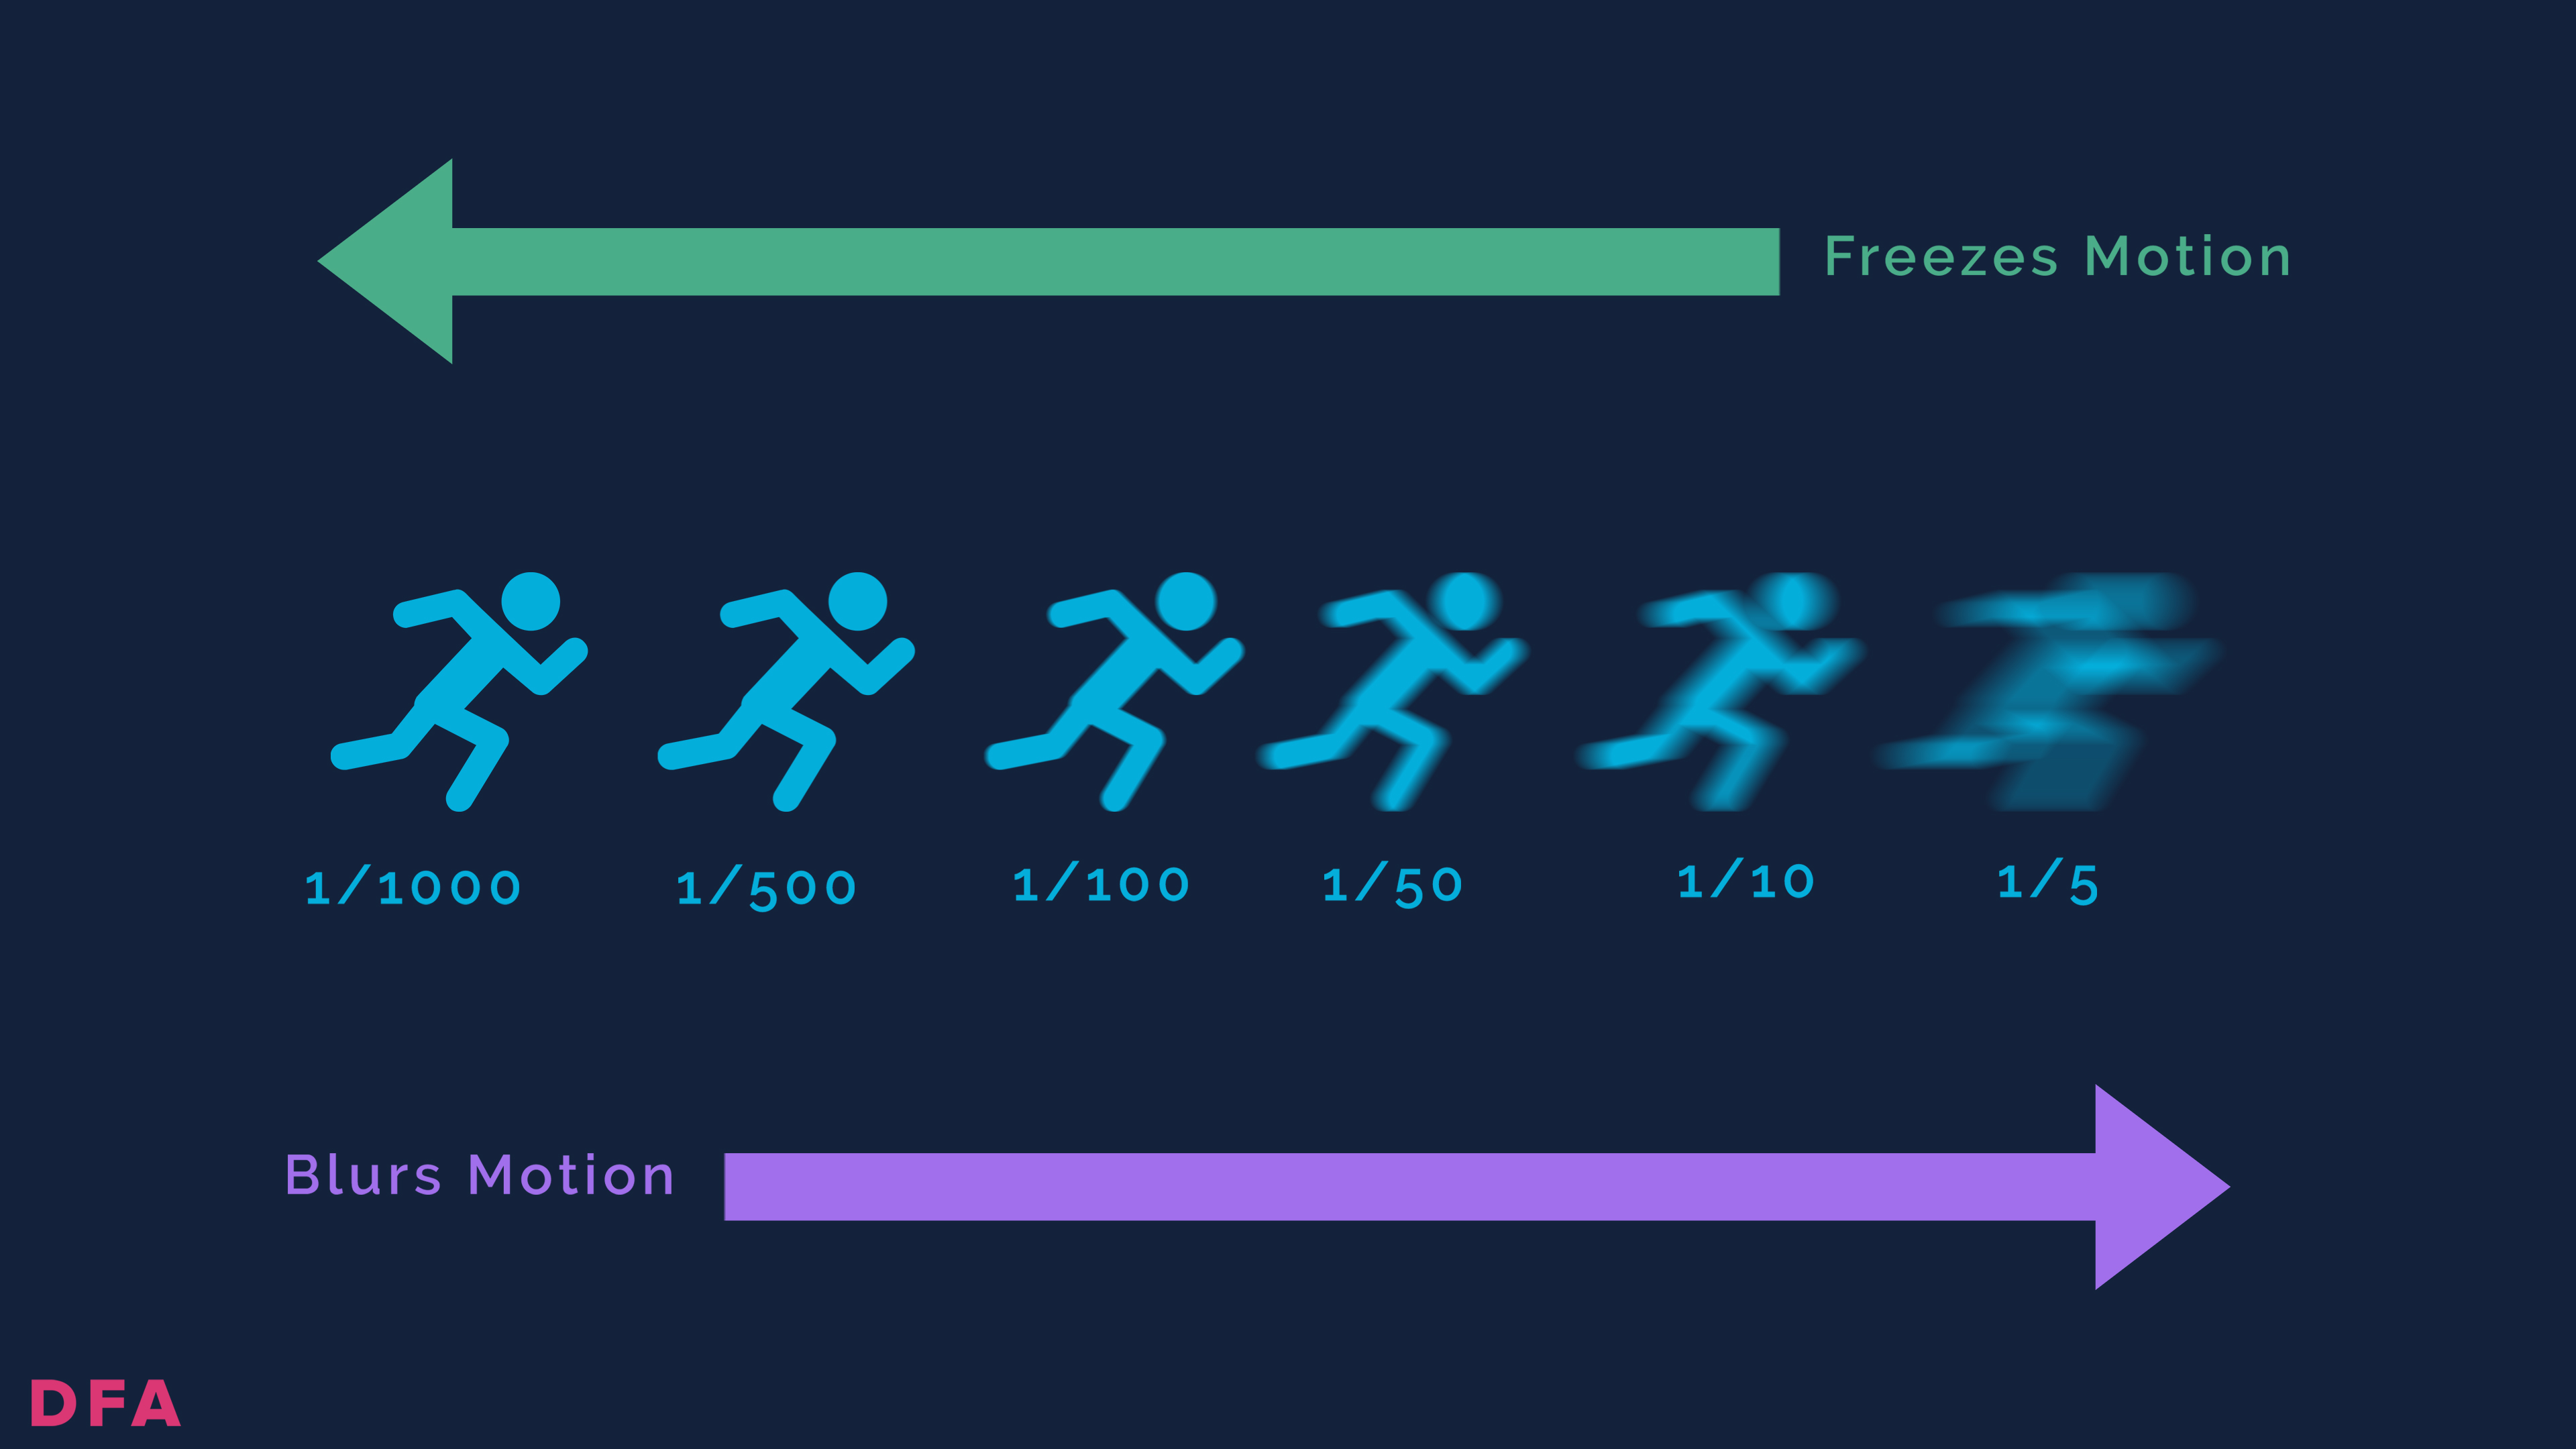
2. You can also change the shutter speed to control the length of time the camera sensor is exposed to light. This affects how much motion blur is in each frame of your video. You can adjust this based on the kind of film you want to create. For example, a cinematic documentary will require a shutter speed which is double your frame rate.
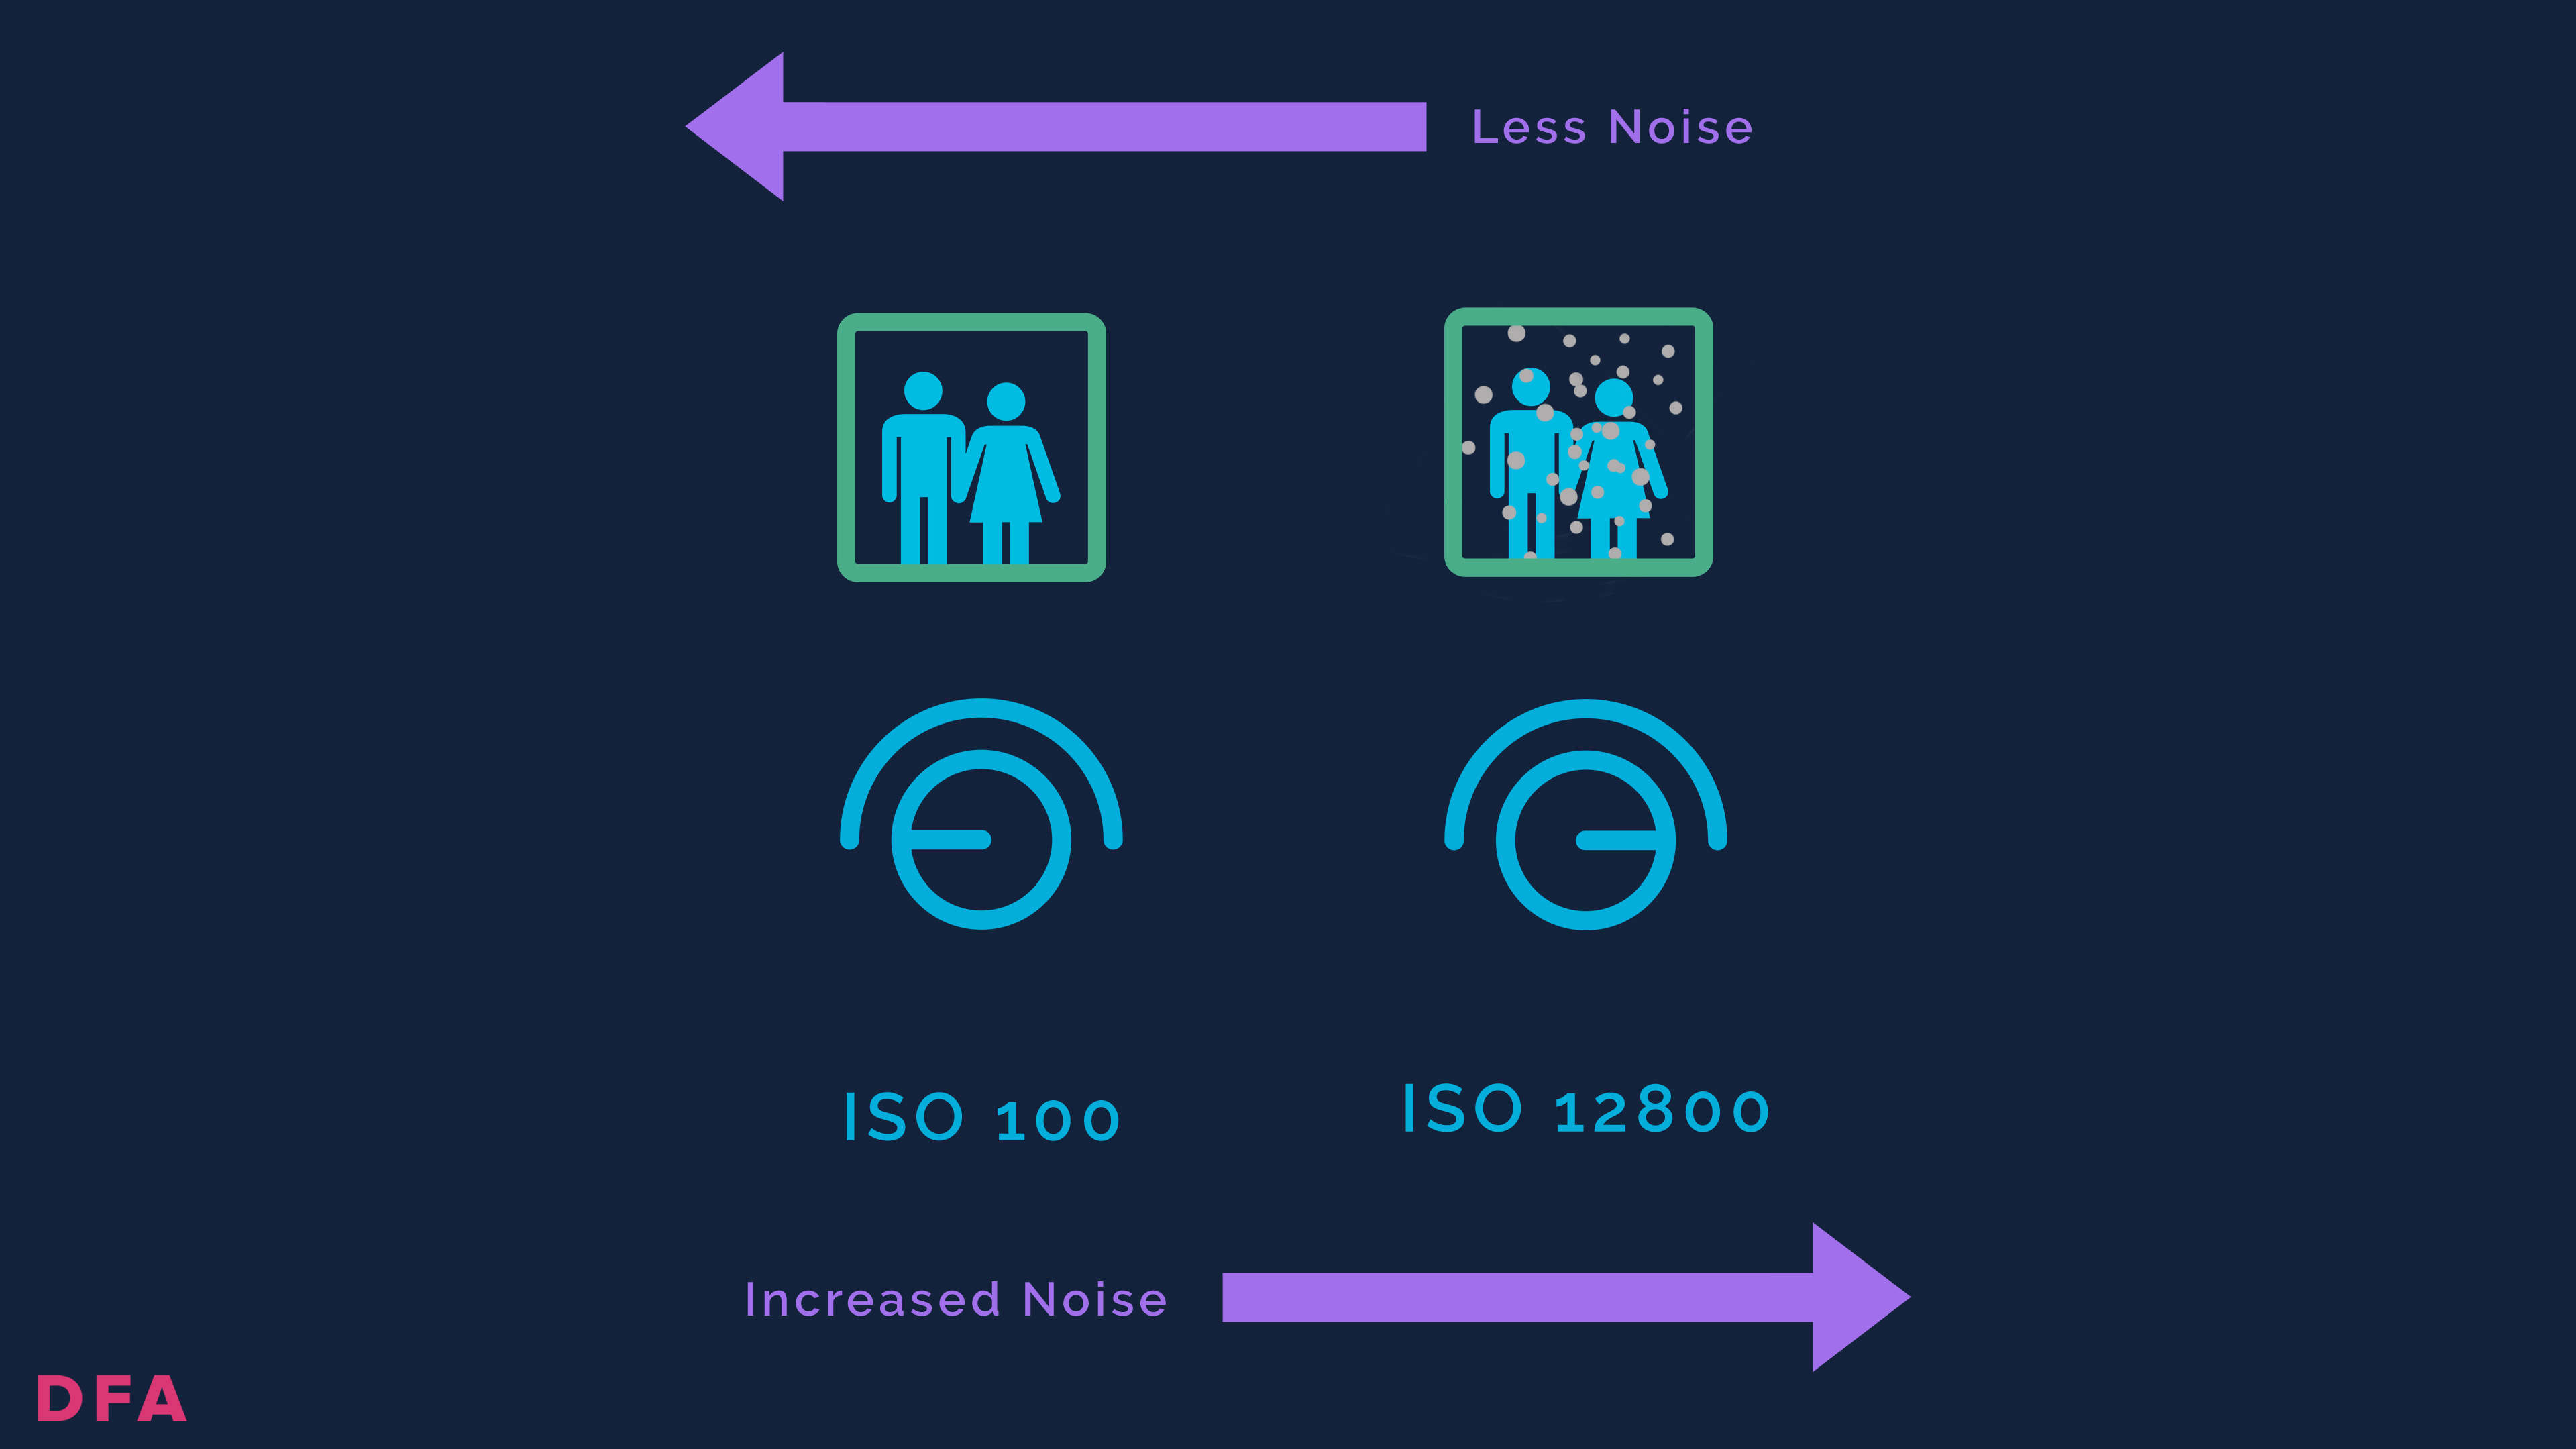
3. You can also play with the ISO settings to make your camera more and less sensitive to the available light. The lower your ISO number, the less sensitive it is. Be careful not to make it too high, as the shot will become grainy and visually noisy.
4. Lastly, you can use an ND filter, a piece of lens-shaped glass, to reduce the amount of light entering your lens.

Experiment With Your Camera Settings
As you can see, there are many ways to play around with exposure, and it is a good idea to experiment with this before shooting your documentary, so you feel comfortable using your camera in different conditions and producing different results.
I always enjoy going out with my camera to capture footage in a range of lights and weather conditions, adjusting the settings for a contrasting look. I’ve learned so much by experimenting with my camera settings when I'm not working on a professional shoot.
Camera Settings Checklist
Here's a free downloadable checklist that you can use before your shoot, so you’re as ready as you can be with your camera. The challenge then is adapting to the conditions that present themselves on the day, and that is all part of the adventure of documentary filmmaking!

How to Make Your Videos Look Cinematic
Creating videos that have a cinematic quality involves more than just having a good camera. It's about understanding and manipulating the elements of your visuals to evoke the richness, depth, and emotion of a film. Above I've talked about the camera settings you need to get cinematic shots. I thought I'd also touch on the other key tips to make your videos look more cinematic:
- Composition and Framing: The rule of thirds is your best friend when it comes to composition. Placing your subject off-center can make your shots more interesting and dynamic. Also, consider the use of leading lines and symmetry to guide the viewer's eye through the scene.
- Lighting: Lighting can dramatically change the mood of your video. Utilize natural light as much as possible, but when you need to use artificial lighting, try to mimic natural light. Soft, diffused lighting often looks more cinematic than harsh, direct light. Experiment with backlighting and side lighting to add depth and texture to your shots.
- Color Grading: Color grading is crucial in achieving a cinematic look. It not only corrects color imbalances but also helps to create a specific mood or atmosphere. Consider using LUTs (Look-Up Tables) to achieve professional color grading effects. Warm tones often convey a nostalgic feel, while cooler tones can create a more somber or tense atmosphere.
- Depth of Field: A shallow depth of field, where your subject is in focus and the background is blurred, can add a professional quality to your videos. This effect can be achieved by using a lens with a wide aperture or by positioning your subject far away from the background.
- Camera Movement: Smooth, deliberate camera movements can greatly enhance the cinematic quality of your videos. Use tools like gimbals, sliders, or drones to achieve steady shots. Incorporating movement such as dolly shots, crane shots, or even handheld shots (when done skillfully) can add dynamism and storytelling depth.
- Aspect Ratio: Most films are shot in wider aspect ratios such as 2.35:1 or 2.40:1, which can be emulated in post-production by adding black bars to the top and bottom of your footage. This wider view can make your videos feel more expansive and film-like.
- Sound Design: Often overlooked, sound design is critical in making your videos feel cinematic. High-quality sound recordings, careful selection of music, and the use of ambient sounds can significantly elevate the viewer's experience.
By focusing on these elements, you can transform your videos from looking amateur to achieving a more polished, cinematic aesthetic. Remember, filmmaking is an art, and these tips are just the beginning. Experimentation and practice will help you develop your unique style and vision.