


Dado Saw Blades - The Ultimate Guide
Dado saw blades – what are they and what are they used for?
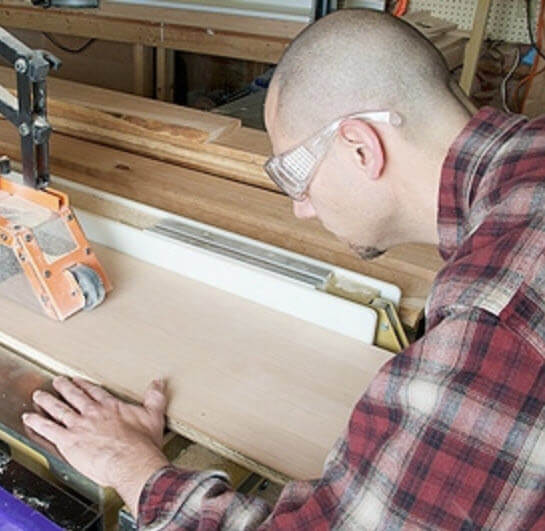
Dado saw blades are a special type of circular saw blade, used primarily in woodworking, for creating grooves or trenches in wood. The grooves are called "dadoes," hence the name, "dado blade."
A dado set typically consists of two outer blades, and a number of inner "chippers" which remove the material between the blades, to create a flat-bottomed groove.

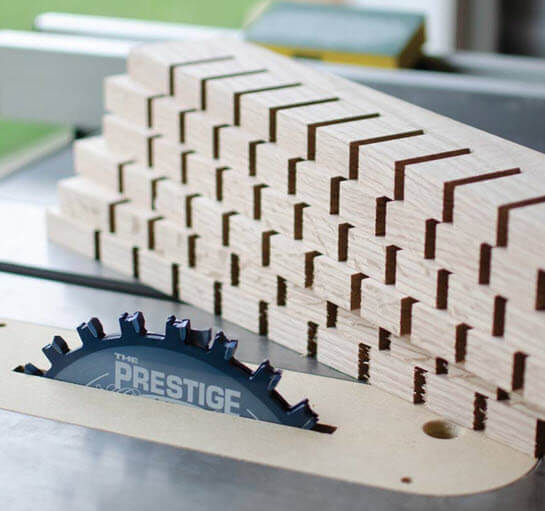
The many types of, & uses for, dadoes.
By adjusting the number of chippers and their thickness, and by using shims, the width of the dado can be precisely tuned.

Here's how a dado blade set is generally configured:
Outer Blades: These are the two saw blades that cut the outer edges of the dado. They are usually identical and are installed on the outside of the stack.
Chippers: These go between the outer blades and remove the material in between the outer cuts.
Chippers are generally much smaller in diameter than the outer blades and usually have fewer teeth.
They're designed to remove material effectively and to help create a flat bottom in the dado cut.
Shims: These are thin pieces of metal or plastic that can be added between the blades and chippers to make micro-adjustments to the width of the dado.
Dado blades are used primarily on table saws and radial arm saws. They are ideal for tasks such as:
- Cabinet Making: Creating grooves in which the back panel or other components can be inserted.
- Shelving: Cutting grooves into boards for shelf supports.
- Joinery: For making joints like tenons, rabbets, and tongue-and-groove.
- General Woodworking: Any project that requires precise, flat-bottomed grooves may benefit from using a dado blade.
- Box Joints: For creating grooves where the sides of boxes will fit together.
Not all saws can accommodate a dado blade. Consult the manual for your specific machine to make sure it is compatibile. Always follow all safety guidelines when using dado blades - like all saw blades, they should be handled with care.
How to Choose the Right Dado Blade
Different types of dado saw blades
Dado saw blades come in a variety of types, for different purposes and preferences. Here are the main types:
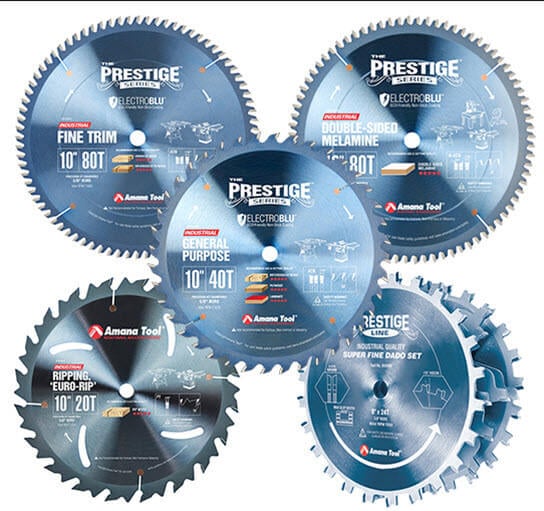
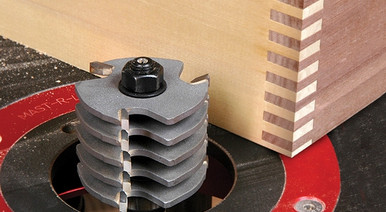
Stacked Dado Set: The most common type of dado blade is the stacked dado set, as seen above. This set consists of two outer blades and a series of chippers that go between them. The outer blades make the initial cuts, and the chippers remove the remaining material to create a flat-bottomed groove. By adjusting the number of chippers and their thickness, you can control the width of the dado.
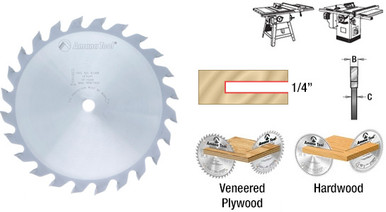
Single Blade Groover: For narrower (1/4") grooves, a single blade groover has the advantage of fitting in most table saws.
Wobble Dado Blade: A wobble dado blade is a single blade mounted on an adjustable hub that allows the blade to wobble side to side as it spins. By adjusting the degree of wobble, you can control the width of the cut. While wobble blades are generally less expensive and easier to set up, they usually don't produce as clean or as flat-bottomed a cut as stacked dado sets. They are usually considered less accurate and are more suited for rough work.
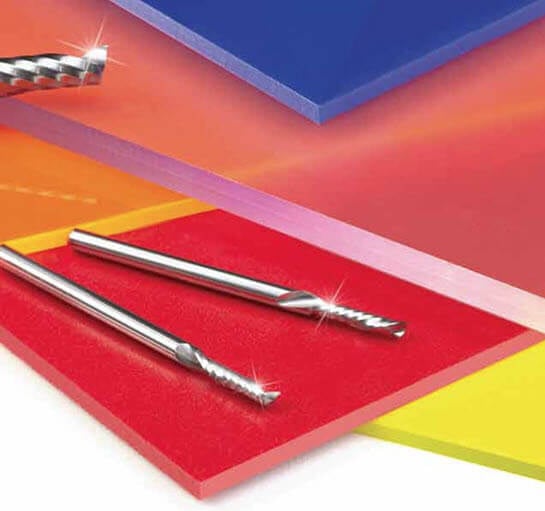
Box Joint Cutters or Router Bits: Though not a traditional dado blade, a box joint cutter set or a box joint router bit can be used for similar applications, such as cutting slots and grooves. These blades are designed specifically for creating box joints and come in a set that includes multiple cutting widths.
Dado Blades with Different Tooth Profiles
Dado blades can also have different tooth profiles—such as flat-top grind (FTG), alternate top bevel (ATB), or a combination of both—to provide different qualities of cut.
Flat-Top Grind (FTG): Produces a flat-bottomed cut and is common for the chippers in stacked dado sets.
Alternate Top Bevel (ATB): Provides a cleaner edge but may not produce as flat a bottom. This is often used for the outer blades in a stacked dado set.
Material and Coating
Dado blades also vary in terms of the material from which they're made and any coatings that are applied:
Carbide-Tipped: Most high-quality dado sets feature carbide-tipped teeth for durability and long-lasting sharpness.
Coatings: Some blades come with special coatings to reduce friction and prolong blade life.

Other Considerations
Choosing the right dado set can make a big difference in the quality of your work, so it's worth taking the time to consider the following factors:
Compatibility: Absolutely check your saw's manual to ensure it can accommodate a dado blade, and to see what the maximum dado width and diameter the saw can handle is. This is critical for both safety and performance.
Arbor Size: Ensure the dado set you're considering is compatible with the arbor size of your table saw or radial arm saw.
Adjustability: Stacked dado sets often come with shims to allow for fine adjustments to the width of your cuts.
Number of Chippers: More chippers generally mean more flexibility in terms of the width of cuts you can make.
Cost: Higher-quality blades are generally more expensive but are often worth the investment for better performance and durability.
Safety Features: Look for blades with features like anti-kickback design.
Troubleshooting
While dado saw blades are invaluable tools for woodworking, they are not without their issues. Here are some common problems that users might encounter and suggestions on how to address them:
- Inaccurate Cuts
Problem: The dado does not have a flat bottom or the sides aren't straight.
Solution: Ensure that the chippers and outer blades are installed correctly. Double-check to ensure all parts are tightened and aligned.
- Vibration and Noise
Problem: Excessive vibration or noise during operation.
Solution: Ensure that the dado set is properly installed and balanced. Vibration can occur if the set is not tightly secured, or if one of the blades is warped or damaged.
- Tear-Out
Problem: The wood fibers tear instead of being cleanly cut, especially at the edges of the cut.
Solution: Make sure the blades are sharp and clean. Use a sacrificial piece of wood or a zero-clearance insert to minimize tear-out.
- Inconsistent Width
Problem: The width of the dado is inconsistent or doesn't match the desired measurement.
Solution: Check to make sure that the set is assembled correctly and tightly secured. Use calipers to measure the width of the assembled set and adjust with shims as needed.
- Overheating
Problem: Blades become extremely hot during use.
Solution: Overheating can dull the blade quickly and may be caused by feeding the wood too slowly or using a dull blade. Make sure the blade is sharp, and adjust your feed rate as needed.
- Material Build-Up
Problem: Resin or material build-up on the blades.
Solution: Clean the blades with a blade cleaner or a mixture of water and mild detergent to remove any build-up that could affect performance.
- Difficulty in Adjusting Width
Problem: Difficulty in achieving the desired dado width.
Solution: Make sure you understand how to use the shims correctly for fine adjustments. Some dado sets come with a better shim system that allows for easier and more precise adjustments.
- Compatibility Issues
Problem: The dado set doesn't fit the saw, or the saw is incapable of stabilizing the set properly.
Solution: We can't say this enough -- Always check the saw’s specifications to make sure it is compatible with dado sets. Note the maximum dado width and diameter that your saw can handle.
- Safety Concerns
Problem: Kickback or other safety incidents.
Solution: Always follow safety guidelines, use appropriate safety gear, and make sure the blade and saw are in good condition before use.
If you encounter persistent issues, consult the dado set's manual and your saw's manual, or consider seeking professional advice. Always remember to follow all safety guidelines when troubleshooting and operating any woodworking tools.
How to Adjust and Calibrate Your Dado Set
Adjusting a dado set involves configuring the blades and chippers to achieve the desired width and depth of the cut. While the general procedure is similar across most types of dado sets, always consult the manufacturer's instructions for your specific dado set. Here are general steps to adjust a typical stacked dado set:
- Safety First
Turn Off the Power: Make sure the saw is turned off and disconnected from the power source.
Wear Protective Gear: Wear safety glasses and hearing protection.
- Installation
Remove Existing Blade: Take out the regular saw blade currently installed in the saw.
Install Outer Blades: Place the first outer blade onto the arbor, followed by the chippers.
Add Chippers: Install the chippers between the two outer blades. The number and size of the chippers you use will depend on the width of the groove you want to cut.
Second Outer Blade: Install the second outer blade next to the chippers.
- Fine-Tuning
Use Shims: Shims are thin pieces of metal or plastic that can be used between the blades and chippers for fine adjustments. Insert them where needed to achieve the desired width.
Secure the Blades: Once the blades and chippers are arranged as needed, slide on the arbor nut and tighten it securely. Make sure there is no lateral movement in the blade assembly.
- Make Some Test Cuts
Run a Test Cut: Before you proceed with your actual project, always make a test cut on a piece of scrap wood to ensure that the dado set is adjusted to the desired specifications.
Check Measurements: Use calipers or a ruler to measure the test cut and ensure it matches your requirements. If it doesn’t, you'll need to adjust the setup accordingly.
- Fine Adjustments
Re-arrange Chippers: If the dado is too narrow or wide, you can either add or remove chippers or replace them with chippers of different thicknesses.
Adjust Shims: If the dado is only slightly off, try adding or removing shims to get the exact width you want.
Check for Flatness: Make sure the bottom of your test dado is flat. If it isn’t, double-check to ensure all blades and chippers are properly seated and tightened.
Repeat these steps as needed until you get the desired width and flatness for your dado.
- Safety Check
Secure All Components: Before starting the saw, double-check to make sure all components are tightly secured.
Reconnect Power: Once you're confident that the dado set is correctly installed and adjusted, reconnect the power to the saw.
Remember, always adhere to all safety guidelines, and if you're not experienced with adjusting dado sets, consider seeking advice or assistance from someone who is.
More video...