Fabric manipulations are a great way of adding a three dimensional textural appearance to your projects.
What You Need
- Sketchbook
- Fabric glue
- Hand sewing kit
- Sewing machine
- 3 metres of printed fabric
- Plain or printed fabric scraps
Fabric manipulations are a great way of adding a three-dimensional, textural appearance to your projects.
Drawings and paintings are a great source of inspiration, being able to see your designs come to life at the start of the design process can lead to unique results.
In this guide, we explore a number of hand sewn and machine sewn fabric manipulations that you can try with your custom printed fabric.
Hand Sewn Manipulations
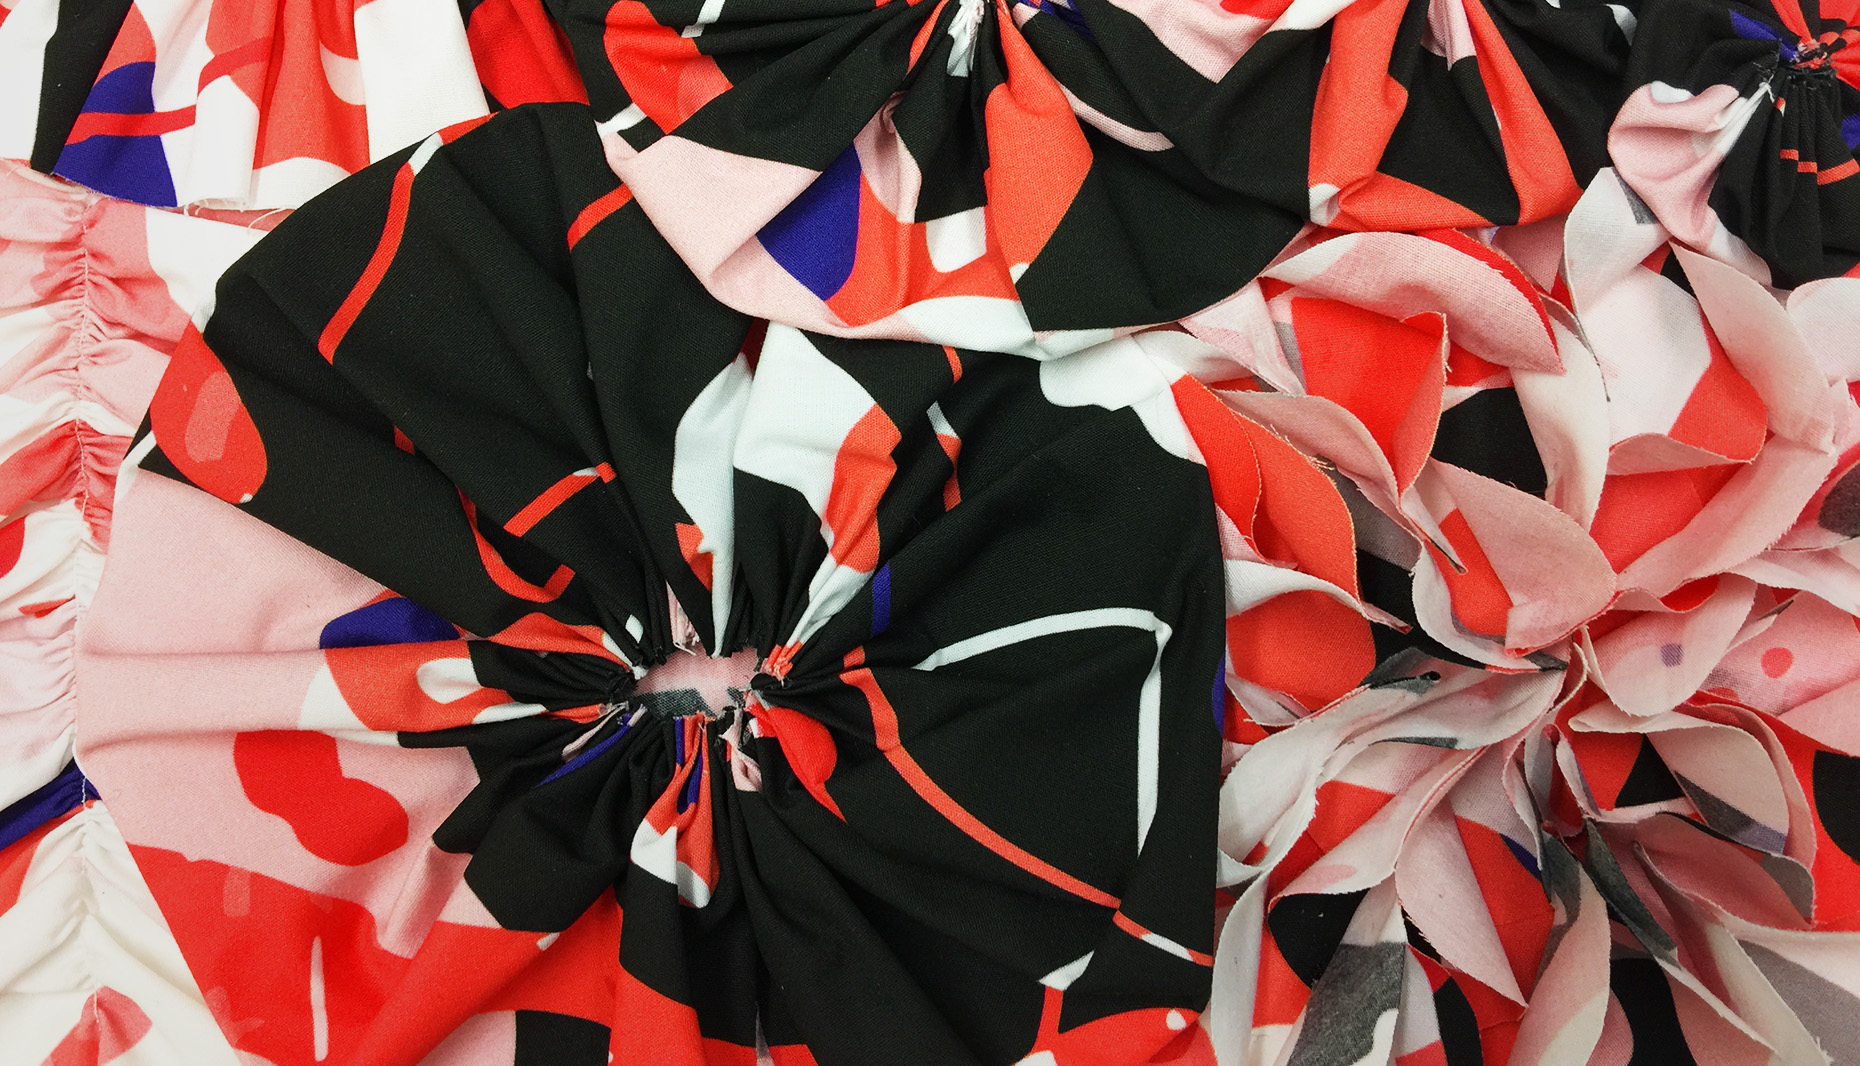
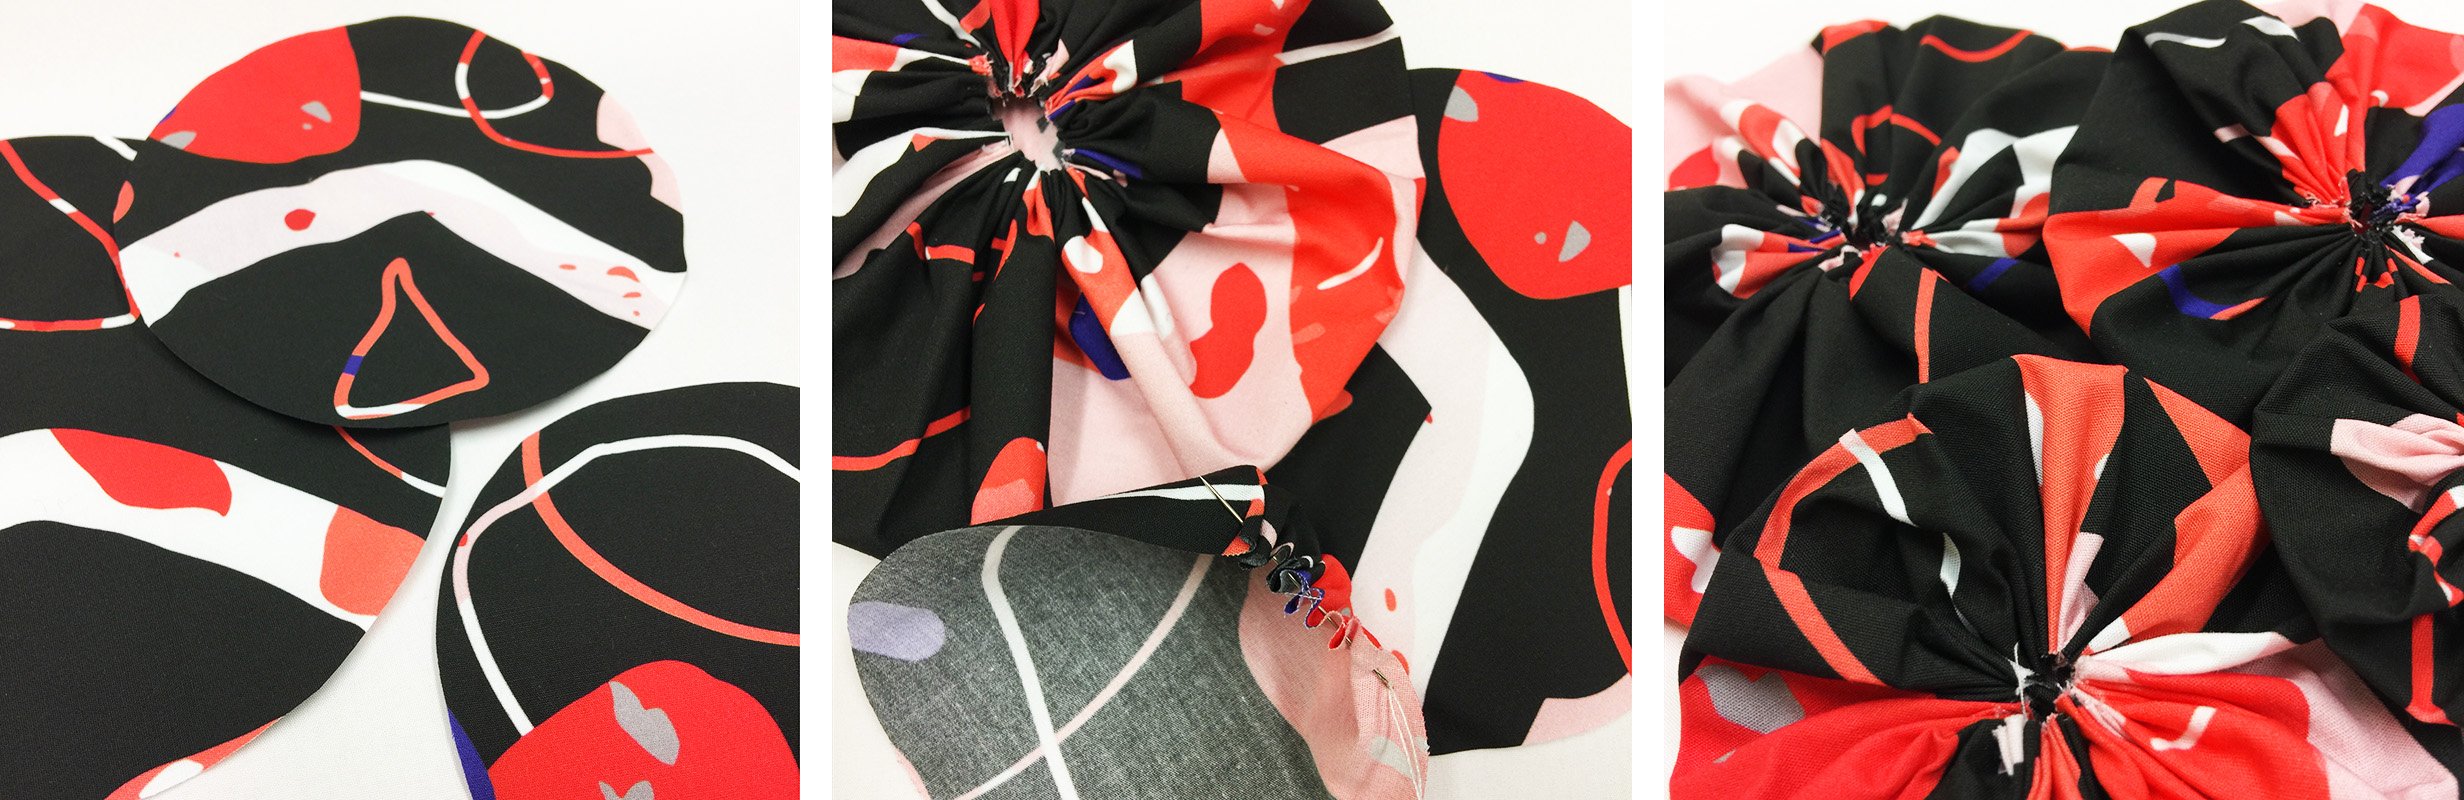
Suffolk Puffs
- Cut several circles, either free-hand or by drawing around a template, that vary in size. You will need to ensure that the circles are no smaller than 20cm in diameter so they don’t become too small to work with.
- Thread your needle with your chosen colour of thread and begin sewing around the edge of the fabric circle, leaving no smaller than a 5mm edge.
- Move the needle up and down, gathering the fabric on the needle as you go. There is no need to pull the thread all the way through each time as it can be pulled through the gathered section in one go when the needle becomes full.
- Repeat this process until you return to the start of the sewn circle and pull the thread to create a puffed circle effect. You may need to pull the edges of the suffolk puff slightly to ensure that no fabric is tucked inside.
- Knot the fabric closely to the centre of the suffolk puff to ensure that the gathers are held tightly in place. Cut off any excess thread and repeat this process to create more.
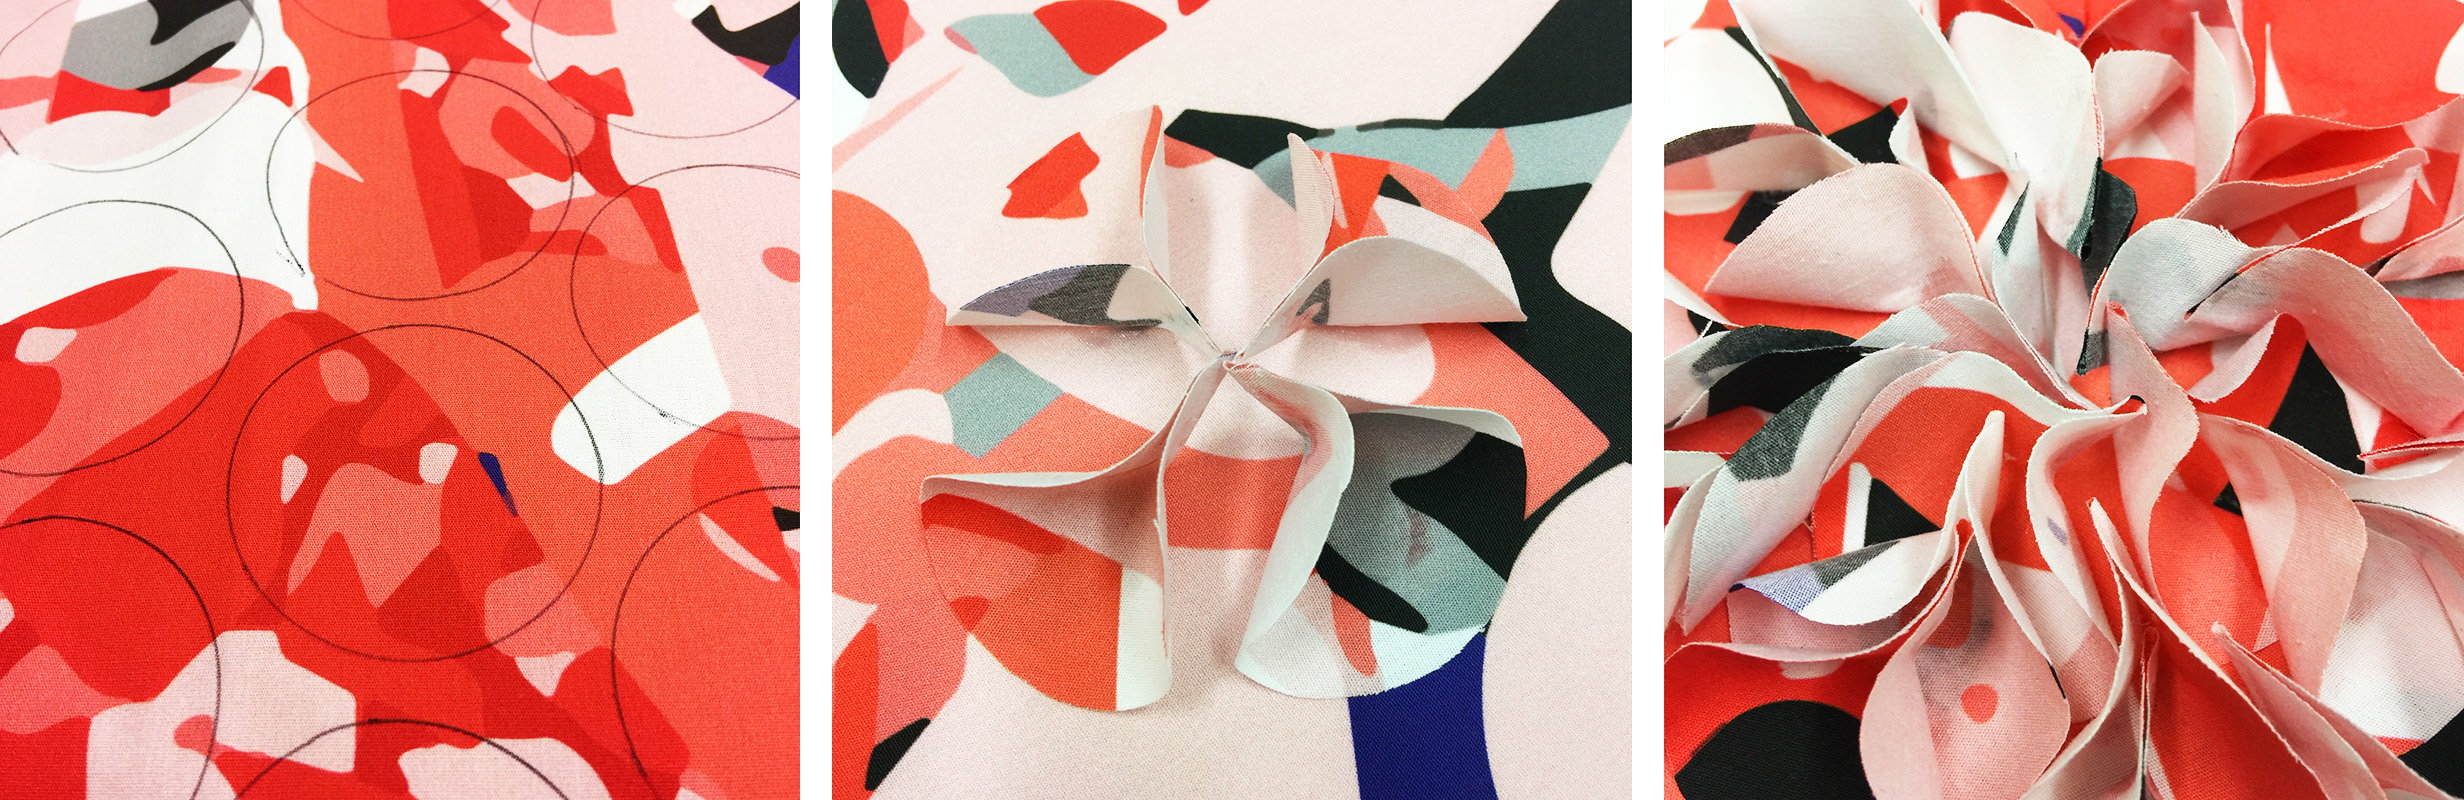
Folded Flowers
- Cut 24x circles each measuring 5cm in diameter. The quickest way to cut several circles at the same time is to fold your fabric a few times before cutting.
- Working with one circle at a time, apply a small amount of glue to the base and pinch the edges, until the glue is dry, to create a petal shape.
- Repeat this process for the rest of the circles so you have 24x individual petals.
- Starting with 4 petals, stick them to a 20cm x 20cm scrap fabric square in a diamond format and repeat this process for the next 4 petals to fill in any gaps. Continue adding your petals to the gaps and see a flower start to form.
- Once all the petals have been added, cut the edges off the square fabric base to follow the shape of the flower.
Machine Sewn Manipulations
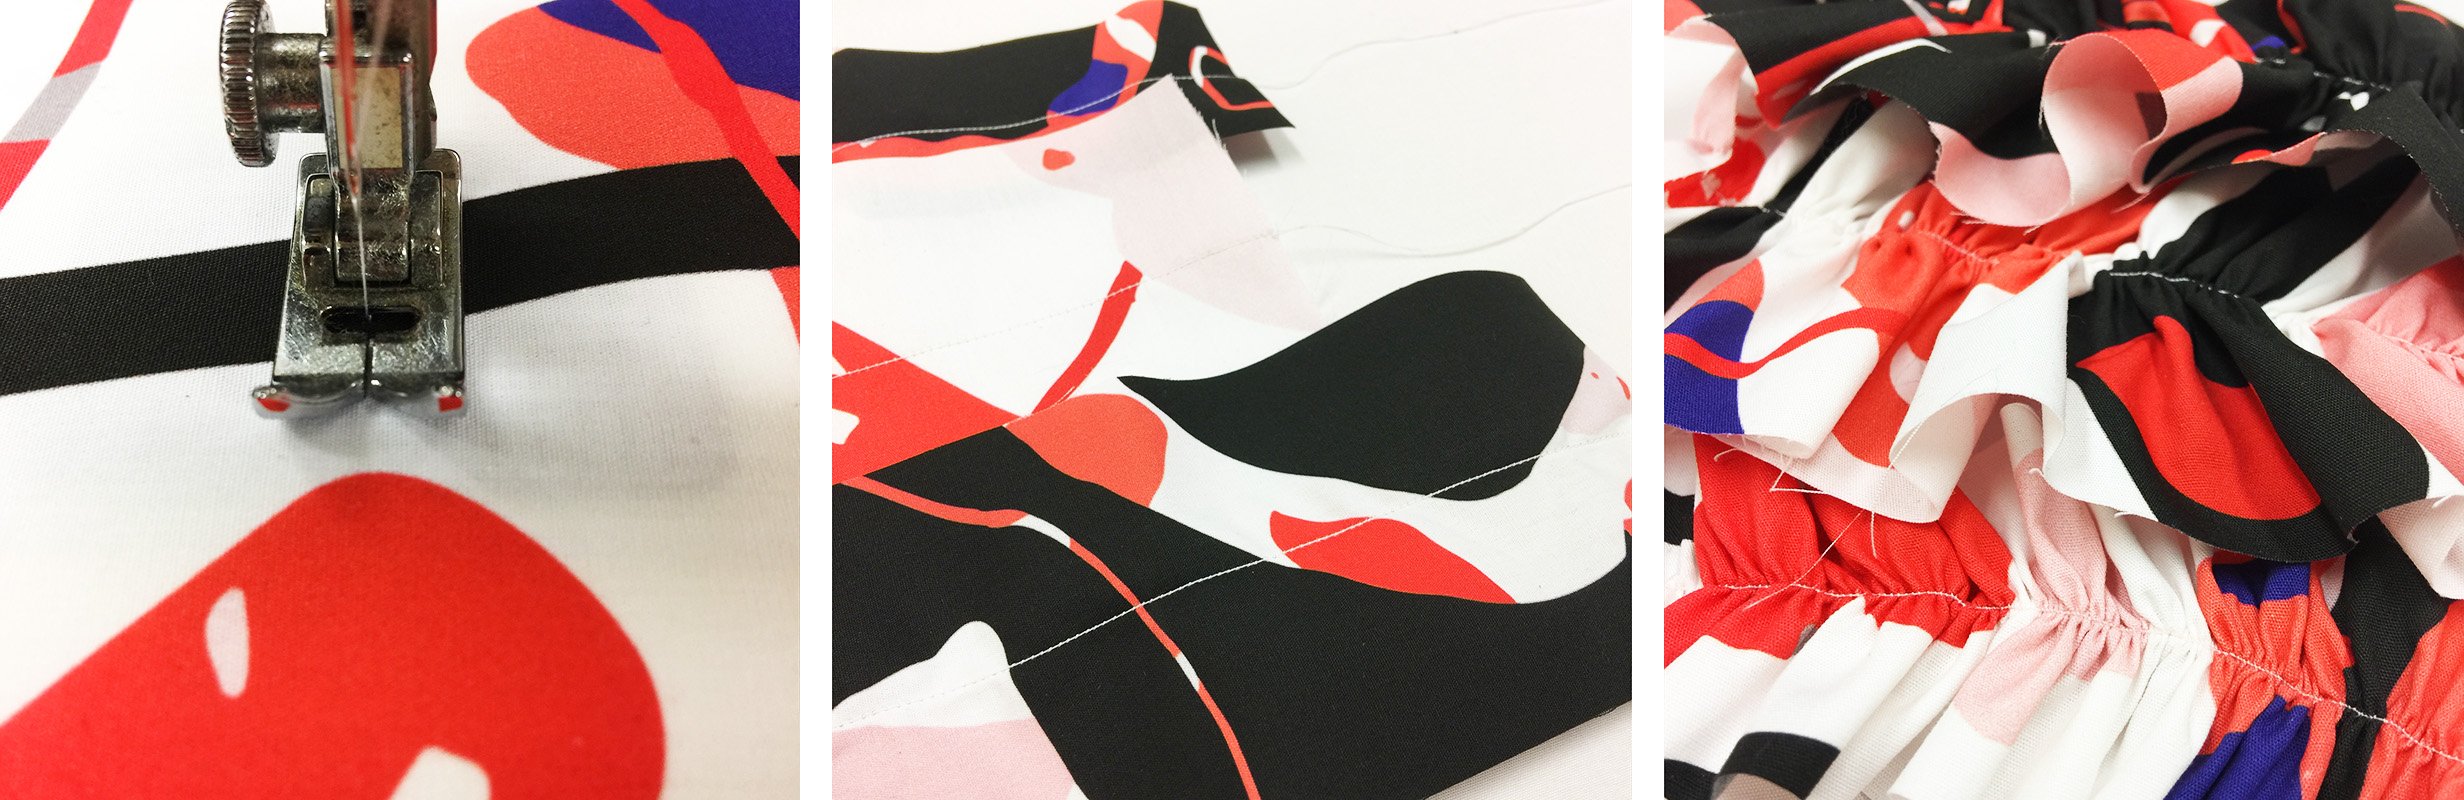
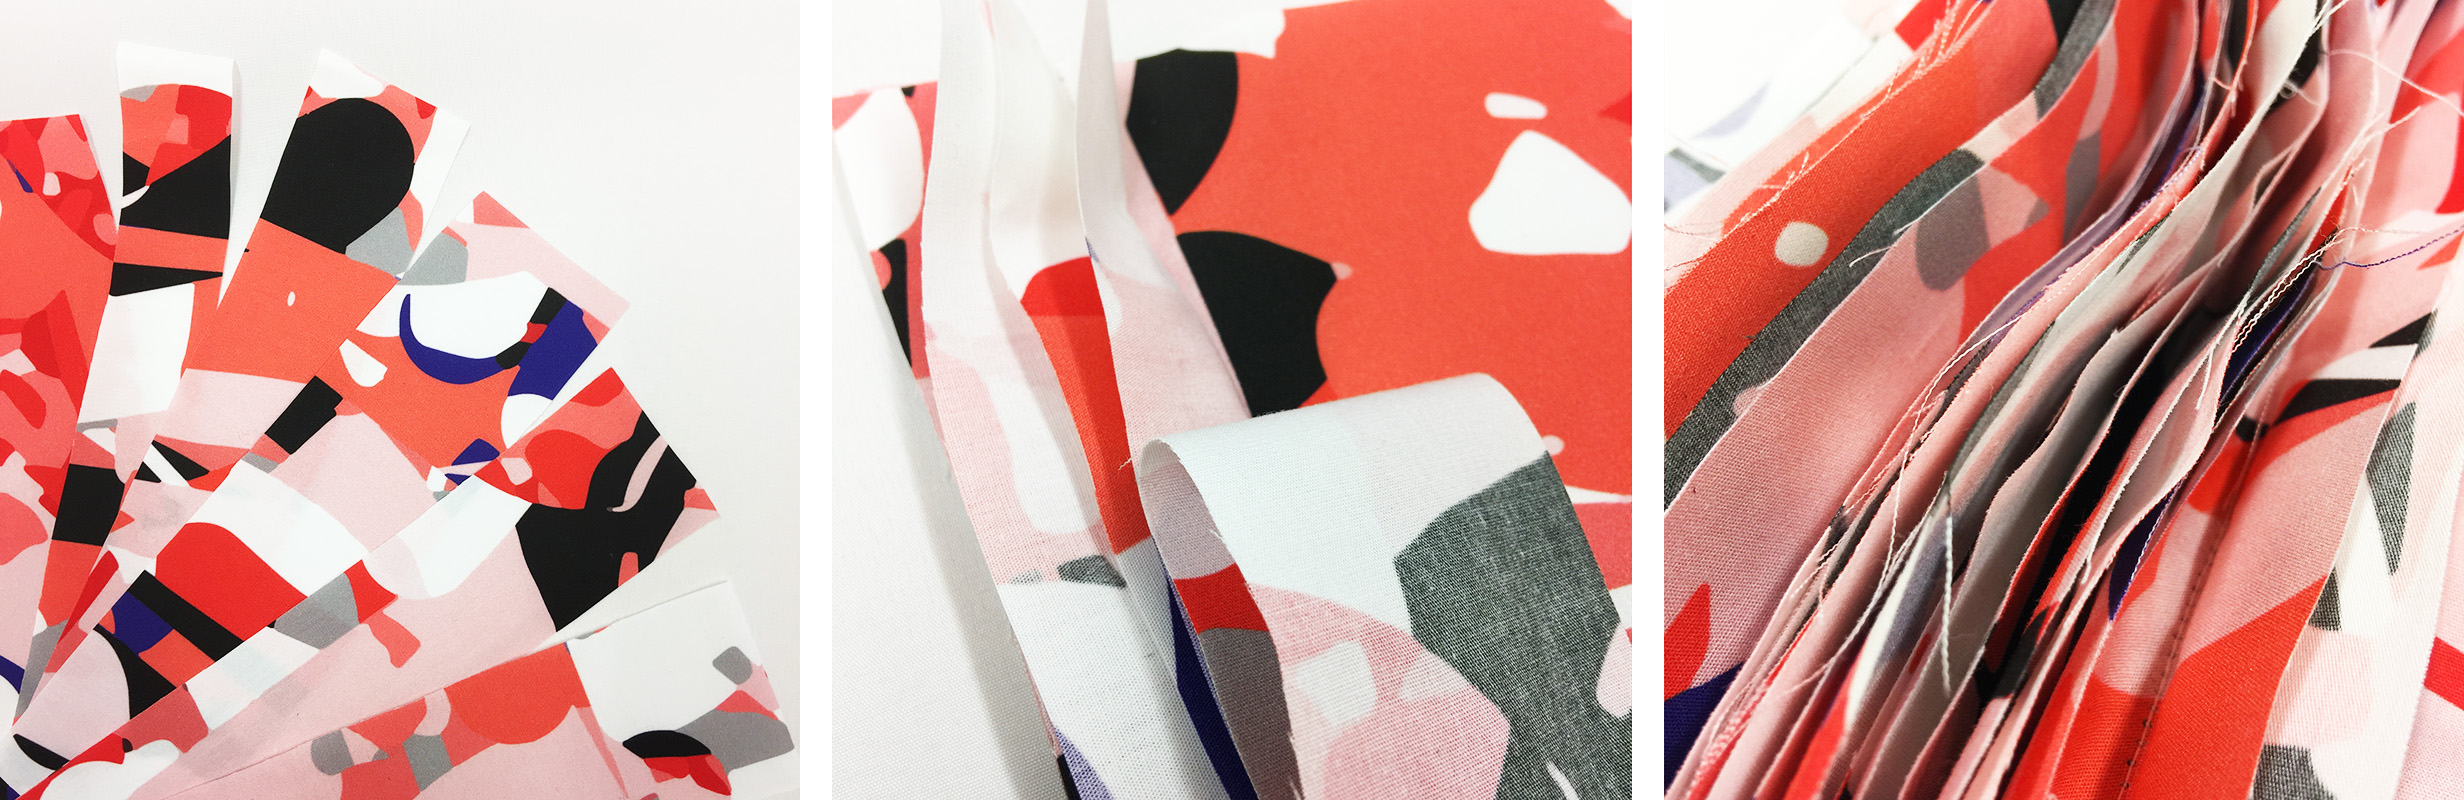
Ruffles
- Cut your printed fabric into strips that vary in length and width, no smaller than 30cm in length and 5cm in width.
- Place your strip of fabric under the machine foot and start by sewing a small reverse stitch to create an immovable end.
- Using a relatively wide stitch, sew a straight line along the centre of the fabric strip until you reach the end. A reverse stitch is not needed here as the loose threads are needed to create the ruffle.
- Leaving a 20cm long length of thread, cut the thread away from the machine and separate the threads into two sections. Only pulling one thread, push the fabric in the opposite direction and see a ruffle start to form.
- Once your ruffle is as gathered as you would like it to be, knot both threads to hold the ruffle in place and repeat this process to create several more.
Frilled Pleats
- Cut your printed fabric into several strips, each measuring 15cm in length. You can use several different widths of fabric or have all the strips the same width of 5cm, depending on the look you are going for.
- Cut a square of scrap fabric that measures 15cm by however wide you need your manipulation sample to be; this will be used as the base to sew the pleats onto.
- Place the left-hand edge of your first strip against the left-hand edge of the fabric base and sew a line down the centre of the strip, ensuring to reverse stitch each end.
- Place the left-hand edge of your second strip against the right-hand edge of the first strip and sew down the centre of the second strip so that the two stitch lines are right next to one another but not overlapping.
- Repeat this process until your strips have filled the fabric base. You will be left with a section of pleats that have a frilled effect.
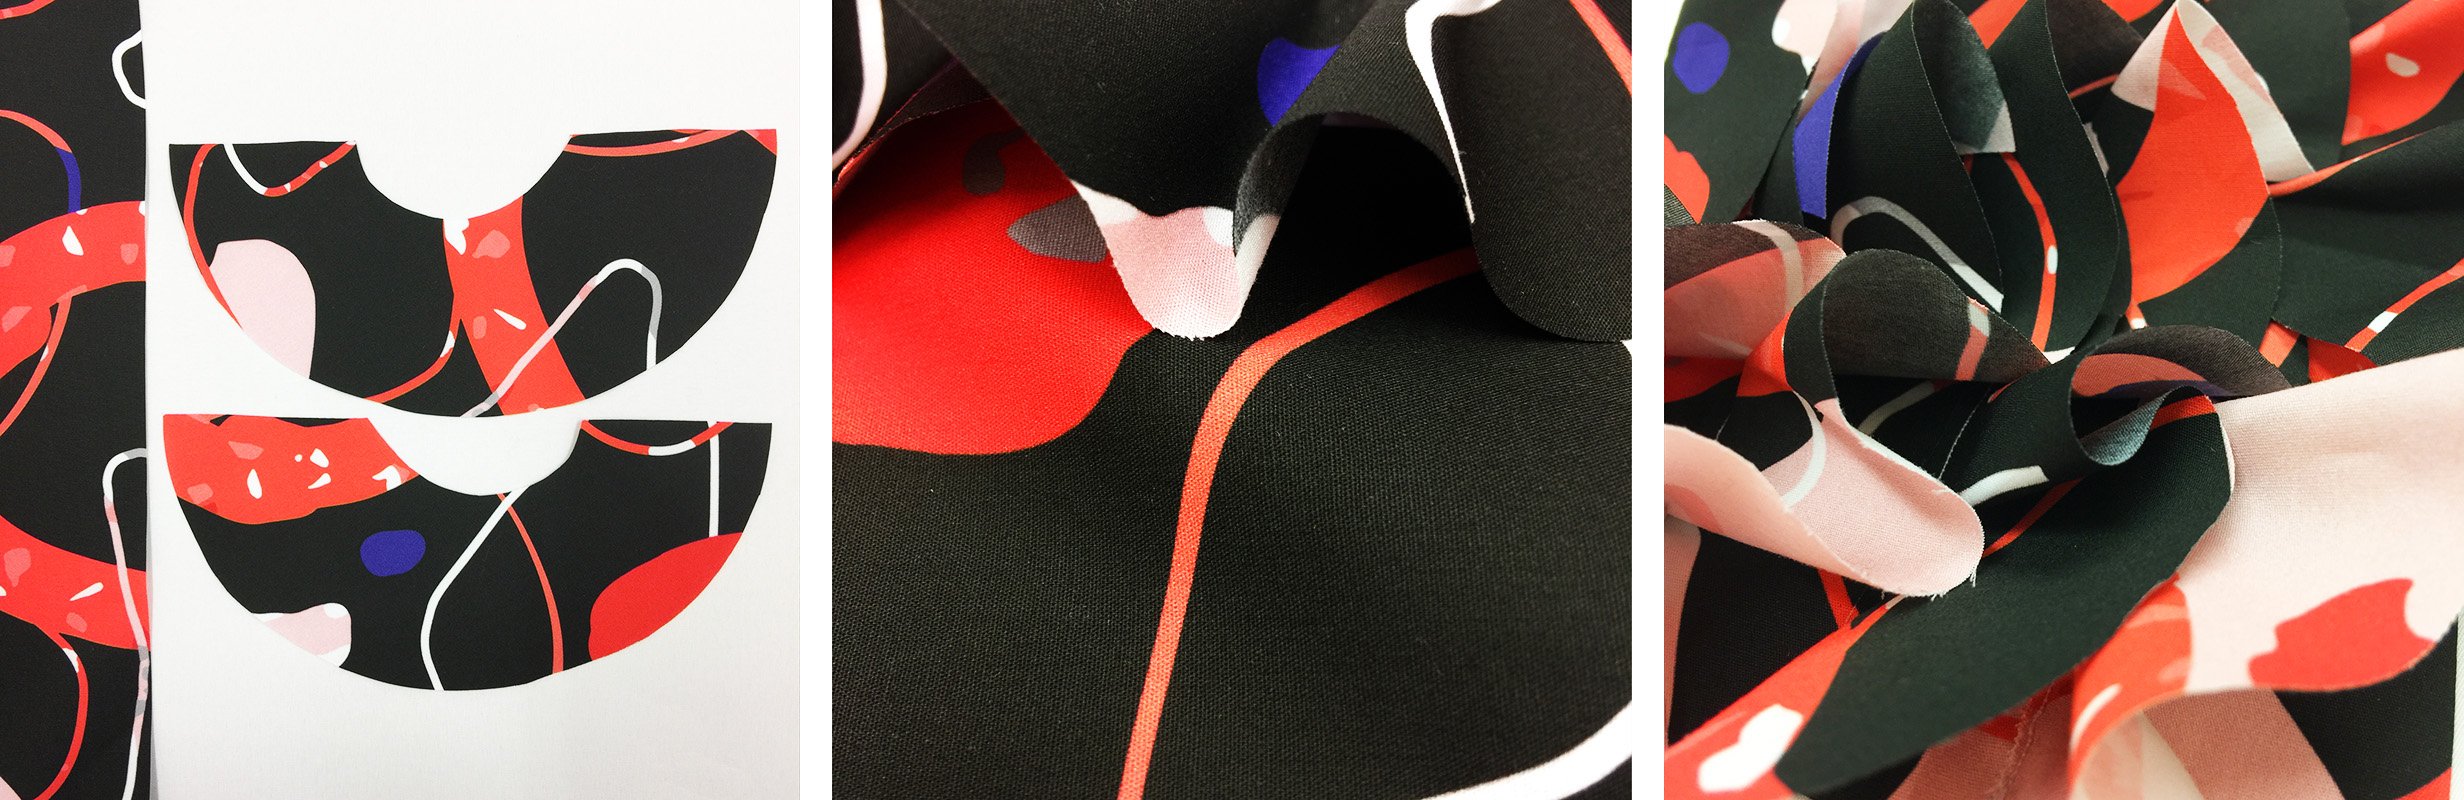
Flounces
- Cut several circles by drawing around a template that measures 15cm in diameter. Next, draw a smaller circle in the centre, over the top of the cut circles, that measures 7.5cm in diameter.
- Fold the circles in half and cut them to create several semi-circles before cutting around the smaller semi-circles that were drawn over the top.
- Pull the edges of the small semi-circles to create a straight line with the inner edge.
- Using a square scrap of fabric that measures 30cm wide by however long you need your manipulation sample to be, place the left-hand edge of the inner semi-circle against the left-hand edge of the fabric base before pulling the flounce and sewing a straight line across.
- Repeat this process by sewing one flounce alongside the other and underneath the layer above, as close to the above stitch line as possible, to create a unique effect.
 Loading...