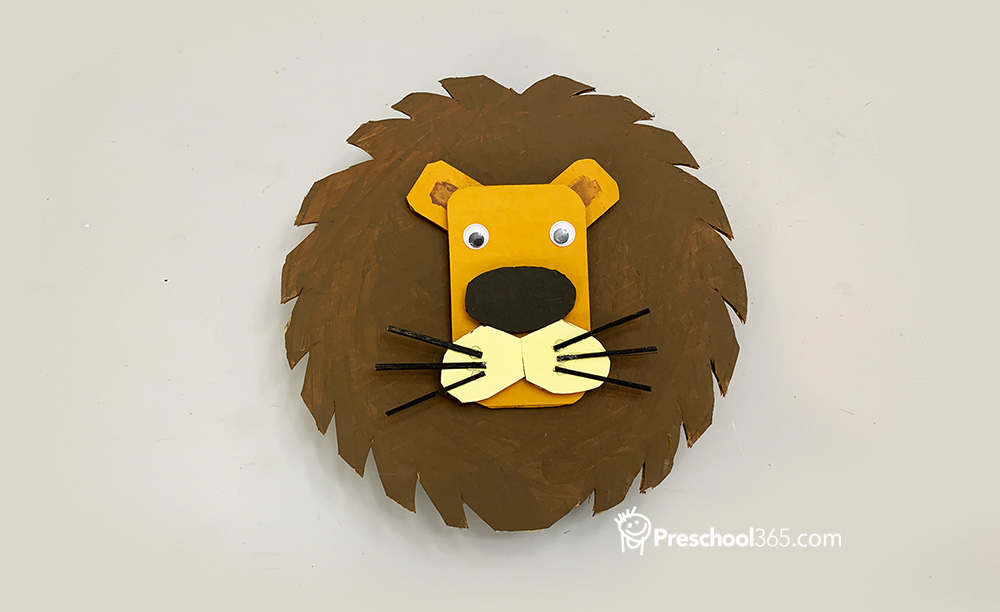
How to make a fun and cute Lion with cardboard and some toothpicks
If your preschooler is learning the letter L and needs some hands-on activity to make it more fun, this simple lion artwork project is the deal to seal that sound of L in their minds. It also makes a great animal project if you are learning about jungles, predators, cats, and so on. Or if you need some artwork time with your children, it works too. Let’s get started.
What we need:
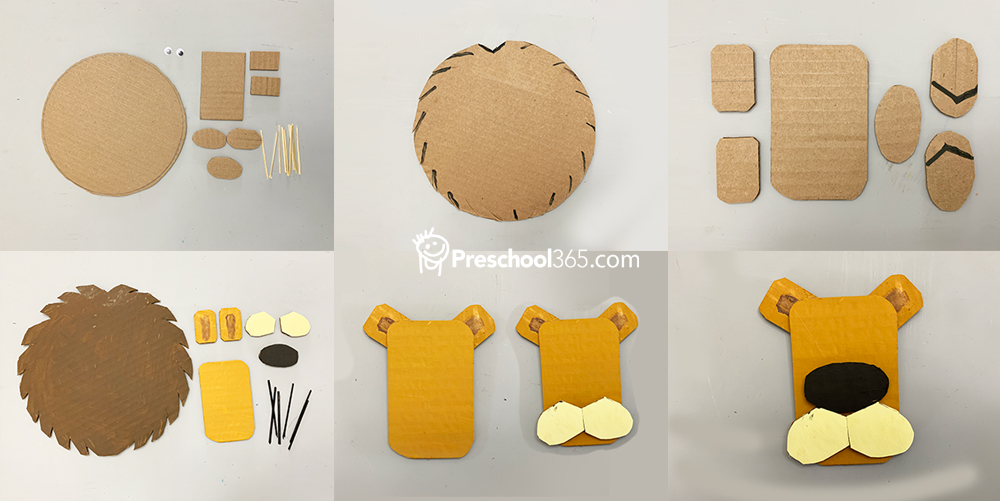
- Cut out some shapes from cardboard. One large circle (4 inches in diameter), one big rectangle (4×2 inches), two small rectangles (1×2 inches), three small ovals (2 inches long).
- Six toothpicks
- Your regular cutting, gluing, and painting tools. Adult supervision required with cutting.
- Some googly eyes.
Steps
- After cutting out all the cardboard pieces, draw out some zig-zag lines at the edge of the circle and cut them out to give it a hair feel. For very young artists, you can just leave it as a clean circle. Trim off the corners of the rectangles to round the edges. Trim off a V at one end of the two ovals. Leave the third oval intact, to be used for the nose.
- Paint the pieces. The fur (hair) is usually darker than the skin, but go ahead and use your own color palette for this. Paint a little dark area on the small rectangle to give the ear some dimension.
- Time to glue them together. Begin with fixing the ears: two small rectangles at the corners of the shorter end of the larger rectangle.
- Join the two V-end ovals so that the third oval can sit in the middle of the V. Glue them.
- Time to fix the whiskers: Trim a bit of the toothpicks if they are long.
- Fix the eyes.