
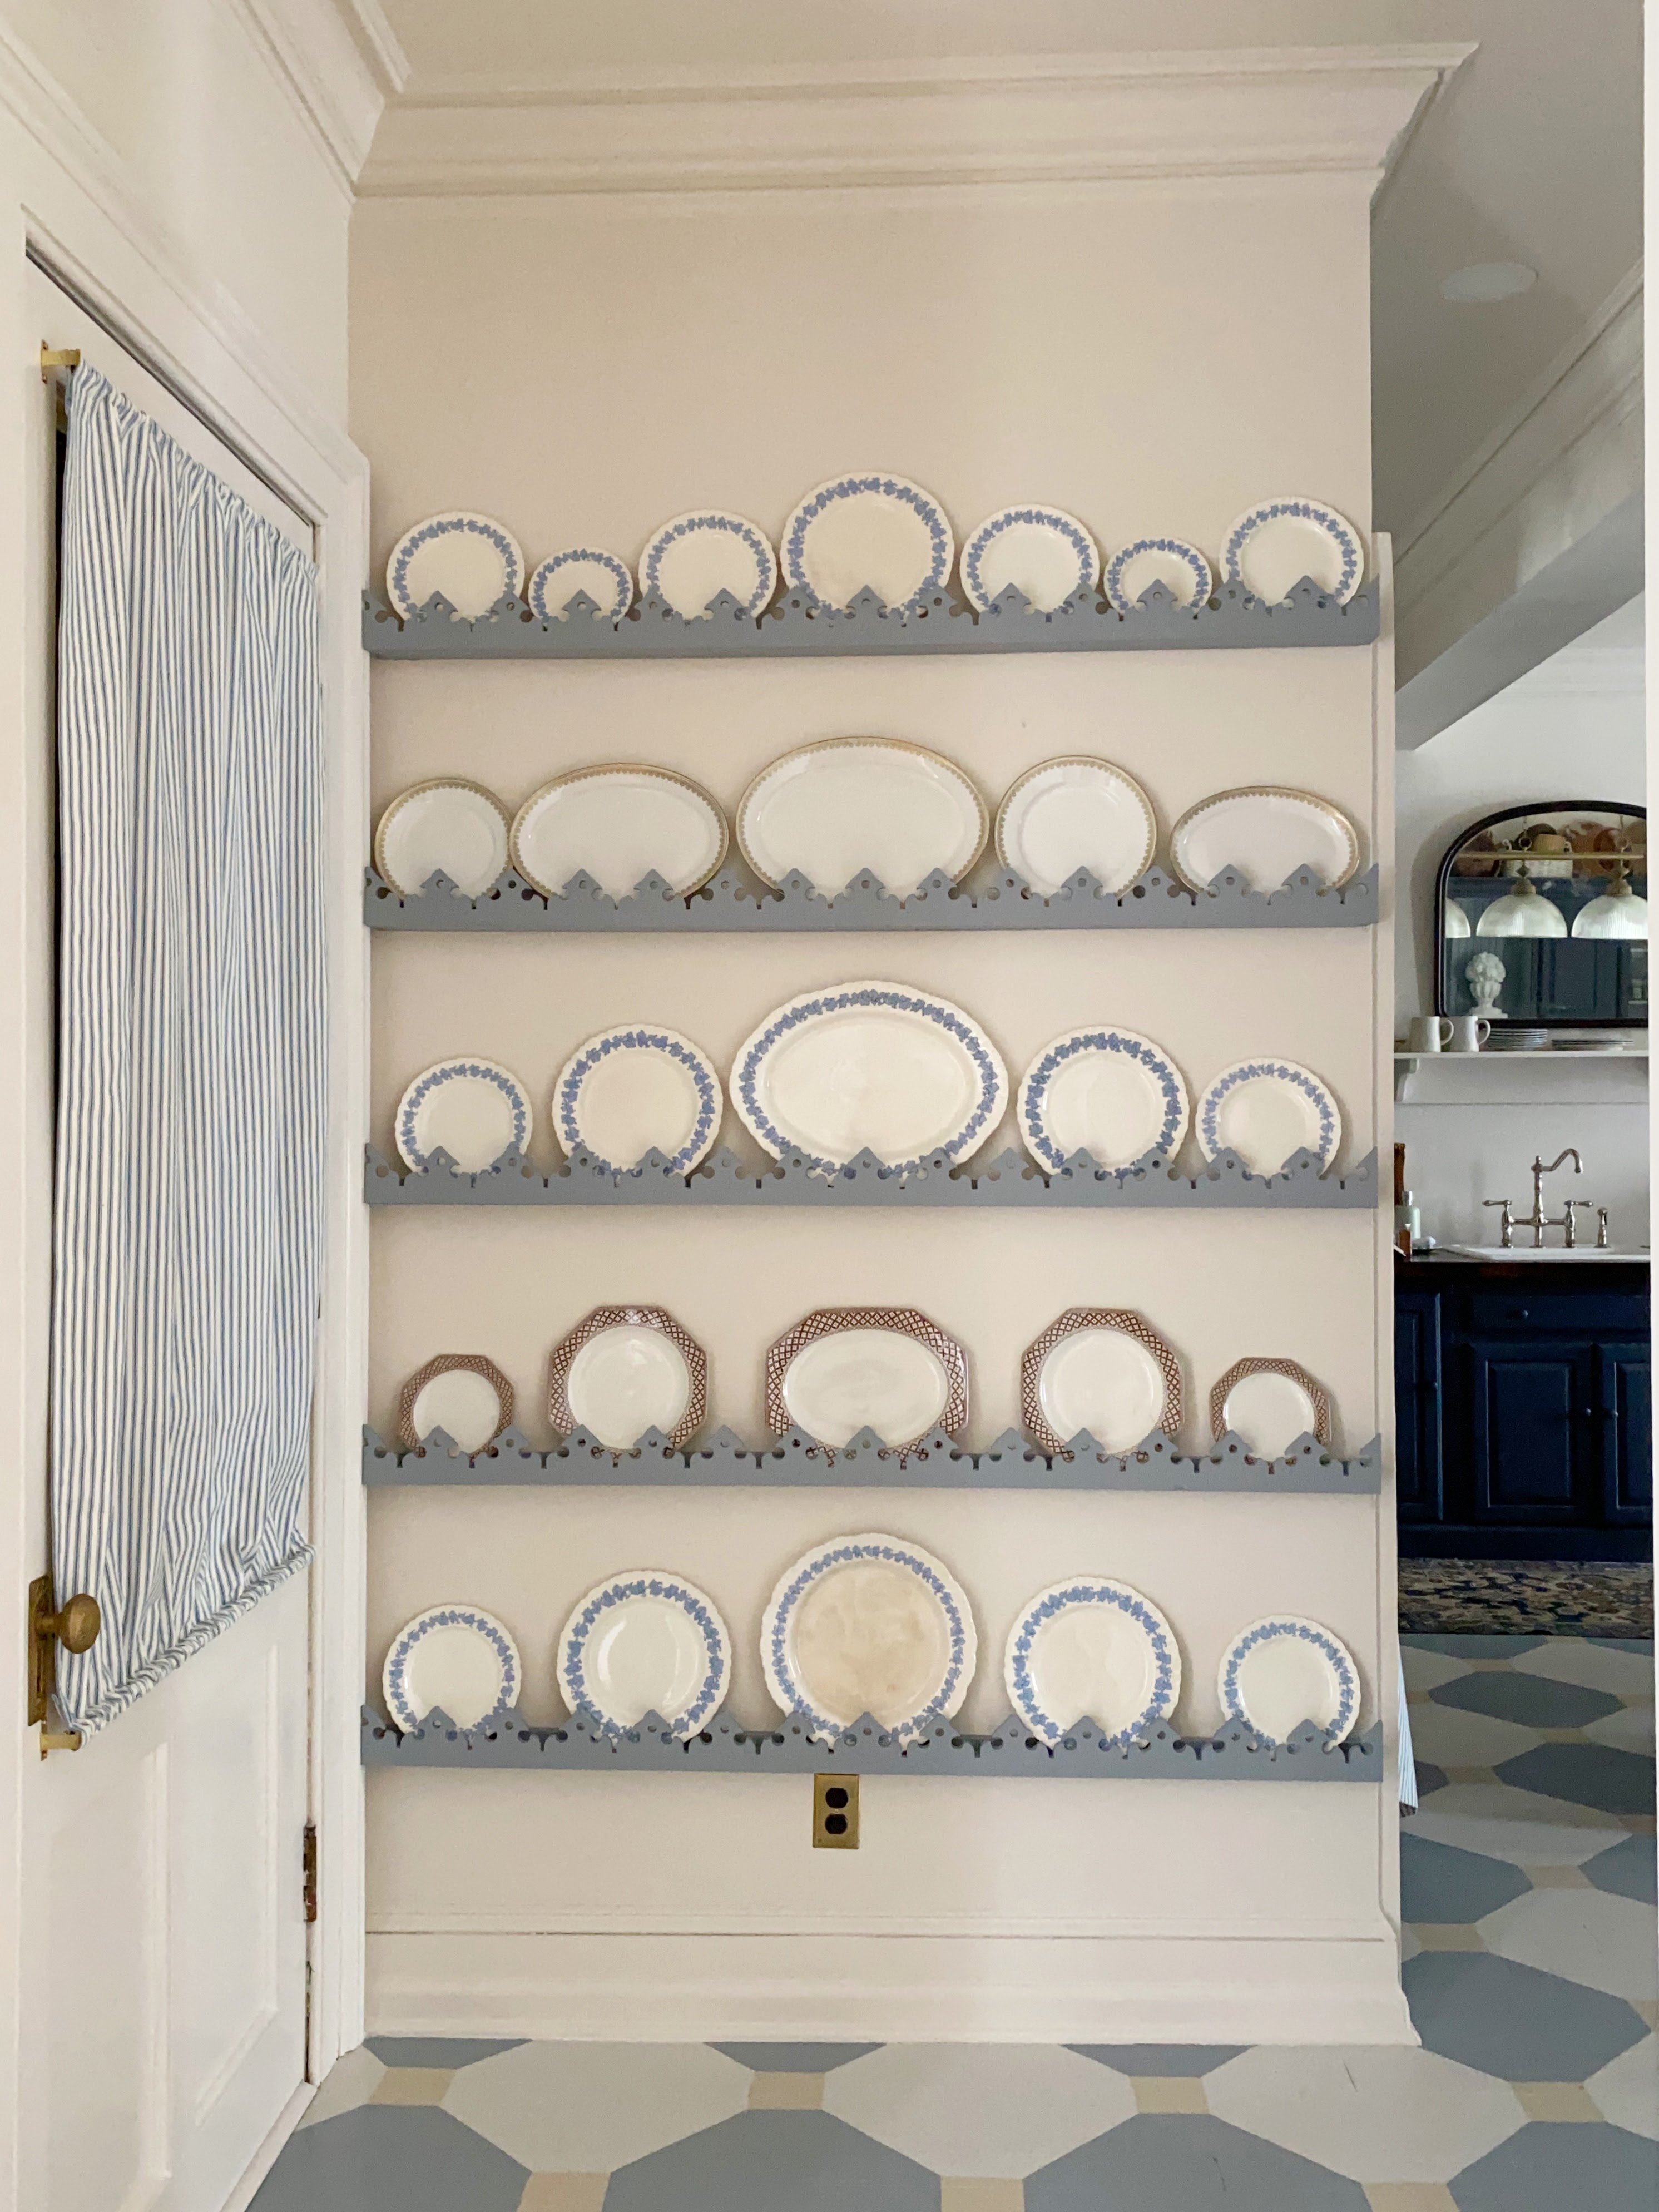
One of my favorite details of our kitchen renovation was the full wall of plate racks we built at the entrance to the room. I love design that is simultaneously functional and beautiful and I love displaying collections in impactful ways. I had both of these ideas in mind when I thought about creating this display. I also loved the idea of making it look handmade and kind of quirky. Whenever I walk through an old house I love seeing the way that utilitarian items like cupboards, shelving, or closet systems, were given special details and flourishes — that’s the spirit I was trying to evoke with these plate racks. The pattern on the fronts came from the decorative details on our staircase, an idea that came to me one day after I was racking my brain for how to design the shelf fronts ( I considered scallops, shells, fleur de lis, and other classic shapes).
Some of the links in this post are affiliate links. If you click the link and purchase the product, I will receive an affiliate commission at no extra cost to you. These commissions help fund this blog and our home renovations. All opinions remain my own.
Here is a photo of the staircase where you can see the little pointed arches I copied for the shelves.

My brother, Joe, helped me come up with the structural design for the shelves. The back (that attaches to the wall) and the bottom are standard 1×2 pine and the front is a 1×4 planed down to 1/2 inch thick and then the pattern is cut out of that.
First, I cut down the 1×2 boards to the length I wanted. I left room for sides, also made from 1×2 – so 3/4 inch on each side.
You can see how they will fit together, below. The back is flat against the wall, and the bottom is perpendicular to the back along the bottom.

Next, I attached the back and bottom of the shelves together. First, I clamped the two boards in place so that they wouldn’t move.

I predrilled a screw hole using a countersink drill bit – my favorite discovery of this project. The bit drills a hole for the screw and bores a countersink hole so the screw head will sit flush with the wood when it is drilled in. And then the drill bit flips around and its a driving bit to drive the screw into the hole. So you don’t have to keep switching the drill bit and the driving bit. I’m sure this is a basic tool for many experienced DIYers but it was a revelation for me!

After the holes were drilled I screwed the two boards together, keeping them clamped the whole time.

I was left with a bunch of these:

The screws holding the two 1x2s together will be hidden against the wall, so there is no need to wood fill the holes.
Next, I added the little shelf sides, made from a piece of 1×2 cut just big enough to sit flush with the top of the back piece and the front of the bottom piece. I didn’t take a photo of these, but you can see them in the subsequent photos. I attached those with a finish nailer. Then, I filled the nail holes with wood filler, sanded when it was dry, and primed and painted the shelves. The color I used was Solitude by Benjamin Moore – I just used the leftover Floor & Patio paint from the painted floors.
To hang the partial shelves (still missing the shelf fronts), I found the studs on the wall where the shelves would be attached and marked plumb lines along the studs, which you can see below.
Holding each shelf against the wall at the height where it would go, I marked where the studs intersected the shelf. At each stud point, I predrilled a screw hole in the back of the shelf (above the bottom of the shelf) using the countersink drill bit.
After the holes were predrilled, I screwed each one into the wall, making sure to level them before I drilled.


Now it was time to cut out the shelf fronts. I took the pattern from the staircase by doing a crayon rubbing – I put the paper against the pattern, used the side of a crayon, and rubbed it against the pattern. Then I used a pencil to trace the outline of the pattern. I cut that out, and traced it on to a piece of cardboard.
Joe used his portable planer to plane the 1×4 shelf fronts down to 1/2 inch thick (1x4s start out 3/4 inches thick). I thought the 3/4 inch thickness looked too bulky with the more delicate pattern when I cut out a test piece.
We cut the planed shelf fronts to the length of the shelves (with the side pieces – the fronts should cover the side pieces). Then we traced the pattern on to the shelf fronts.

Start in the middle if you want your pattern to be centered. You can add a flourish at the ends, or just continue the pattern until the end. I liked the way the pattern ended in exactly the middle of an arch on either side, so we left it that way.
Joe used a jigsaw with a finishing or scrolling blade to cut out the pattern. Since there were rounded areas (the holes in the middle of the arches and the rounded areas at the bottom of the arches), he used a drill press to drill those out, which made the jigsaw cutting a lot easier and faster.

After the fronts were cut out, I had a lot of sanding to do. I sanded the edges of all the cut out areas with 80 grit sandpaper because they were really rough (I could have done a better job at this step but I was so tired of sanding by the end!).

I primed and painted both sides of each shelf front with one coat of primer and two coats of paint.
The shelf fronts were attached with finishing nails using a nail gun.

My favorite thing about these shelves is that I can completely change up the look with the seasons or holidays.


Tools for this project:


Beautiful! Love it!