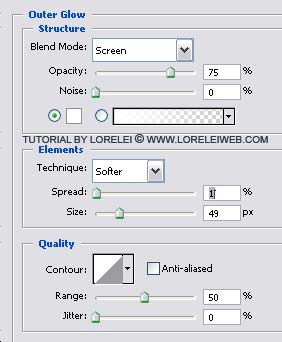
Next, Choose the first layer of the moon, and go to Layer >> Layer Styles >> Outer Glow, apply these glow settings to give your moon a natural feeling of shine. Remember that you need not apply the shine to the reflection layer!
So, you got the moon done!
Now only the easy stuff are left.
Take a nice picture of a girl. As usual, I used a photo from Liam Stock, but this is very optional, you can use your own pic, though for our “eclipse”, it’s better to have a figure with a semi-transparent veil in hands.
Crop the girl (we assume this tut if for more advanced users so we won’t stop to explain how to crop a picture, if you are unsure, please post your question below.
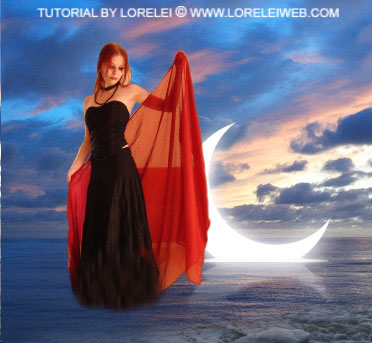
After having cropped her carefully, paste her unto our canvas.
Since we want to live up to our metaphorical title – “moon eclipse”, be sure that the girl’s veil covers the moon a tiny bit.
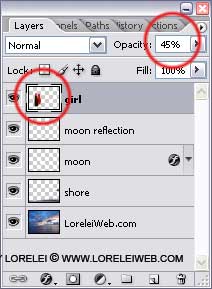
Set the opacity of the layer with the girl to 45% (more or less, depending on your background image).

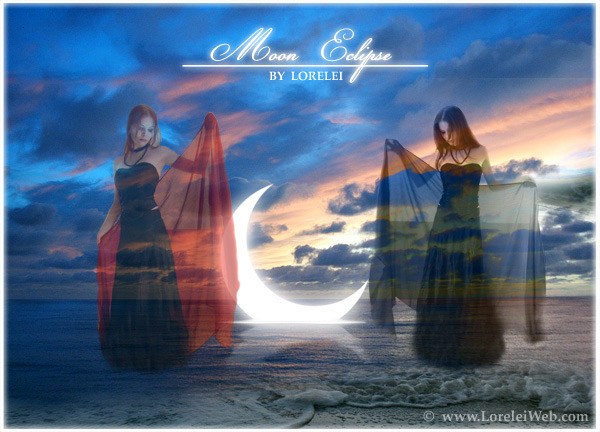
Take another girl, and repeat the previous steps: crop her, paste her unto the canvas, only in order to make her look a bit different, we did not just reduce the opacity of the layer, but we only set the blending option to “Luminosity”.
That’s it, add a title, and the image is ready:


Great article . Will definitely copy it to my blog.Thanks.
[…] “Fairy and Sunset Landscape“, “Mysterious moonlit landscape“, and “Sinking Moon Eclipse” (and some others)… I hadn’t much time recently and therefore made very little […]
[…] Sonra DeviantArt için Ay Tutulmas? yap?lm?? olmas?, bu bir kaç kez ö?retici ve I vermek ve s?rr? if?a karar yazmak – nas?l “etkisi” batan ay yapabilirim istendi. Ben yeniden çal??t?, ancak do?al olarak özde? olmak dönmedi … Umar?m bu disappointingly basitti ke?fetmek vermeyecektir resmi olu?turun. Yine de, bu tut daha ileri düzey kullan?c?lar için … Zaten söylemeliyim, bugün bu ?aheseri yapacak: […]