For millions of years, worms have been hard at work breaking down organic materials and returning nutrients to the soil. Worm composting (also known as vermiculture) is one kind of composting that can be done indoors, and is especially great for kids (and in classrooms). A worm bin can provide many valuable, exciting, and experimental opportunities—not to mention prized plant food after just a few months.
FYI: Vermont state law will prohibit all food scraps from the trash in 2020.
Why worm composting?
Worm composting (or vermicomposting) is one method to recycle food scraps into a nutrient-rich soil amendment for gardens and house plants. Worm castings are a fantastic fertilizer for houseplants and your garden and, compared with other fertilizers, worm compost contains more slow-release nutrients that are immediately available to plants.
Worms work with fungi, bacteria, and other invertebrates (aka “FBI agents”) to transform this organic matter into a usable material, which improves soil structure, nutrient storage and availability, and water retention capability of soils. This composting method is simple, effective, and convenient. It saves water, energy, soil, and landfill space. Best of all, it’s a fun, hands-on learning experience for everyone.
Vermicomposting is a supplement to a compost pile, not a replacement for one. It’s a great option for apartment dwellers and others who don’t have space for a full-fledged compost bin.
Choose the right worms
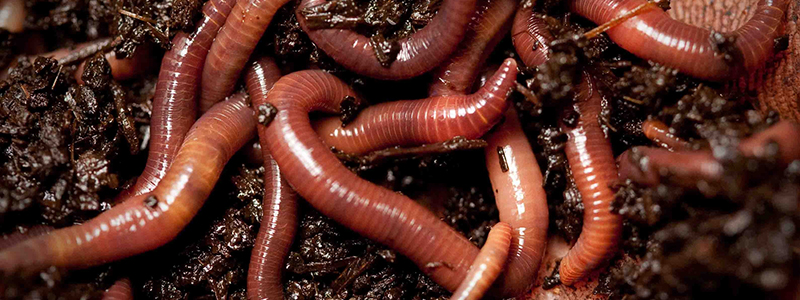
Red wigglers (Eisenia fetida) are the worms used for vermicomposting. These are not the night crawler earthworms (Lumbricus terrestris) common in Vermont. Originally from the Mediterranean region, red wigglers live in the upper layers of soil, not deep in the ground like night crawlers, and will not survive most Vermont winters.
Fun Fact: 19 species of earthworms have been found to live in Vermont, none of which are native to the state. Read more about worms in Vermont in Earthworms in Forests (PDF).
As a result, worm bins should be kept indoors. These worms thrive in temperatures between 60 and 75 degrees Fahrenheit (F), and will not survive below 32°F or above 85°F. Although red wigglers have been known to survive in an outdoor compost pile during winter, it is not common. In addition, you do not want to risk another introduced species to the Vermont biosphere.
The worm bin
You can purchase fancy bins online like the Worm Factory 360, but if you are feeling adventurous, all you really need to make a worm bin is an opaque, rectangular plastic container and a drill.
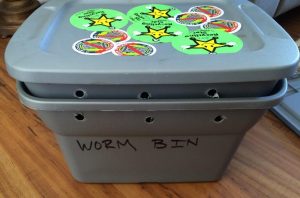 For the simplest bin, just drill 1/4″ or smaller holes around the entire perimeter of the top of the bin. If the bin has a lid, drill multiple holes in it as well. These provide ventilation. If you are using just one bin, do not put any holes in the bottom, but you’ll need to make sure the bin doesn’t become too wet.
Having a multi-layer worm bin makes getting to the black gold (i.e. vermicompost) much easier. Drill holes in the second container (same type as the first container) and around the top of the container. Stack the bins so that, as the worm population increases, you can increase your farming capacity by adding new bins/trays to your system.
Once you’ve built your bin, you’ll need to order the inhabitants. You’ll improve your odds of worm composting success by ordering red wrigglers (Eisenia fetida) from an established worm farmer.
How to feed your worms
Shred up some newspaper, soak it in water, wring it out, and add it to the bin first. Like some humans, worms like a fluffy bed. Unlike humans, these worms will eat their bed.
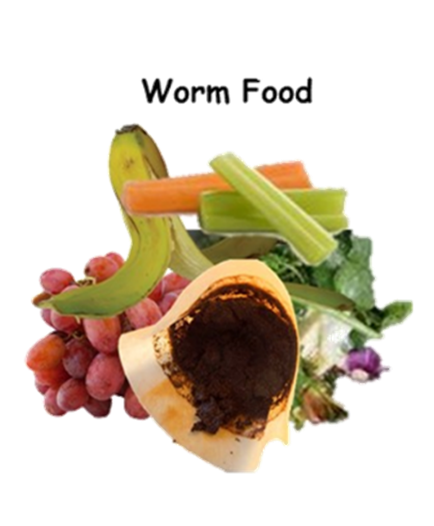
Though worms can eat most organic material, certain foods are better for your worm bin. For best results, cut up food scraps in little pieces or run it through a food processor before feeding the worms.
Increasing the surface area of the worm food speeds up microbial decomposition and can decrease potential odor issues. Warning: Broccoli and other cruciferous vegetables can be very odorous in a single bin set up. Limit or omit this group of veggies to avoid disgruntled friends or family members.
 Main foods
Worms can eat these foods frequently: Apples, bananas, berries, broccoli, carrots, eggplant, lettuce, mushrooms, pears, squash, tomatoes, watermelon, avocados, banana peels, bell peppers, cantaloupe, corn, grapes, mango, peaches, potatoes, spinach, tofu, zucchini.
Snacks
Worms can eat these foods in moderation: Coffee grounds, coffee filters, tea leaves, tea bags, pasta (without sauce), rice (no oil), breads (minimal).
Bedding
Worms like any of these options for bedding: Shredded newspaper, pieces of cardboard, dry crushed egg shells, dried leaves, paper egg cartons.
Foods to avoid
Worms do not like these foods: Glossy/shiny paper, green grass, meat/dairy products, spicy or pickled foods, oils, butter, vinegar, garlic, onions, leeks, hot peppers, citrus rinds, pineapple.
Harvesting your compost
If you take care of your worms and create a favorable environment for them, they will work tirelessly to eat your food scraps and produce compost. As time progresses, you will notice less and less bedding and more and more compost in your bin.
After 3-5 months, when your bin is filled with compost (and very little bedding), it is time to harvest the compost. Removing the finished compost from the bin is called ‘harvesting the worm castings’. After several months, worms need to be separated from their castings, which create an unhealthy environment for them in high concentrations.
To prepare for harvesting, don’t add food to the bin for up to 1 month. This ensures that the worms are hungry: During the harvesting process, you will basically be luring the worms away from their castings with fresh food.
Harvesting in a single bin system
Push all of the contents in your worm bin to one half of the bin, removing any large pieces of non-decomposed food or newspaper.
Put fresh bedding and food scraps on the empty side of the bin, and continue burying food scraps only on the freshly bedded half for 2-3 weeks. The worms will naturally gravitate over to the new side (where the food is), conveniently leaving their compost behind in one section. Remove the compost and replace it with fresh bedding. To facilitate worm migration, cover only the new side of the bin, causing the old side to dry out and movement.
You may continue composting your food scraps after harvesting. Just add fresh bedding and more food scraps.
Harvesting in a multi-tray system
Using a multi-tray system makes harvesting castings a bit easier than the single bin system. Just stop feeding the top tray, and place new food scraps in the bottom tray. The worms will eventually migrate down to the tray that contains food, leaving a nearly worm-free tray on the top.
This process may take up to 2 months, depending on how much edible organic material remains in the old tray.
Learn more
Contact the CSWD School Outreach Coordinator to set up your classroom with a worm bin. CSWD will supply everything–—except the students!