
There are a lot of aquarium setups that will do better with a custom sump filtration system. Almost any saltwater tank should have one. Even if it is just a 10-gallon sump on a 20-gallon tank, it can make all the difference in how well your tank runs long-term and how easy it is to keep it going along the way.
The general benefits of a sump include increased total water volume, a place to hide almost all equipment (heaters, protein skimmers, all filtration, etc.), a safe place to add supplements (many additives in a reef tank are best well mixed before going in to the main tank), and even a good place to refill during water changes or add top-off water for a saltwater tank.


You will find an endless amount of information online about what the best design is and what you need, what you don’t need, etc. I have seen a ton of designs and many are much more complicated then they need to be. Many are very redundant with multiple stages of mechanical media, repetitive stages, and more.
Over the years I have seen and worked on many sumps, and done a lot of research to come to my current designs. These designs fit the needs of saltwater and freshwater specifically. They meet all the needs of the systems they are designed for. They provide flexibility for you to use any return pump you want, any protein skimmer you want, maximize the refugium space or filter media space, and keep things as easy as possible for you to maintain.
The saltwater design maximizes the use of natural filtration, the refugium. This is where good macroalgae grows. By doing so it removes nutrients from the water column thus minimizing the amount of nutrients left available for bad algae to grow in the display tank. The sump design also allows you to use almost any skimmer you want. In-sump skimmers are larger and much more effective than skimmers designed to just hang on the back of the tank. The fact that they are in the sump also means that if they ever overflow for any reason they overflow into the sump, not down the back of your tank, on the wall and floor, etc. The saltwater design also allows you to easily add an automatic top-off system, media reactors, and many other things you may decide to add to your system. You can even add a hang-on filter sock holder.
Why Not Use A Manufactured Sump?
There are a lot of manufactured sumps out there, and many are much better than others. But the problem with any of them is that they are designed for one specific use and do not have any flexibility. If you want to use a specific skimmer you may only have one or two options of manufactured sumps that are large enough to fit it, and they may not fit in your stand. Many also have features that are unnecessary so in order to get everything you do want you also have to pay for the features you either aren’t worried about or flat out don’t want. One manufactured design I saw that was one of the better ones and quite popular actually has the skimmer right next to the return pump. This means that if any bubbles make it out of the skimmer they will be pulled in by the pump and pushed into the display which can look horrible and drive you crazy. It also means that as the water level in the sump varies, the skimmer will work better and worse since in-sump skimmers need a specific water level and once tuned in, their productivity changes instantly when the water level changes. So even these professionally designed sumps don’t always seem to be designed well for practical uses. You may find exactly what you want and prefer to go with a manufactured sump, but in my experience, you end up paying a lot more for no flexibility.
Making your own sump may sound daunting but if you take the time to finalize a great design the actual assembly is not bad at all. The supplies needed to actually assemble the sump are the tank, glass baffles, caulking gun, silicone, tape measure or ruler, permanent marker, small level, and a couple 1/2″ PVC elbows to use as a spacer for any baffles that are supposed to be off the bottom. The PVC elbows can be placed on the bottom of the tank and will perfectly space any baffles that need to be 1″ off of the bottom (the outer diameter of the elbows is 1″). I also use a product called Pro Caulk, which you may have seen on TV, which just allows you to give a nice finish to the silicone, but that is up to you.
Saltwater Design Specifics
Smoked Baffles: Smoked baffles prevent the light on the refugium from growing algae throughout the entire sump, which can be a pain if not almost impossible to keep clean. Smoked glass does cost a little more than clear, but since you only have to make the sump once it is more than worth it for all the work it will save you. All baffles in a sump with a refugium should be smoked to help prevent as much algae as possible. The smoked glass should be the darkest that the glass shop has available.
Minimal Baffles: My standard design uses only four baffles. The first baffle keeps the water level around the protein skimmer stable. This is very important since most skimmers are a little tricky when it comes to getting them adjusted properly and any change in water level can completely undo your fine tuning. The second baffle drives water down, which helps minimize any bubbles coming from the skimmer and input to the sump (drain from the tank). The third baffle drives water up again (again, helping to fight bubbles) and helps contain the refugium. The last baffle keeps the macroalgae in the refugium from getting to the pump section which helps prevent the pumps from clogging.
Maximum Refugium Space: By knowing which return pump and protein skimmer you will be using you can keep those sections as small as possible which leaves the maximum amount of space possible left for the refugium. These means there is that much more space for the refugium to be effective while still providing all the needed space for the skimmer and other equipment.


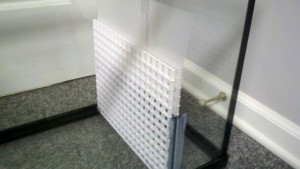
Mesh Baffle Wall: The last baffle is designed to keep macroalgae and fish out of the pump section. It consists of eggcrate on both sides of a glass baffle. The glass baffle is only six inches high and the eggcrate extends to the estimated water line. Between the two pieces of eggcrate is a sheet of needlepoint canvas (plastic mesh) that extends above the water line. The eggcrate is siliconed to the glass baffle and holds the needlepoint canvas in place. The needlepoint canvas is not attached in any way, it is just held in place by the eggcrate. This creates the perfect wall to keep macroalgae and fish out of the pump section with minimal maintenance. The needlepoint canvas can be black or white. White will show how dirty it is better so you will know when you need to clean it. Black will help keep even more light out of the pump section (preventing algae). This one feature can save you a lot of hassle by keeping stuff out of the pump section, including valuable fish that inevitably make their way into the sump.
This feature is one of the best things about this design. I have gotten emails calling it “genius” because of the fish it has saved for people. I have also talked to people whose sumps do not have this or an equivalent feature and lost fish that were pulled in to the pump.


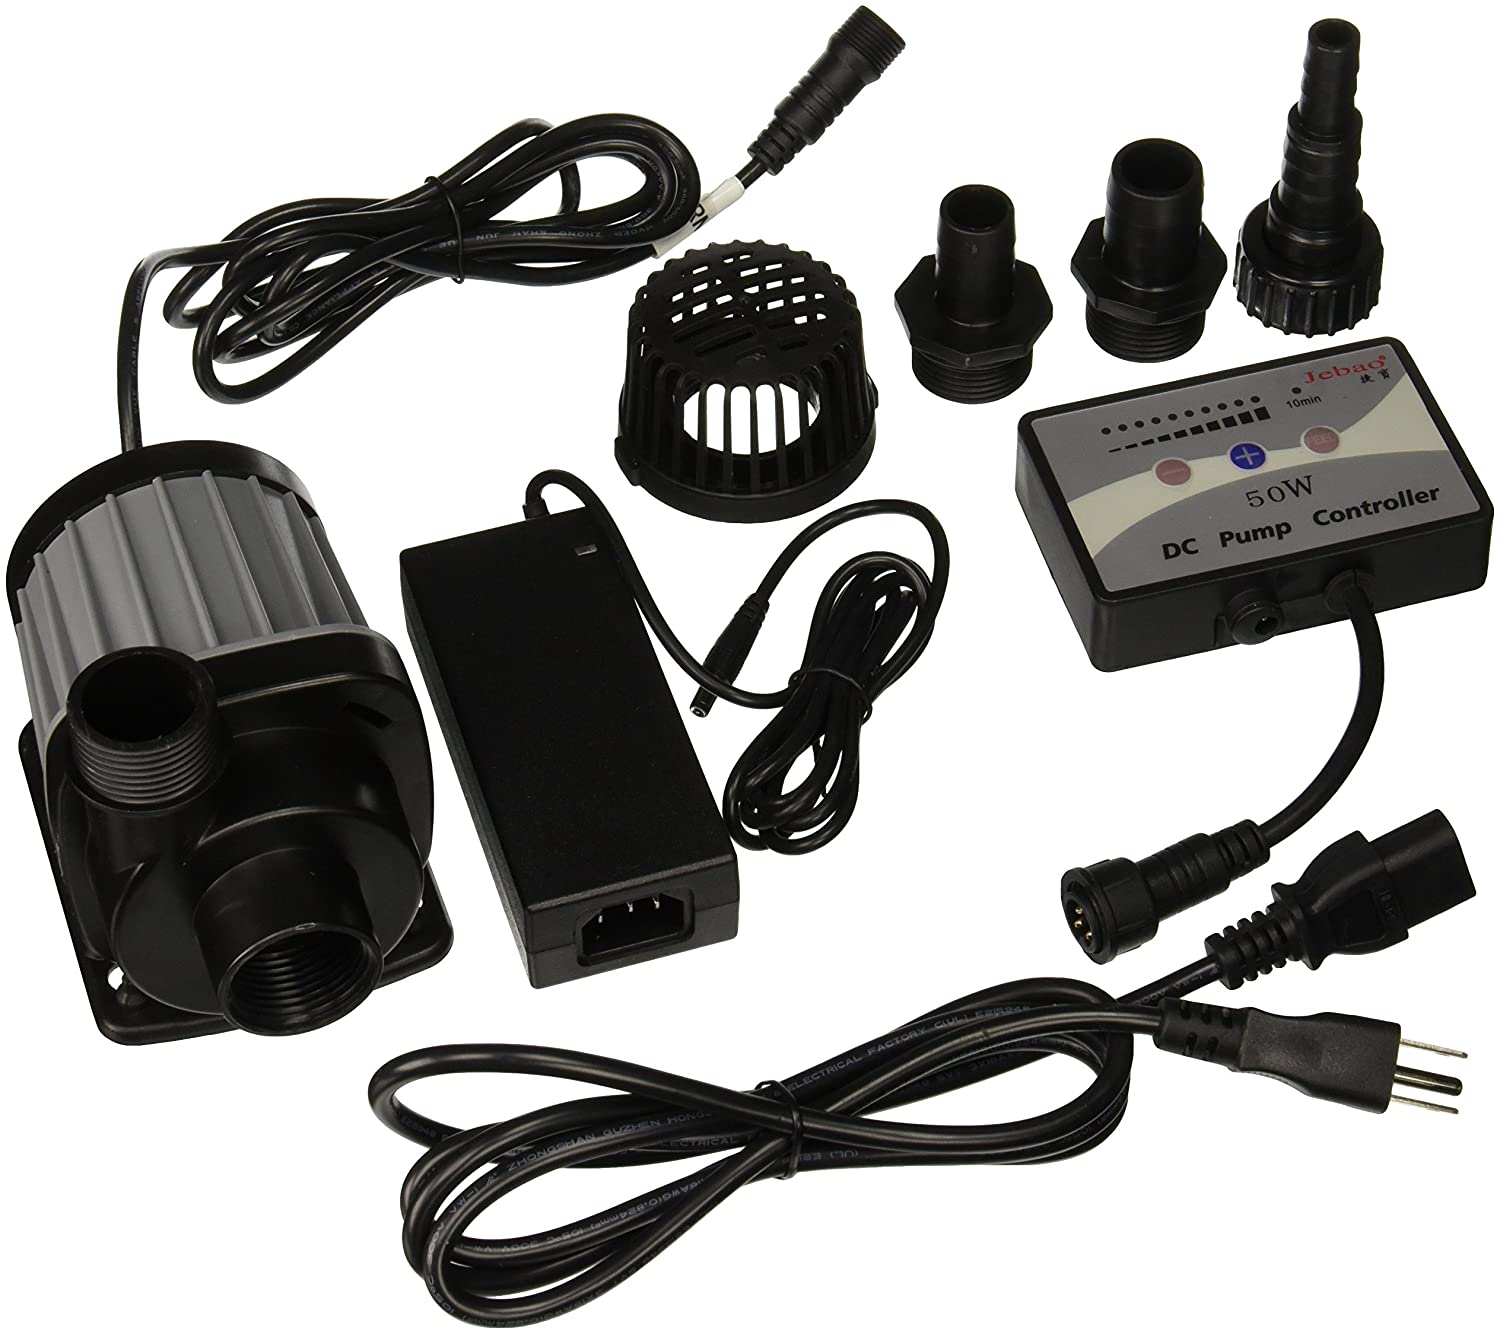
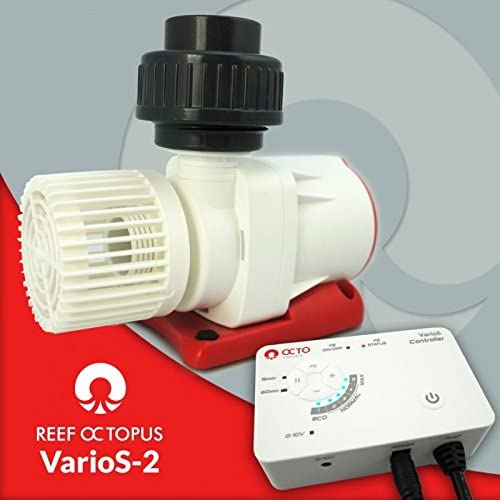
Pump Section: The last section is the pump section and allows you to use any return pump you want to. I highly recommend using a DC controllable pump. These are quieter and the ability to adjust the flow is very useful. I had to add a valve on the returns on my 300-gallon because Marineland’s undersized overflows couldn’t handle the flow from a modest Rio (the bottoms of the glass canopies were literally underwater). If you have anything besides the returns lines being run by the return pump (such as a second tank, a filter, etc.) the adjustable flow can let you match the flow to your exact needs. Below are good, better, and best options (although, there are even more expensive options available if you desire).

Easy Maintenance: The needlepoint mesh used with the last baffle to keep the macroalgae out of the pumps is very easy to remove and keep cleaned.
Glass Lid: By using a clear glass lid you can dramatically cut down on the noise, splash and salt creep, evaporation, and keep electrical equipment out of the sump. This is the perfect place to set your refugium light and be sure it won’t end up submerged.
Options for Custom Reef Sumps:
-In-sump reservoir for automatic top off system.
-Slow flow refugium.
There are a few options you may decide to easily add to the standard saltwater sumps. My design allows you to easily add:
-Automatic Top Off System
-Media Reactors
-Filter Sock Holder: may require some extra space in the skimmer section. Eshopps and CPR Aquatics both make a hang-on filter sock holder. There are also many designs available online to make your own filter sock holder, usually using eggcrate.
Standard Saltwater Reef Sump Design

Freshwater Design Specifics
Before I go into any detail on freshwater sumps, I want to say that I STRONGLY recommend against them. In almost all cases, a good canister will be better, easier, and even cheaper, with a lot less hassle. The guaranteed win of a canister makes them a much better option.
Why You Shouldn’t Use a Sump on Freshwater Tanks
It’s important to really understand all the differences between sumps and more typical freshwater filters such as canisters and HOBs.
Sumps are more maintenance than a canister or HOB. You will usually hear that maintaining a sump is easier than a canister, but this isn’t completely accurate. When people talk about how easy it is to maintain a sump, they are usually talking specifically about how short each maintenance task is. It only takes a minute or two to swap out a filter sock. That’s what they are talking about. The big picture is that you have to do that at least twice per week per filter sock. Then you have to wash the filter socks (usually in a washing machine, otherwise it’s by hand). On top of that, you have to maintain any other media you may or may not be using (carbon, Purigen, etc.). On top of that, you may or may not decide to worry about the other stuff that usually settles in a sump, grows on the sides, etc. (this usually should be addressed at least every 3-6 months, although it is often neglected entirely because it can be such a hassle).
With a canister, you just drag the thing to the tub or utility sink once per month. That session certainly takes a lot longer than it takes to swap out a filter sock, but the cumulative work is probably about the same (it depends on the tank, sump, and canister). The big difference is whether you are knocking it all out at once or spreading it out. Canisters can be a pain, but that is usually only when they are neglected (when people think it’s okay to not clean them until their flow slows down). If you actually do the maintenance on a canister every month, it can take as little as 10-15 minutes. In addition, the mechanical filtration that a canister provides is better because it is enclosed. It doesn’t allow any bypass which allows you to use much finer media, even polishing pads or filter floss that is crammed in very tightly. These are MUCH better at keeping a tank crystal clear. As long as you keep them cleaned monthly, canisters are by far the best filter option.
Another huge difference though is that if you neglect a canister, it’s okay (kind of). If it’s due this weekend, but you’re busy, it’s okay to wait a week or two and it will still be doing its job. If you neglect a filter sock, it immediately stops working because all the water will just overflow out of it. And since that maintenance is required more often, this is much more likely to happen. Again, the filter socks need to be swapped twice weekly (and that’s assuming you have enough to begin with).
Yes, all filters need maintenance. Generally, a filter should be cleaned monthly. If you let it go longer, the gunk that it collected just starts to rot which can create a nitrate factory and severely lower water quality.
Another often overlooked aspect is the requirement for overflows. This requires you to either spend more money and buy a pre-drilled tank that has built-in overflows (which cost more, take up space in the tank, and create a huge pain when something inevitably ends up in the overflow), drill it yourself and risk it cracking, or using the much less reliable hang-on-back overflow box option. None of these are as simple or as reliable as a canister. Also, they change what you can keep in the tank. I can’t keep all the fish I’d like in my 300-gallon because of the overflows. Small top dwellers such as guppies, killifish, hatchets, danios, and many more are out because they would inevitably go down the overflow. Even mid-dwellers are at risk and regularly end up in the overflows and sump.
And even if you aren’t interested in small fish that would go over the overflow at all, it also means floating food overflows out of the tank. Even sinking foods that float a little are a problem.
I had a sump on my 75 and ended up removing it because it was such a hassle. I now have a Fluval FX4 and I wish I had never bothered with a sump in the first place. In most tanks, a sump is undersized and/or hard to work with since it is crammed inside the stand of the tank. So you have to get on the floor, get your arms in where needed, move the media, etc. A canister can still be annoying in these ways, but it’s only for a minute while you get it disconnected. The sump is always in the stand.
On my 300, I couldn’t get mechanical filtration to work. Filter socks clogged in 12-24 hours and I couldn’t fit any more in the sump I have. Trays holding filter pads either clogged as quickly as the filter socks, or were so coarse that they didn’t do their job of mechanical filtration. So I pulled all the mechanical out of the sump and just added a Fluval FX6. The tank has never run so clean and with so little work. I would pull the sump entirely, but the tank has built-in overflows, so I need to keep the sump to keep the water level full. So now the sump just runs some K2 media which requires no maintenance.
Another often overlooked downside to sumps is their noise. Although it can be minimized with the right type of overflow, drain pipes that extend into the water, DC controllable pumps, etc., they are still noisier than canisters. Canisters are truly silent. I still remember the first time I turned on an FX5 and thought it wasn’t running. I had to actually put my ear on the canister to tell it was working. Sumps simply can’t do this. One of the biggest benefits of sumps in freshwater is the ability to use Kaldnes tumbling aerated media which requires very strong aeration. Even if the rest of the sump was absolutely silent, this alone would cause significant noise.
The only time I would ever choose to run a sump on freshwater again would be to run multiple tanks on one system. This requires a sump. With a system, the chemistry is much more stable and the whole system runs better than individual tanks will. It can handle sudden increases in bioload much more easily and the synergy of all that volume can be unbelievable. It also makes it really easy to move fish around, separate breeding pairs or babies, etc. It also minimizes the work by only requiring one water change, not one per tank. Even the filtration can be much easier if the system is designed properly. Although for any given tank the maintenance is arguably more with a sump, if one well-designed sump is running a multi-tank system, the total work can be much less than if each tank were filtered individually.
Pros to Sumps
- Volume
- K2 media (see below)
- Overflows keep the surface cleaner
- Allows for multiple tanks on one system (this requires a sump)
Cons to Sumps
- More work
- Mechanical stops working as soon as it is neglected (as little as days)
- Inferior mechanical filtration
- Food goes over the overflows
- More points of potential failure or leak
- DIY is best, but isn’t easy and still isn’t cheap
- Not always easy to change if you didn’t do it perfectly the first time
- More noise
If You Still Want or Need to Run a Sump on Freshwater

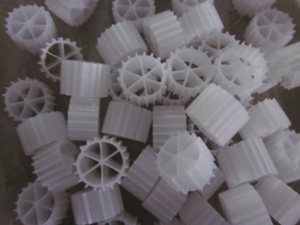
K2 Media Section: This is a revolutionary, self-cleaning filtration method that utilizes a floating plastic media called K2. It has been used in waste management and on fish farms for many years, but has only recently been brought to the aquarium hobby. This section is partially filled with the specially designed K2 media which is kept tumbling and strongly aerated by strong air stones. This tumbling action helps break apart waste and keeps the media itself clean. The media then becomes an ideal site for beneficial bacteria because of the aeration and water flow.
The tumbling action helps break apart large waste, which is why this section is first even though it is primarily a biological media.
K2 media is small enough to fit through the eggcrate. This means that you need to use needlepoint canvas to contain it to its section of the sump.
The K2 should fill approximately 60% of this space. Since K2 is sold on eBay and other sources by the volume, it makes it very easy to calculate how much you need to buy. Just determine the volume of the K2 section (accounting for the actual water level line, not all the way to the trim of the tank) and multiply by 0.6, and that will be how much K2 you need to buy.
Air stones (standard 1″ air stones) are better than bubble wands because they concentrate the flow of bubbles, which greatly increases the flow they create. The air stones can be kept in place with suction cups on the bottom glass of the sump, or by attaching them to small stones with zip ties (this is how I like to use air stones in the display). I usually run the air line to a tee, then use just enough air line to connect two 1″ air stones. So each spot in the sump with air actually has two air stones.
Eggcrate and Plastic Mesh Wall: The first baffle looks a little complicated, but it is actually a very simple and effective design. The glass baffle itself is nice and low at only 6″ tall so that the pump won’t run out of water. This means the water level in the whole sump varies instead of just the very last section. So instead of the pump section dropping 6″ or more, the whole sump drops by only about an inch or so usually. Siliconed on the side of the baffle opposite from the K2 media is eggcrate (found in the lighting department at Home Depot and some other hardware stores). On the K2 media side of the baffle, above the glass, is plastic mesh (needlepoint canvas which can be found in any craft store). The plastic mesh should be zip tied to the eggcrate and extend up to about one inch or so from the trim of the tank. This will keep all the K2 out of the filter pad section.
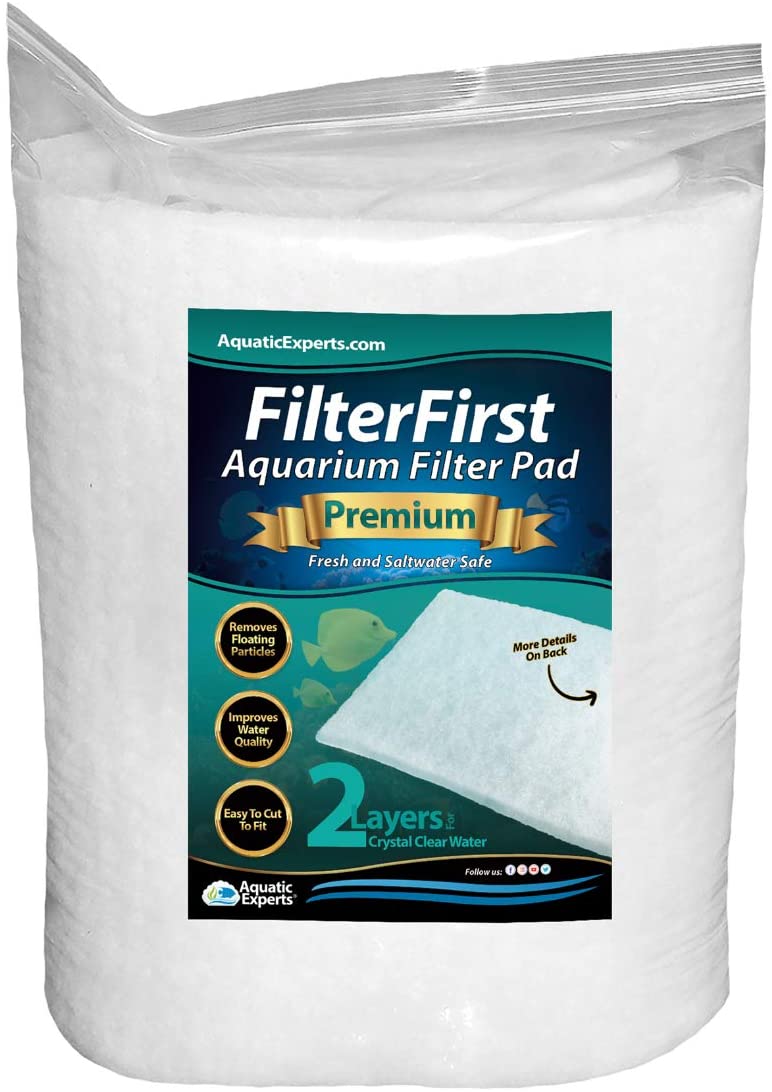
Filter Pad/Mechanical Media Section: Between the first and second baffles is a filter pad that very effectively removes physical debris, extra food, etc. It is easily accessible for quick replacement and, depending on which one you use, can be used over and over. However, it’s usually much easier to just order a cut-your-own roll of filter pad in bulk and throw away used filter pads.
Since all the water going through the sump passes through the filter pad, it is extremely effective. You will want to decide on the exact filter pad to use before finalizing your sump’s design so that the baffles are the right width apart. Ideally, the width of the filter pad roll you decide to use should match either the length or width of the filter pad section so you only have to make one cut to have the perfectly sized filter pad. You can also double stack the filter pads or even make multiple tiers of eggcrate with filter pads between them, but in most systems, keeping it simple is usually best.


Chemical Media – Below the filter pad is the ideal place to put any chemical media you may be using. This may be carbon, crushed coral, Purigen, GFO, Poly-Filter, or anything else. For more information on the media selection, please read the Filter Media Guide.
The bottom of the media stack should be held up by eggcrate supported by PVC couplers. If you use the same couplers to hold up the baffles that need to be off the bottom when installing them, everything will be lined up perfectly at the same height.
Last Baffle: The last baffle should be about one inch off the bottom and come up to about one inch from the top trim. You never want to go all the way to the trim. It shouldn’t matter, but if it ever does, you don’t want a baffle up there blocking water flow.
Pump Section: The last section is the pump section and allows you to use any return pump you want to. I highly recommend using a DC controllable pump. These are quieter and the ability to adjust the flow is very useful. I had to add a valve on the returns on my 300-gallon because Marineland’s undersized overflows couldn’t handle the flow from a modest Rio (the bottoms of the glass canopies were literally underwater). If you have anything other than the return lines being run by the return pump (such as a second tank, a filter, etc.) the adjustable flow can let you match the flow to your exact needs. Below are good, better, and best options (although, there are even more expensive options available if you desire).
Glass Lid: Just like in the saltwater sump design, a glass lid on a freshwater sump greatly helps to cut down on noise, evaporation, splash, and to prevent any equipment inside the stand from falling into the sump.
Where to Get the Glass
Call a few local glass shops. Many will charge $40 or more per piece, others will charge as little as $5-10 per piece. Call a few shops until you get one with reasonable prices. In my experience, larger shops are busy with big jobs so little stuff isn’t worth their time, so they will have higher prices. Smaller shops appreciate your business and are happy to do small jobs between their big jobs, so their pricing is better.
Actual Assembly
The actual assembly of the sump is pretty straightforward as long as you plan everything out well. You will need to order your glass from a glass shop. Some may not work with such small orders, but most should be happy to cut the glass for you. They will also grind down the edges so you won’t slice your hand open. You should base your measurements on the INTERIOR width and height. The width should be 1/16″ less than the actual interior width. For example, if the actual interior width of the tank is 12 1/2″ then the baffles should all be 12 7/16″ wide. The 1/16″ should be enough wiggle room to actually get the baffle in the proper placement. Double check the dimensions of the baffles when you pick them up, I did have one cut at the wrong size by the glass shop once and that will definitely mess things up for you.
All baffles should be at least 1″ below the bottom of the top trim in order to leave a 1″ gap above any baffles. Most baffles will have other factors that determine their height. For example, the first baffle in a saltwater reef sump should be tall enough to keep the water level around the skimmer stable without the water in the skimmer section being too deep for the skimmer to function properly. You may need to place the skimmer on an eggcrate platform to maximize water depth in the sump while still allowing the skimmer to function properly. Some PVC and eggcrate are perfect for an easy skimmer platform.
The second baffle in the saltwater reef design should be 1″ off the bottom and 1″ below the top trim. So if the actual INTERIOR height of the tank is 15″ from the bottom glass to the bottom of the inside lip of the top trim then the baffle should be 13″ tall.
The baffles on either side of the refugium in the saltwater reef design should be 6″ tall. This is tall enough to keep the sand and macroalgae in without being so tall that they interfere with the flow of water. A strong return pump can lower the water level in a sump a lot and if the last section is too small it can start to pull air and require you to overfill the whole system. By keeping the height of these baffles lower the water level in most of the sump will go up and down, not just the water level in the last section, so you should never have a problem with a pump being too strong for your sump.
Have the eggcrate cut to fit and ready to go as well, you will be using silicone to seal that in just like the baffles. I usually try to have it about as high as I expect the water level to be. You want it high enough to support the needlepoint canvas but low enough to be able to get the needlepoint canvas in and out.
Once everything is cut and ready to go and the glass on the tank is marked for exactly where you want the baffles, it is time to actually seal everything in. Silicone is only about $4-5 per tube so be liberal with it. The last thing you want is to be sparing with it and end up knocking a baffle out on accident once you already have the tank running. You can finish the silicone with ProCaulk if you want, it will look better. Let the silicone fully cure before you move the tank. Check that the baffles are placed properly and level, sometimes they will lean so you will want to correct this while the silicone is still wet.
The needlepoint canvas (plastic mesh) can be found at any craft store. Walmart also (sometimes) sells packs of it in their craft section.
The eggcrate is the plastic grid that goes over some lights. I have only been able to find it at Home Depot (not Lowe’s unfortunately). It is in the lighting section (near all the 4′ utility type light fixtures).
If you have any questions feel free to email me. I know that planning and building your own sump can be overwhelming so I am happy to help as much as I can.
Update: An Upgrade to the Sump on my 300 Gallon Freshwater Tank

K2 Tumbling:
Three Types of Overflows:
How Sumps Work (Without Flooding):